


74
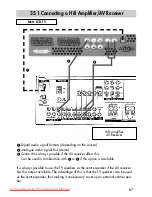
Connection of external devices with YUV compo-
nent output to the "COMPONENT IN" RCA jacks.
The signal type always refers to the input
and output of the AV device.
AV devices equipped with a YUV jack can be con-
nected to the LCD TV by means of a YUV cable
(see page 86). In the "AV Devices" menu, the con-
nected AV device must be registered with signal
OUT "YUV".
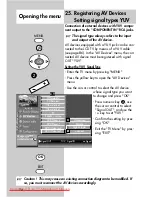
Setting the YUV Signal Type
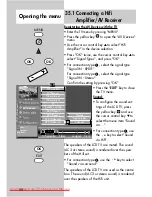
- Enter the TV menu by pressing "MENU".
- Press the yellow key to open the "AV Devices"
menu.
- Use the cursor control to select the AV device
whose signal type you want
to change and press "OK".
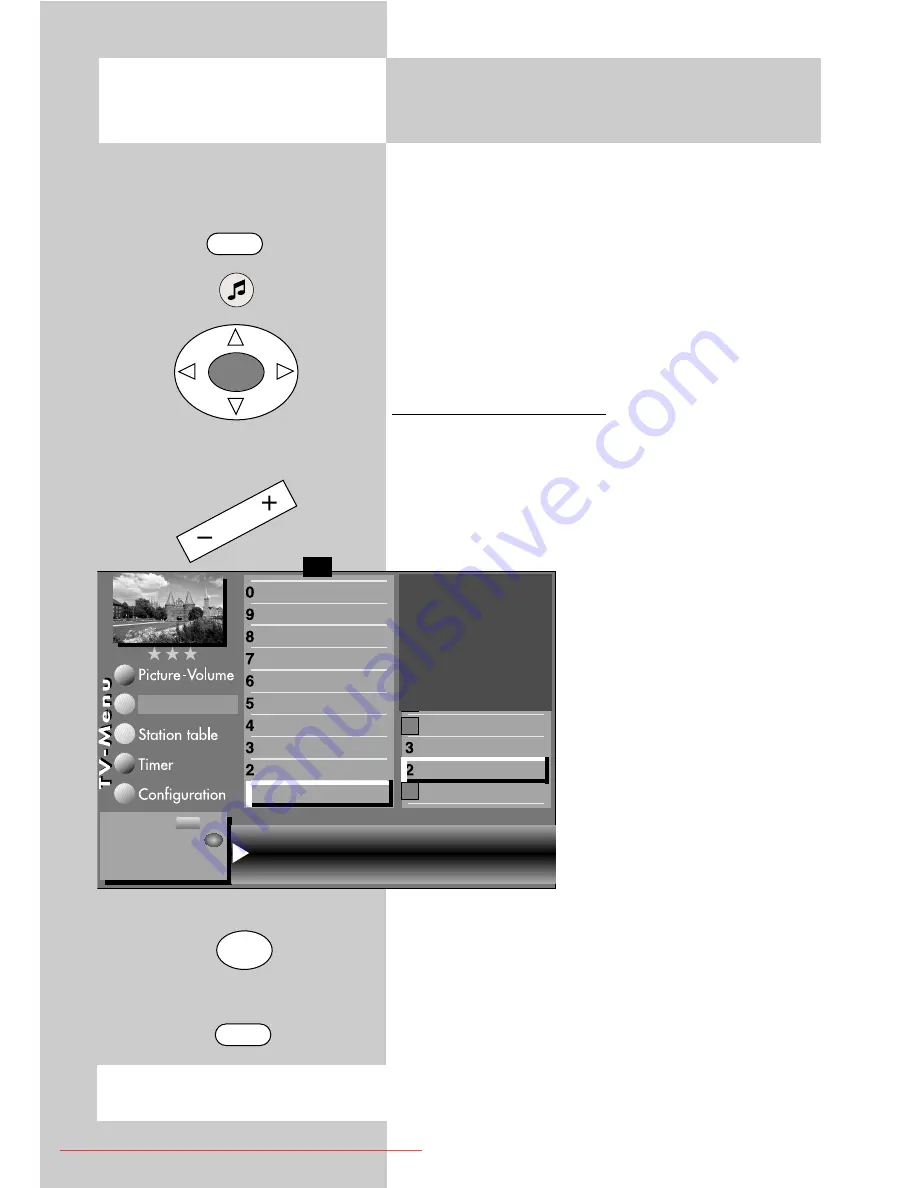
- Press numeric key
"
, use
the cursor control to select
"Signal OUT", and use the
- +
key to set "YUV".
- Confirm the setting by pres-
sing "OK".
- Exit the "TV Menu" by pres-
sing "EXIT".
☞
MENU
OK
OK
EXIT
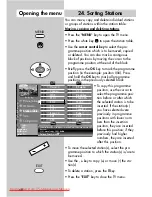
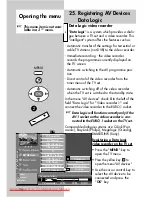
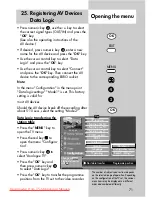
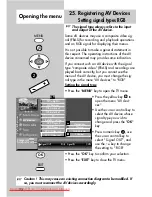
Opening the menu
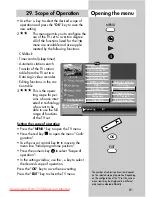
25. Registering AV Devices
Setting signal types YUV
Caution ! This may cause an existing connection diagram to be modified. If
so, you must reconnect the AV devices accordingly.
☞
Signal OUT
YUV Signal IN
no Signal
DataLogic
Name
Signal types
connect
HiFi amplifier
AV-Receiver
Other device 2
Other device 1
PC
Satellit / set top
DVD Player 2
DVD Player 1
DVD/Videorec.2
DVD/Videorec.1
F1
➔
✗
AV devices
Change with
Accept value with .
OK
– +
607 47 2042.A1 Clarus GB 04.12.2007 9:59 Uhr Seite 74
Downloaded From TV-Manual.com Manuals