27
26
23
2
24
26
1
25
1
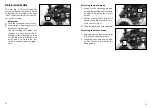
ERGOpor seat element
(Option)
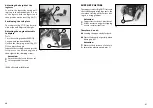
Detaching the ERGOpor seat
element
The seat element is detached by slack-
ening the clamping screws (fig. 23/
➀
)
on both sides and pushing the clamps
inwards (fig. 23).
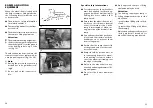
Attaching the ERGOpor seat
element
First press the seat element onto the
frame (fig. 24).
The fixing screws
➁
should then be
positioned between the supporting
plates
➂
.
Then push the clamps (fig. 25/
➃
) out-
wards under the frame tubes and
tighten the clamping screws (fig. 25/
➀
).
ERGOpor seat cushion
The ERGOpor seat cushion (fig. 26/
➀
)
is secured to the seat shell with Velcro
fasteners and can be pulled off.
!
Attention:
After assembly of the seat unit onto
the chassis check the fixation of the
seat.
3
4
1
COMPONENTS
SEAT
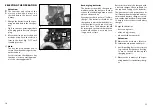
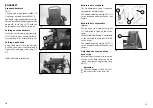
Folding over the seat strap
For cleaning and maintenance work
on the batteries the seatbelt can be
folded over to one side (fig. 21).
1. Pull the back flap off of the seat
strap. – Velcro fastener.
2. Lift the left seat strap rod and fold
it over to the other side (fig. 21/
➀
).
Placing the seat strap
To replace the seat strap, press the pins
of the seat strap rod (fig. 21/
➀
) as far
as possible into the corresponding
holes of the side frame (fig. 21/
➁
).
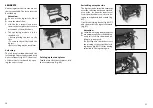
Adjusting the seat depth
The seat depth can be changed by
moving the backrest to a different
position.
☞
Note:
The adjustment must be carried out
by an authorised workshop.
22
21
3
3
1
2
For this the attachment screws (fig. 22/
➂
) are to be removed. Then attach the
backrest holders again at the desired
position with the securing screws.
Subsequently refasten the back flap
underneath the seat strap. – Velcro fas-
tener.
☞
Note:
Hereto observe subchapter <
repo-
sitioning the armrest cushion
>.


