background image


7.


Každodenní údržba / Everyday use and 
maintenance


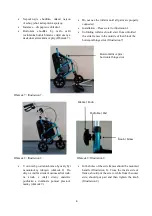
NASTAVENÍ VÝŠKY RUKOJETÍ 


Rukojeti  by  měly  být  umístěny  ve  výšce, 
která  uživateli  poskytuje  pohodlí  a  pocit 
bezpečnosti.  Je  důležité  zajistit,  aby  obě 
rukojeti byly ve stejné výšce. 


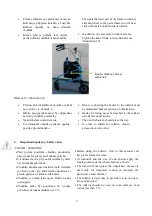
Chcete-li upravit výšku rukojetí, odšroubujte 
plastovou  matku,  která  upevňuje  rukojeti, 
odstraňte  podložku  a  šroub  a  podle  potřeb 
upravte  výšku  rukojetí  (zasunutím  / 
vysunutím do / z rámu). 


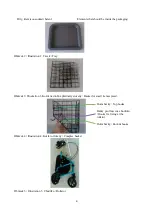
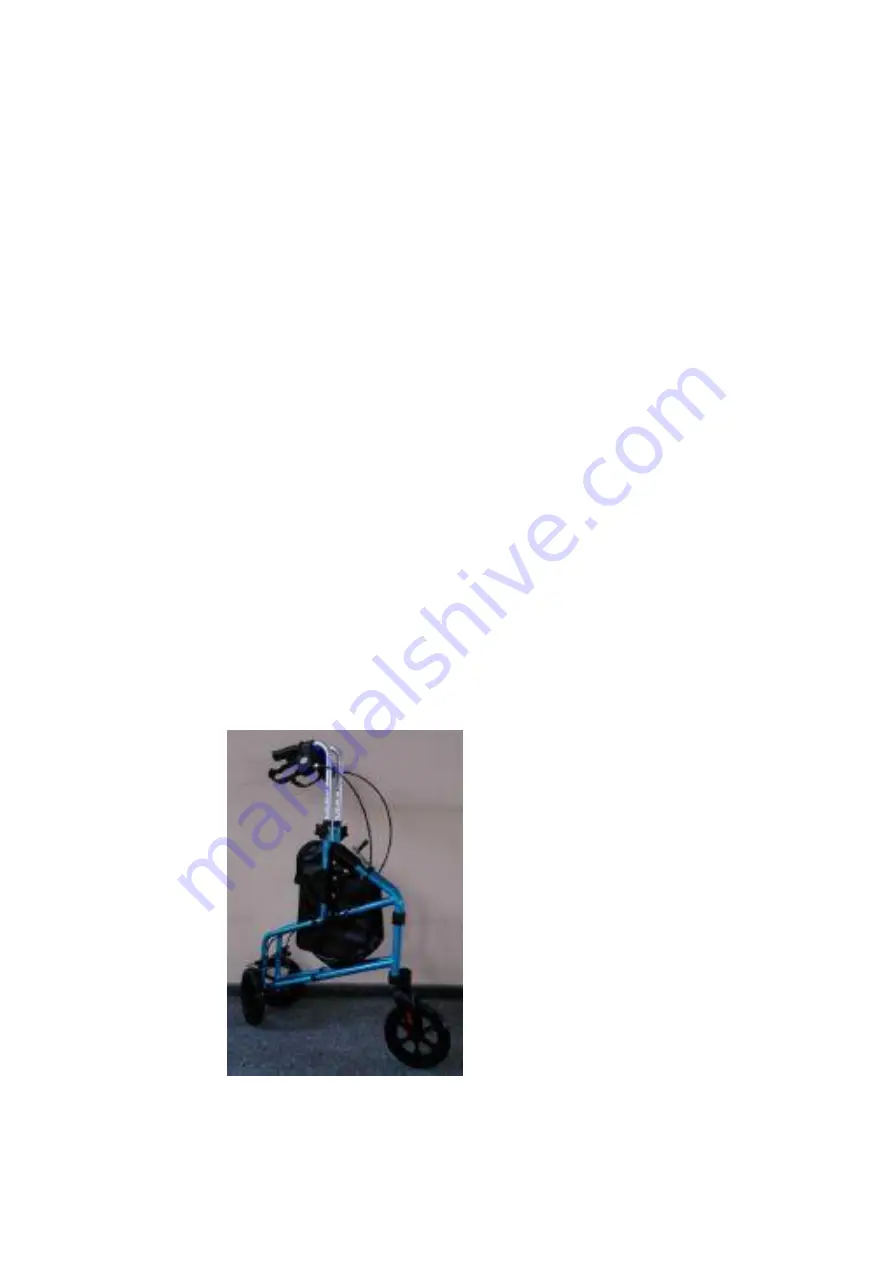
Po  nastavení  požadované  výšky  umístěte 
šroub  z vnitřní  strany  rámu,  podložku  a 
plastovou  matku  z vnější  strany  rámu  a 
dostatečně utáhněte (obrázek 8 a 9).     


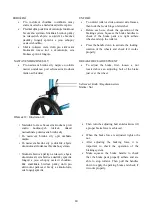
Ujistěte  se,  že  šroub  je  dostatečně  utažený 
tak, aby bylo zabráněno pohybu rukojetí. 


SLOŽENÍ: 


Pro  složení  chodítka  za  účelem  snazšího 
transportu  musíte  nejprve  zablokovat  rotaci 
kol brzdami. 


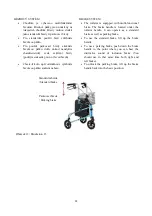
Dále  je  pro  složení  chodítka  nezbytné 
odejmout  tácek  na  drobné  předměty  a 
vyprázdnit tašku na drobné předměty. 


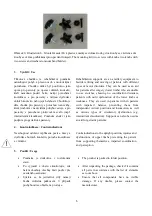
Zatáhněte za vzpěru směrem  nahoru a složte 
rukojeti k sobě (obrázek 11). 


Obrázek 11 / Illustration 11. 


HEIGHT ADJUSTMENT HANDLES 


Handles should be located at a height that will 
provide  comfort  and  a  sense  of  security  for 
the  user.  It  is  important  to  ensure  that  both 
hands are positioned at the same height. 


To  change  the  height  of  the  handles  unscrew 
the  knob  for  fixing  handles,  remove  washers, 
the screws and depending on the needs extend 
or shorten the frame handles. 


After  adjusting  the  appropriate  height  put  the 
screw  on  the  inner  side  of  the  side  frame, 
while the outer side on the screw put pad, and 
then tighten the knob. (Illustration 8 and 9.) 


Make  sure  that  the  handle  is  properly 
tightened, so that it prevents movement of the 
handles. 


FOLDING: 


In  order  to  fold  rollator  for  ease of  transport, 
you must first block rotation of the wheels. 


Then  it  is  necessary  to  remove  the  tray, 
basket  for  small  items and  emptied a bag for 
small items. 


Pull up horizontal hinge strut and then submit 
rollator,  directing  the  handle  to  each  other. 
(obrázek 11). 


Summary of Contents for Vitea Care BILLY VCBK5221

Page 1: ...1 N VOD K POU IT CHOD TKO T KOLOV VCBK5221 BILLY Rev 02 2018 USER MANUAL 3 WHEEL ROLLATOR VCBK5221 BILLY Rev 02 2018...

Page 2: ...aindikace Contraindications 5 5 Pou it Usage 5 6 Bezpe nostn pokyny Safety of use 7 7 Ka dodenn dr ba Everyday use and maintenance 9 8 Technick parametry Technical parametres 14 9 Symboly Symbols 15 1...

Page 3: ...y surface inside and outside the building Handles anatomical made of polyethylene aluminium frame 2 Popis produktu Description of product Obr zek 1 Illustration 1 1 Rukojeti 2 Brzdov p ka s aretac ot...

Page 4: ...he packaging Obr zek 3 Illustration 3 Ko k na drobn p edm ty slo en Basket for small items spread Obr zek 4 Illustration 4 Ko k rozlo en Complex basket Obr zek 5 Illustration 5 Chod tko Rollator Horn...

Page 5: ...ujte zda balen obsahuje v echny sti podle v e uveden ho seznamu Ujist te se e jednotliv d ly nemaj dn viditeln po kozen V p pad pochybnost se obra te na prodejce Rehabilitation supports are an ancilla...

Page 6: ...block the horizontal hinge strut Illustration 7 Obr zek 7 Illustration 7 Obr zek 8 Illustration 8 Obr zek 9 Illustration 9 V otvorech po stran ch r mu by m ly b t namontov ny rukojeti obr zek 8 Do d r...

Page 7: ...sed tka by m la b t zadn kola zabrzd n Chod tko nenahrazuje invalidn voz k Sed tko je ur eno pouze pro kr tkodob odpo inut i p esun pacienta na kr tk vzd lenosti Chod tko je ur en jako opora Nikdy na...

Page 8: ...ng the ground are to use all of four wheels Use of the product on the icy wet greasy strongly gritty surfaces is unacceptable it creates a risk of falling Before each use of this product Perform visua...

Page 9: ...te za vzp ru sm rem nahoru a slo te rukojeti k sob obr zek 11 Obr zek 11 Illustration 11 HEIGHT ADJUSTMENT HANDLES Handles should be located at a height that will provide comfort and a sense of securi...

Page 10: ...K FORCE ADJUSTMENT To adjust the brake first loosen a nut located above an adjusting bolt of the brake just over the wheel Se izovac roub Regulation screw Matka Nut Obr zek 12 Illustration 12 N sledn...

Page 11: ...ovou p ku sm rem nahoru Obr zek 13 Illustration 13 BRAKE SYSTEM The rollator is equipped with multi functional brake The brake handle is located under the rollator handle It can operate as a standard...

Page 12: ...stacle and holding the rollator handle lift slightly up and enter rollator on the obstacle CARE AND MAINTENANCE Clean the frame with a damp cloth clean the seat with damp cloth with mild detergent Rem...

Page 13: ...on and all the elements within the packaging Check if any elements have any visible mechanical damage Before each use Control of wheels brakes The brakes can worn out check the condition of the brakes...

Page 14: ...vu 270 mm Rollator width after folded Hmotnost chod tka 5 3 kg Rollator weight Minim ln hel oto en 64 Minimum turning radius Pr m r kole ek 190 mm Wheels diameter Typ kole ek Pln Full Type wheels Maxi...

Page 15: ...ards Protect from humidity V robce Chra te p ed p m m slune n m z en m Manufacturer Protect from sunlight Datum v roby Maxim ln hmotnost u ivatele Permitted user weight t te pozorn n vod k pou it Mo n...

Page 16: ...tended to the transport by plane S riov slo Mo nost sk pnut prst Serial number The possibility of fingers jamming ka chod tka Rollator width 10 Kontakt Contact details mdh sp z o o ul ks W Tymieniecki...

Reviews: