background image


1. 

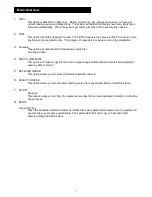
COPY


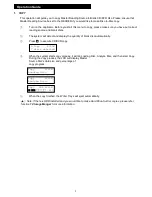
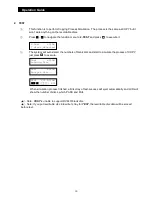
This option makes Disc to Disc copy.  Before you start to copy, please make sure you have put 
correct reading source and blank discs.  The system will detect and display how many blank discs 
there are automatically.  When the system got ready, just press OK to execute Disc copies. 


2. 

TEST


This option simulates Copying Process.  The TEST process is the same as COPY but it won’t write 
anything on the recordable disc.  The purpose of process is to ensure an error free duplication. 


3. 

Compare


This option will compare bit to bit between source disc 
And copied disc. 


4. 

COPY & COMPARE


This option will make a copy first and then compare copied discs with master disc immediately for 
ensuring data is correct. 


5. 

SET BURN SPEED


This option allows you to adjust and select Duplication Speed. 
 

6. 

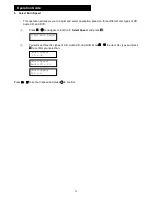
SELECT SOURCE


This option allows you to set master reading source from any Optical Drive or Hard Disk Drive.   


7. 

UTILITY


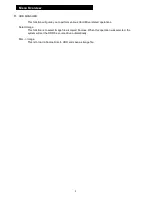
             Pre-scan 

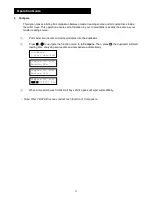
This feature helps you to check the master source disc that can be duplicated correctly or not before 
copy process. 

8. 

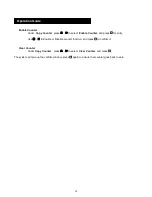
SETUP


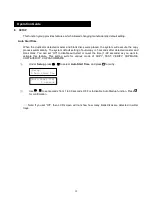
Auto Start Time 

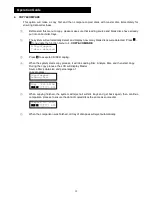
When the duplicator detected master and blank discs were placed at the same time, the system will 
execute the copy process automatically. The system default of auto-copy is 5 seconds after 
detected master and blank discs.  


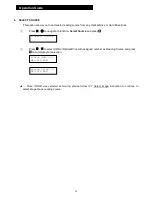
Menu Overview 

Summary of Contents for Dolphin 5900

Page 1: ...Dolphin 5900 CD DVD Tower User Manual...

Page 2: ...9 format recordable media or vice versa 2 Temperature Warning If the duplicator was stored in a location where the temperature dropped below 0 C within the past 24 hours please leave the duplicator in...

Page 3: ...ontents Introduction 4 Features 5 Control Panel 6 Menu Overview 7 Operation Guide 1 Copy 9 2 Test 10 3 Compare 11 4 Copy Compare 12 5 Ste Burn Speed 13 6 Select Source 14 7 Utility 15 8 Setup 19 9 HDD...

Page 4: ...included function list instructions operating status and error message are real time display on the screen Users can read and follow the instructions to complete their jobs easily even without user m...

Page 5: ...Copy technology When the system was installed with HDD the system will load master source disc to HDD while copying disc to disc In 2nd run copy the system will automatically copy from HDD instead of...

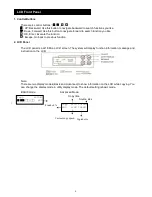
Page 6: ...ous function 2 LCD Panel The LCD panel is a 2x16 Mono LCD screen The system will display function information message and instruction on the LCD Note There are two display modes Basic and Advanced to...

Page 7: ...disc And copied disc 4 COPY COMPARE This option will make a copy first and then compare copied discs with master disc immediately for ensuring data is correct 5 SET BURN SPEED This option allows you t...

Page 8: ...Drive related operations Select Image This function is to select Image file as copied Sources When this operation was selected the system will set the HDD be source drive automatically Disc Image This...

Page 9: ...ank disc automatically Press OK to execute CD DVD copy When the system starts copy process it will do Loading Disc Analyze Disc and then start Copy During the copy process the LCD will display Master...

Page 10: ...start to simulate the process of COPY just press OK to execute When simulation process finished all disc tray of test success will eject automatically and LCD will show the number of discs which PASS...

Page 11: ...sc and all copied discs into the duplicator Press to navigate the function menu to 6 Compare Then press OK the duplicator will start loading disc analyzing source disc and comparison automatically Whe...

Page 12: ...E Press OK to execute CD DVD coping When the system starts copy process it will do Loading Disc Analyze Disc and then start Copy During the copy process the LCD will display Master Source Disc s data...

Page 13: ...Audio CD and DVD Press to navigate to function 7 Select Speed and press OK You will see three disc types of CD Audio CD and DVD Move to select disc type and press OK to confirm your selection Press to...

Page 14: ...t Source and press OK Press to select HDD or Optical Drive with assigned number as Reading Source and press OK to complete your selection Note If HDD was selected as Source please follow 12 1 Select I...

Page 15: ...Tray When erasing process finished the tray will eject automatically The duplicator can erase different types of re writable discs simultaneously You can place re writable discs you would like to eras...

Page 16: ...s OK again Insert your Audio CD into reading drive and insert only ONE blank CD R disc into any one of the writers After system recognized audio CD and blank disc LCD screen will show song list with n...

Page 17: ...er source disc and all discs of writer trays Under Utility press to select Full Erase and press OK for execution Copy Counter This operation will record duplicate result duplicated quantity and total...

Page 18: ...ss OK for entry Use to Enable or Disable counter function and press OK to confirm it Clear Counter Under Copy Counter press to select Clear Counter and press OK The system will pop up the confirm wind...

Page 19: ...u can set Off to disable auto start or re set the time 1 99 seconds as you want to activate this feature This setting suits for various mode of COPY TEST VERIFY COPMARE COPY VERIFY COPY COMPARE Under...

Page 20: ...y Use to select display mode and press OK for confirmation Basic Advanced Button Beep You can choose whether to hear a beep when press a button or not Under Setup press to select Button Beep and press...

Page 21: ...t function of Eject All No Eject Eject Target or Eject Source Press OK for confirmation Reader Speed This feature allows you to set reading speed of master drive Under Setup press to select Reader Spe...

Page 22: ...uage you want and press OK for confirmation Clear Setup Reset all of the Setup settings and back to the manufacturer s default setting Under Setup sub catalog press to select Clear All and press OK fo...

Page 23: ...5 seconds after system power on Under Setup press to select Advanced setup and select 1 Power On Time and press OK for entry Use to set seconds After selection press OK to save it and press ESC to lea...

Page 24: ...D Manager and press OK Press to select HDD or Optical Drive with assigned number as Reading Source and press OK to complete your selection Note If HDD was selected as Source please follow Select Image...

Reviews: