MFJ-1775W Rotatable Mini-Dipole
Instruction Manual
5
Step-By-Step Procedure
1)
Set up saw horses or other stable supports (plastic trash cans, chairs, folding tables, etc.) to support
the antenna during assembly.
2)
Prepare a temporary 6-8’ ground-level mounting mast for easy initial testing and adjustment.
3)
Sort the antenna parts into groups of similar parts. Be sure all parts are available.
4)
After examining the antenna parts, gather the following tools needed for assembly:
•
#2 Phillips screwdriver
•
5/16" nut driver for #6 nuts and hose clamps.
•
Small (4”-6”) adjustable wrench OR
o
Two 7/16" open-end wrenches (or wrench and nut driver) for U-bolts and
center insulator bolts.
•
Heavy wire cutters for trimming capacitance spokes
•
Pliers for holding the spoke ends as they are trimmed
•
Safety glasses.
5)
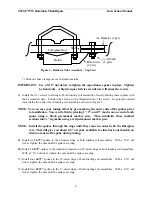
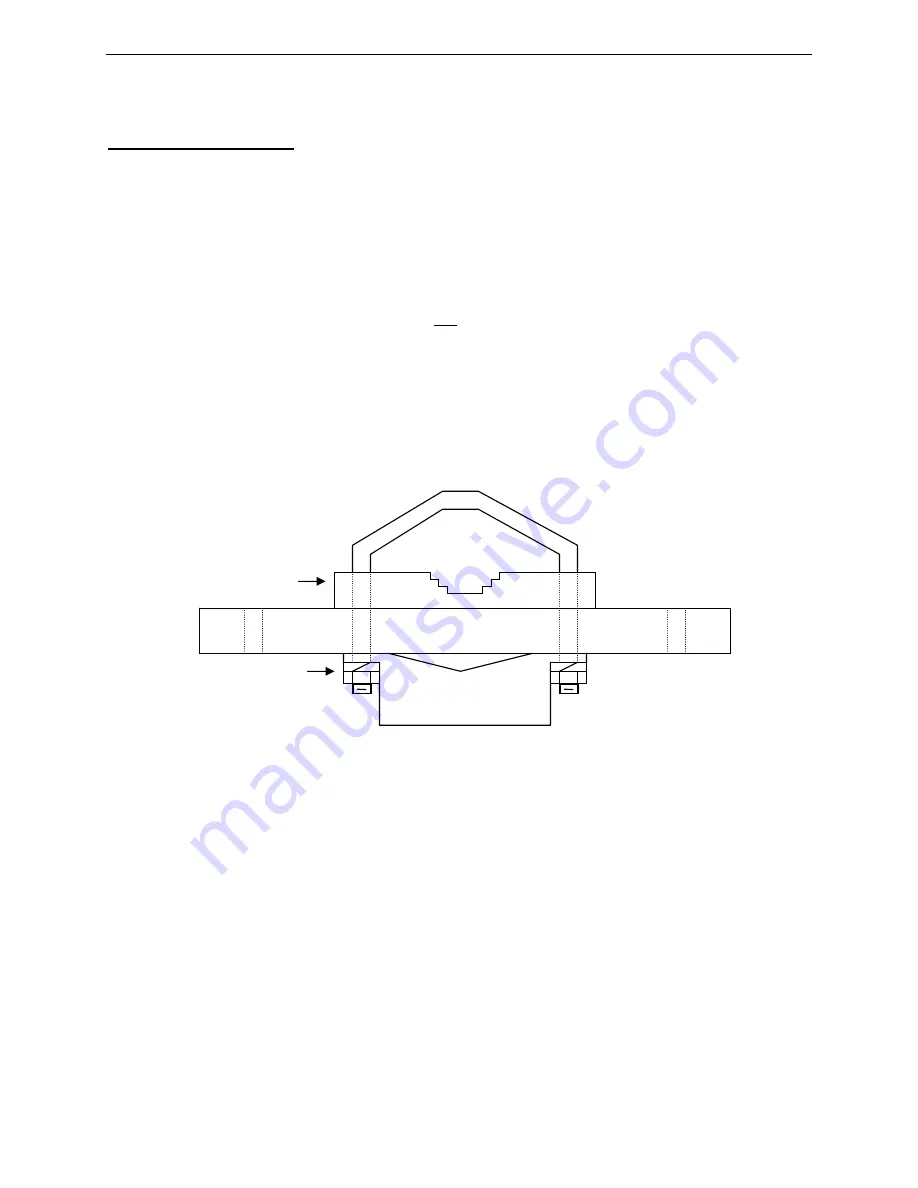
Bolt the balun loosely to the 1 x 12” fiberglass rod using the U-bolt set and ¼-20 hardware. The
nuts will be tightened when the antenna is mounted on the mast. See Figure 2.
Note:
When the balun is mounted as shown, the mast size is limited to 1-3/8” diameter maximum.
For a 1-1/2” diameter mast, you must mount the balun directly on the mast below the
fiberglass rod with the additional U-bolt set provided.
6)
Slide the 1-1/8 x 60” aluminum radiator tubes over the center insulator/balun assembly with the
slot on each aluminum tube on the topside of the fiberglass rod/balun assembly. Insert the ¼-20
bolts through the aluminum tube/fiberglass assembly and through the balun lugs. Add the ¼-20
split lock-washers and nuts and tighten securely. See Figure 3.
Fiberglass Rod
Balun
¼” LW& nut
(2 places)
U-Bolt set
Figure 2: Balun/Center Insulator Assembly – Top View

