MFJ-1775W Rotatable Mini-Dipole
Instruction Manual
7
13)
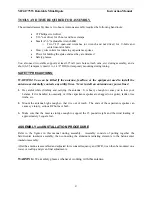
Install four
18.75”
(see note below)
spokes in the 12-meter rings of both loading coil assemblies.
With a 5/16” nut driver, tighten the nuts until the spokes are snug.
Note:
One or two of the 60 meter 36” spokes on one loading coil only may need to be replaced
with 40” spokes, depending on the desired 60 meter operating frequency. See the 60-
meter tuning instructions below.
14)
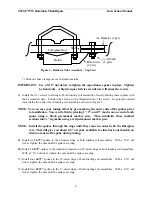
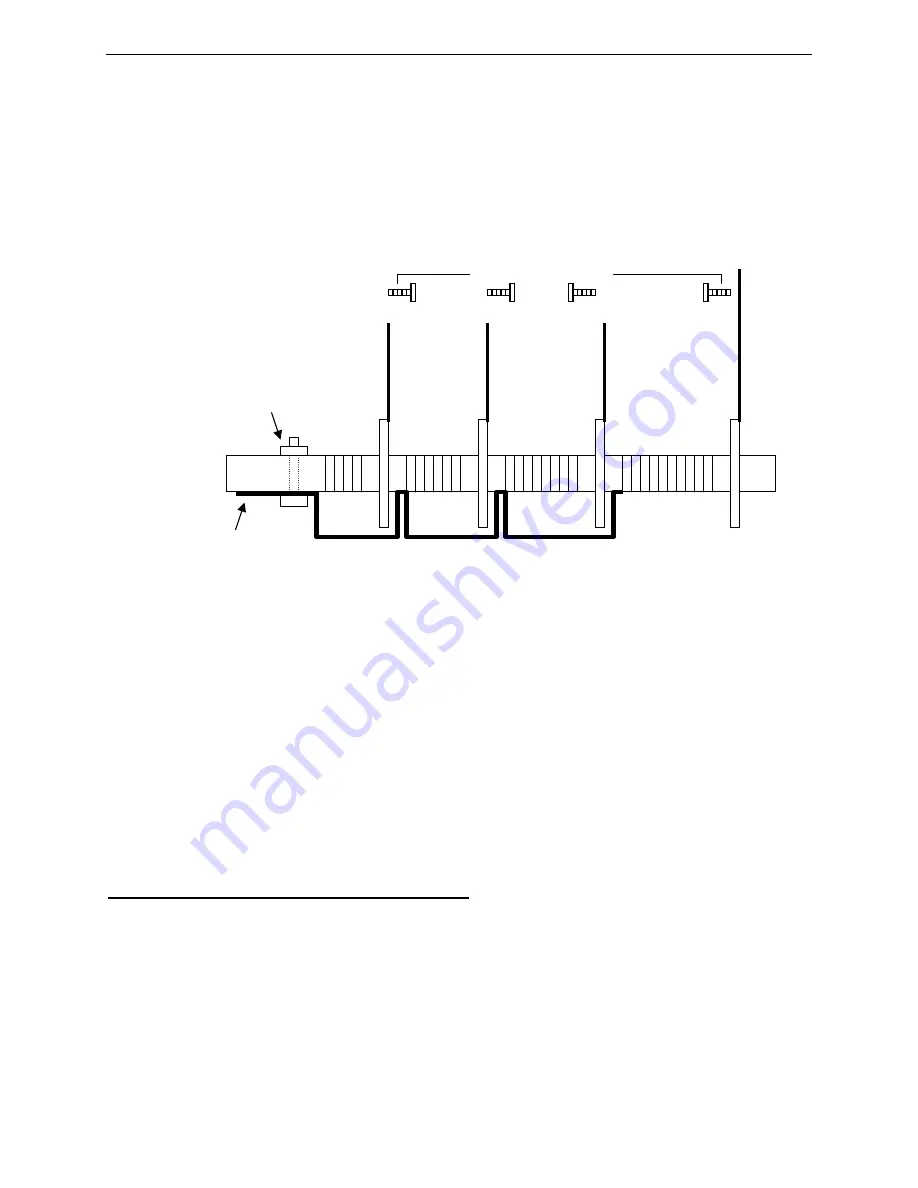
Loosen the mounting screw indicated in Figure 5 so that the aluminum radiator can be slid under the
aluminum tab. Slide the aluminum radiator tube until it contacts the mounting screw that was just
loosened. Tighten the mounting screw.
Do not over-tighten this screw or you may BREAK the
fiberglass form.
Slide the hose clamp over the tab and tighten the hose clamp to firmly attach the
loading assembly to the aluminum radiator.
15)
Double check the tightness of all the hardware you installed and then mount the antenna on the short
temporary tuning mast 6-8 feet above the ground.
16)
Tune the antenna as discussed in the next section.
17)
Mount the antenna in the final location. Slight re-tuning may be necessary.
FREQUENCY AND SWR ADJUSTMENT
An SWR analyzer such as the MFJ-259B or equivalent is highly recommended when tuning the MFJ-
1775W. While a transceiver and SWR meter can be used, an SWR analyzer will significantly decrease
the time and effort necessary to tune the antenna.
The MFJ-1775W covers wider frequency ranges on the higher bands, and narrower segments on the
lower frequency bands. The 60 meter band has the narrowest range of operation (approximately 40 KHz)
and is the most sensitive to adjustments.
12 M
coil
17 M
coil
30 M
coil
60 M
coil
(8) 36”
(2) 41”
(4)
36.75”
(4)
18.75”
(4)
18.75”
Figure 5: Loading Coil Assembly
AL tube fits
under this tab
Loosen to slide
AL tube under
the tab
Screw orientation

