4.1.3
Turn on external AC power.
4.1.4
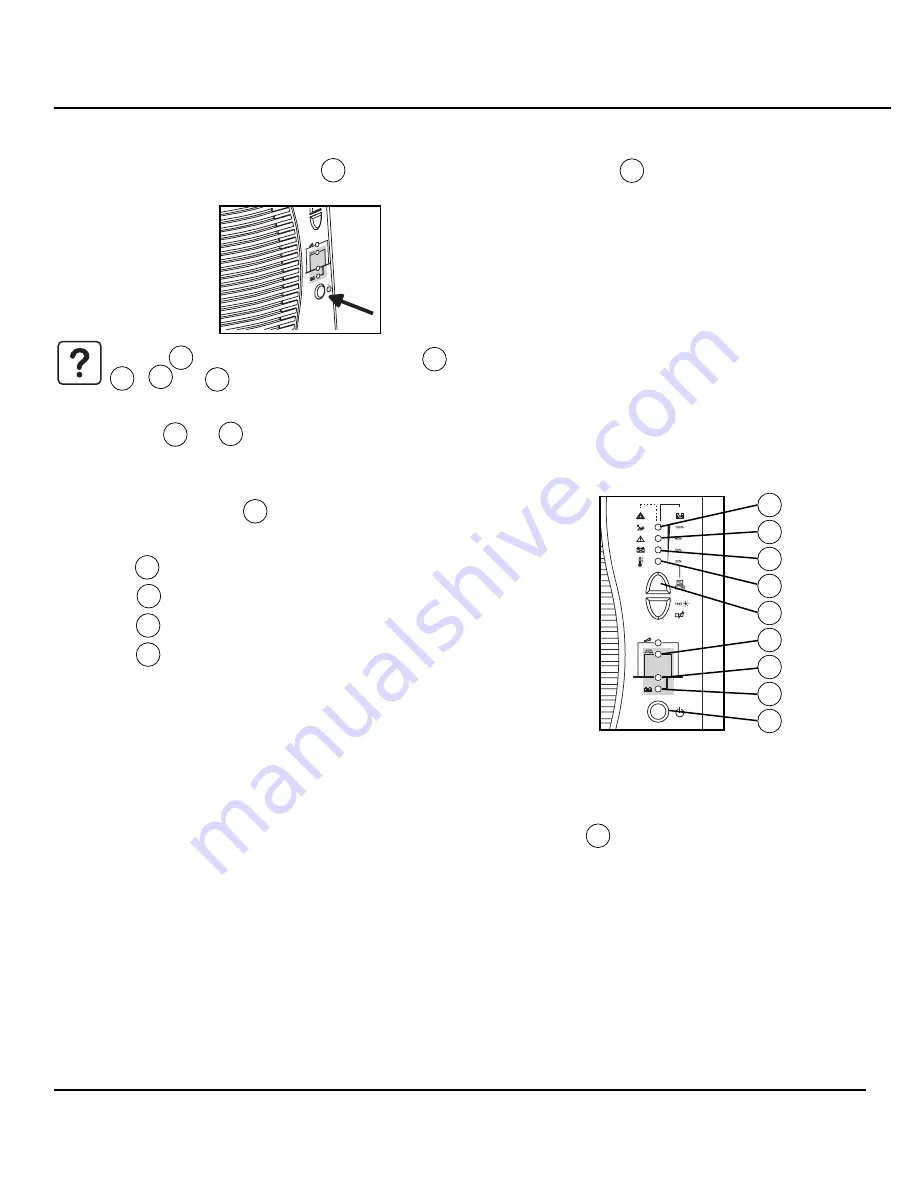
Press the ON/OFF button 21 on UPS. After 30 seconds, LED 19 goes on. All
connected equipment is energized.
If LED 19 does not go ON, or if LEDs 11 ,
12 , 13 or 14 flash, there is a fault (refer to section 4.1 of User Manual).
4.1.5
LEDs 11 to 14 provide three different indications:
◗
Remaining backup time in percent (in ON-LINE mode).
◗
Percent load drawn by the protected equipment,
when button 15 is pressed.
◗
Operating faults (flashing LED and beeps):
11 Overload
12 UPS fault
13 Battery fault
14 Excessive ambient temperature
4.1.6
Allow the battery packs to charge for at least 10 minutes.
4.1.7
Remove power from the Comet EXtreme UPS by setting the
AC main circuit breaker supplying power to the UPS to “OFF.”
4.1.8
Set all battery circuit breakers, EXCEPT one, to the “OFF” position.
4.1.9
Verify that the Output Power ON/OFF switch on the UPS is in the “ON” position.
4.1.10 After approximately 30 seconds, at least one of the four yellow LEDs on the front panel
of the UPS should be lit. Additionally, the Battery Input LED 20 , on the front panel of
the UPS should be lit. This will indicate that the battery pack is operational.
4.1.11 Activate the next battery, if system has more than one battery set, by setting its circuit
breaker to “ON”. Deactivate the battery that was tested previously by setting its circuit
breaker to “OFF”. The battery test LEDs should still be illuminated.
4.1.12 Repeat step 4.1.12 until all batteries have been tested. Any battery that fails to light at
least LED 1 may need to be charged for a minimum of 3 hours. Repeat the scanning
procedure. If the battery pack again fails to light at least LED 1, it should be replaced.
4.1.13 Restore power to the Comet EXtreme UPS by setting the AC mains circuit breaker
supplying power to the UPS to “ON.” And set all battery circuit breakers to the “ON”
position.
12
86-153721-01
Comet EXtreme Transformer Distribution Cabinet
21
20
19
18
15
14
13
12
11


