5
To power off the Remote Collar Receiver turn off the remote transmitter, realign the Remote
Transmitter Pairing Receptacle with the corresponding Collar Receiver Pairing Receptacle. Once the
Receiver Indicator Light goes red separate the two Pairing Receptacles. The Collar Receiver is now off.
Step 3 – Pairing Collar Receiver to Transmitter
Rotate the Intensity Dial so it’s no longer selecting “off.” The Remote Transmitter will now be
powered on.
1.
Rotate the Receiver Selector Dial on the transmitter to 1, indicating the first receiver for
pairing.
2.
Ensure the Collar Receiver is off.
3.
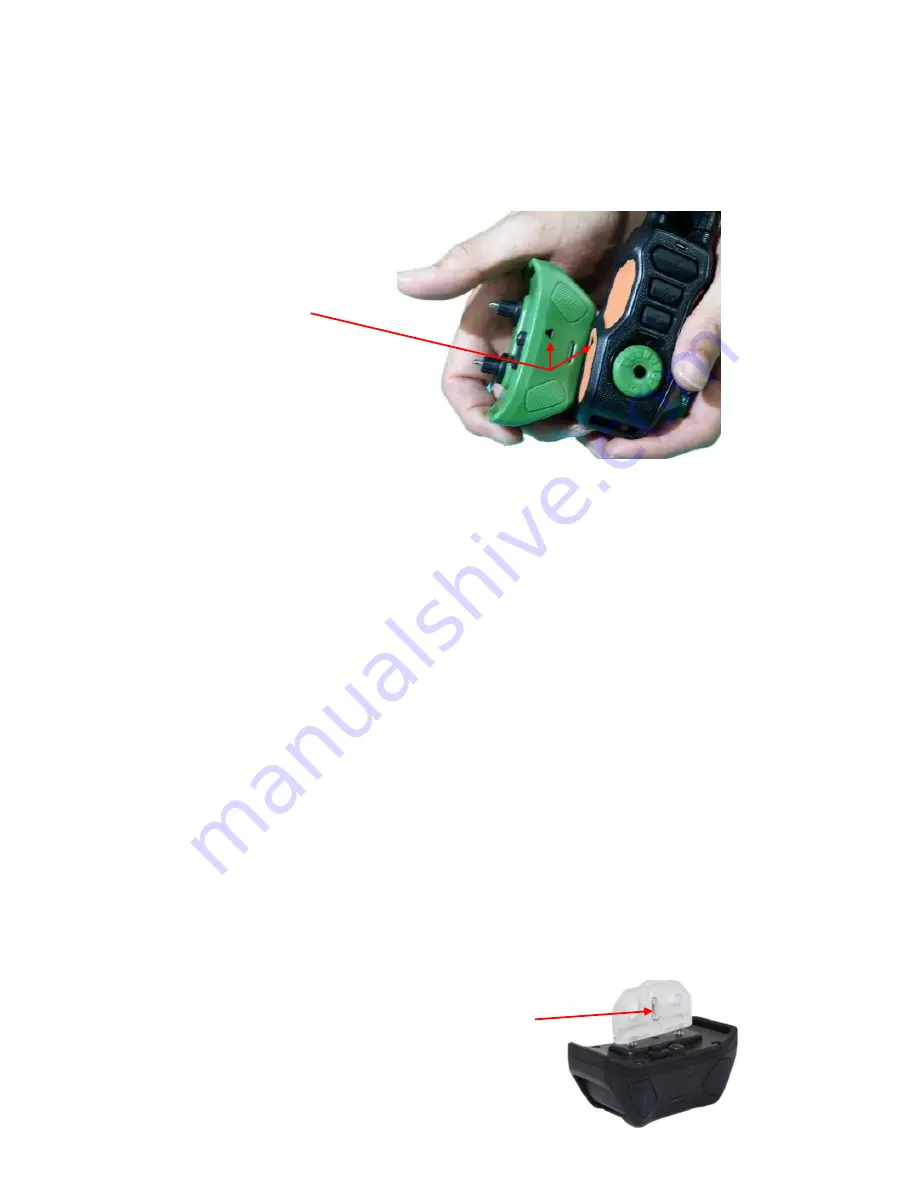
Align and the Remote Transmitter Pairing Receptacle with the corresponding Collar Receiver
Pairing Receptacle. Hold until the Receiver Indicator Light is a steady green, once the steady
green light begins to flash press any of the stimulation buttons. Pairing is now complete.
4.
If needing to pair a second or third Collar Receiver, repeat these steps but rotate the
Receiver Selector Dial on the transmitter to 2 or 3, depending on what Receiver Collar you’re
pairing.
Step 4 - Test the Training System Functions
The testing methods will help determine whether the training system is functioning as intended.
Please ensure that the pairing process is complete before attempting to test the functionality.
Testing the Static Shock Function
1.
Put the test bulb over the Contact Points of the Collar Receiver.
2.
Power on the Remote Transmitter and adjust the Intensity Dial from off to 0 or above.
3.
Select the correct Collar Receiver with the Receiver Selector Dial on the transmitter.
4.
Press the Static Shock Button and the test bulb will flash orange, indicating the static shock
function is operating correctly.
To Pair, hold these two
triangular pairing receptacle
marks together and follow the
instructions below
Test Light. Place over
the probes and the
light will flash when
the collar is shocking


