background image


MGI ZIP X5 

User Manual


15

14

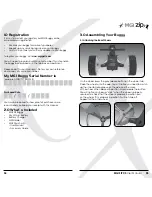
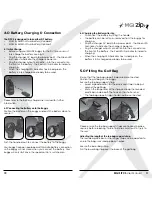
5.  To fully shut down the buggy and prevent the battery from  
 

discharging, disconnect the battery by lifting its handle.  The  


battery can be left on or removed from the buggy.

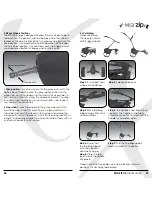
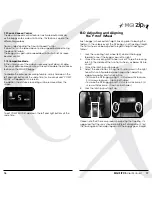
7.4 Battery Level Indicator

Battery indication is located on the left side of the top box screen. 
Four coloured bars are highlighted showing full charge. The 
lesser number of bars displayed, means there is less battery life 
available. You should always check the battery status before you 
play golf to ensure the four bars are there.

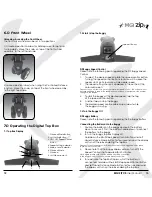
7.5 Unit Measurements

You can move from meters / kilometres to yards / miles simply by 
pressing the Unit Setting Button [on the right].
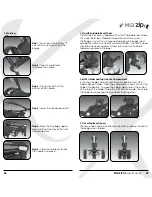
7.6 Distance Modes

There are three distance measurement modes. To move between 
the modes by pressing the Distance Mode Button [DM] [on the 
left]

Distance A and B: resettable distance measurements could be 
used to measure how far you hit your shot and to measure how 
far you have walked for the day. To reset, simply press the DM 
Button [left side] for 3 seconds until the reading displays “0”.
Distance Total: cannot be reset as it is the Odometer for the life of 
the buggy. This feature will assist with service reminders which are 
recommended at each 500kms or 6 months periods.

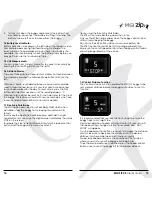
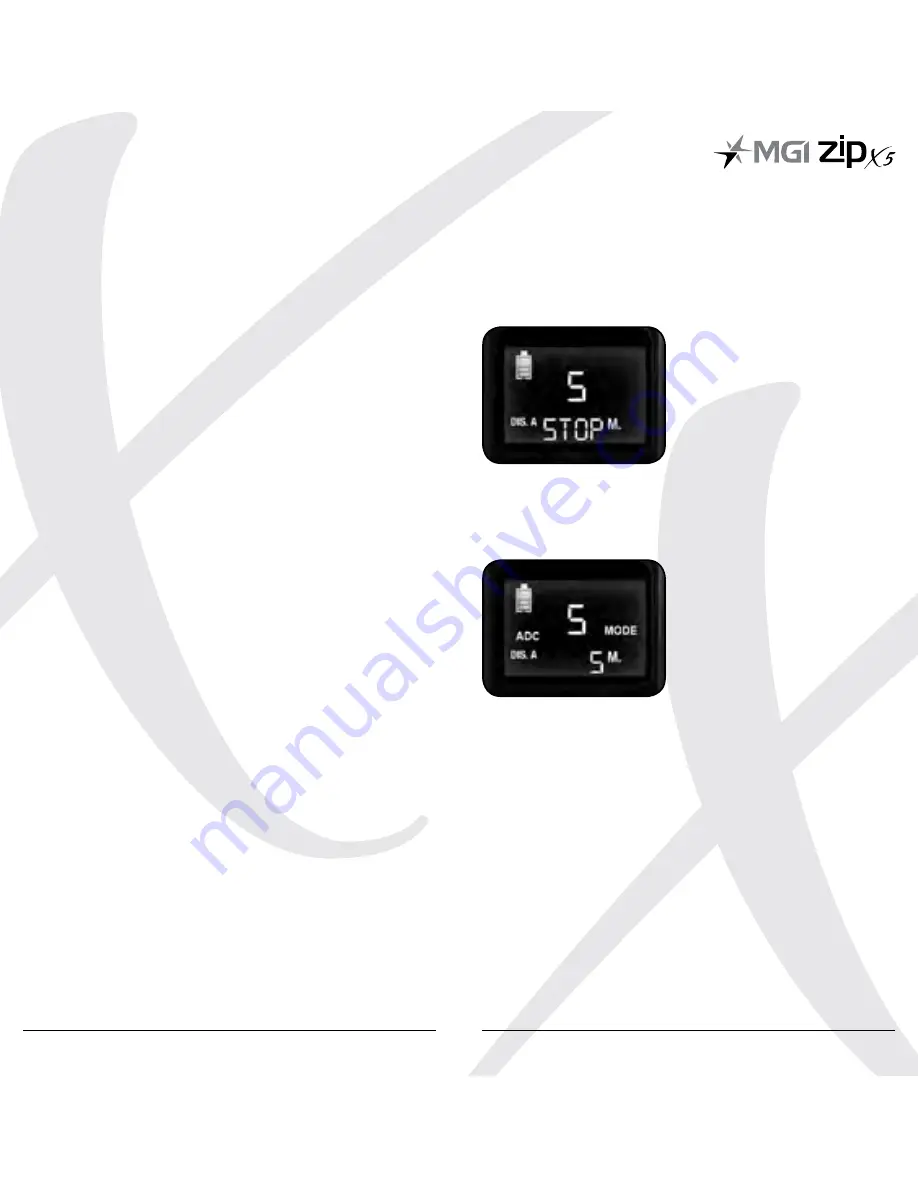
7.7 Electronic Park Brake

The MGI Zip X5 has an Electronic Park Brake [EPB] which when 
activated, stops the buggy from creeping forward on a hilly 
terrain.
To activate the Electronic Park Brake press and hold the right 
hand button for 3 seconds. The digital screen will display the words 
STOP on the screen.
To release the Electronic Park Brake simply tap the speed control 
button and the buggy will resume movement.
 

Tips on using the Electronic Park Brake
The EPB will consume battery power when in use
Only use the EPB on large slopes when the buggy cannot stand 
still by simply stopping the buggy.
Do not use the EPB on flat surfaces to conserve battery life.
The EPB function should not be ON for a long period of time. 
Simply use the on/off speed control when stopping on flat terrain 
or during longer breaks on the course
 

7.8 Control Distance Function

The Control Distance Function enables the MGI ZIP buggy to be 
sent a preset distance before the buggy auto stops. To use this 
function:

It is recommended that you lock the front wheel to ensure the 
buggy tracks in a straight line.
Press and hold down Speed control button for 3-4 seconds until 
the speed setting changes to 5 [metres or yards] and “ADC 
MODE” will appear.
Turn the Speed control button clockwise to increase the distance 
or anti-clockwise to decrease the distance until the desired 
distance is achieved between 5-60 [metres or yards]
Always look ahead and assess the condition of the terrain of 
where you want to send the buggy prior to doing so.
Once the desired distance is reached, press the Speed control 
button once to send the buggy off to the desired distance.

Summary of Contents for zip X5

Page 1: ...User Manual VERSION 1 3 ...

Page 2: ... Assembling the Buggy 05 3 1 Attaching the Rear Wheels 05 3 2 Rear Wheel Positions 06 3 3 Unfolding 07 3 4 Folding 08 3 5 Fourth Foldable Rear Wheel 09 3 6 GPS Holder and Top Handle Compartment 09 3 7 Inverting Rear Wheels 09 4 0 Battery Charging Connection 10 4 1 Initial Charge 10 4 2 Connecting the Battery onto the Buggy 10 4 3 Charging the Battery after Use 11 5 0 Fitting the Golf Bag 11 6 0 Fr...

Page 3: ...Date You may be required to show proof of purchase so we recommend you keep your receipt with this manual 2 0 What s Included MGI ZIP Buggy 24v Lithium Battery Battery Charger GPS Holder MGI Pouch with User Manual Accessory Guide 3 0 Assembling Your Buggy 3 1 Attaching the Rear Wheels On the wheel press the grey release button on the wheel hub Place the wheel onto the axle You will notice you need...

Page 4: ...losest to the end of the axle To do this press the grey release button on the wheel hub push the wheel on to the axle and release the release button onto the groove To test for free wheel position try rolling the wheel backwards The wheel should spin freely with no resistance Repeat for both wheels 3 3 Unfolding Please see below the steps to unfold a ZIP Buggy Handle Please note that the handle ca...

Page 5: ...ompartment and connect the holder into position To open the holder always press the button at the top of the holder Place the GPS into the cradle then close the holder by squeezing the two sides closer together 3 7 Inverting Rear wheels The rear wheels can be inverted on the axle to reduce the size of the buggy when folded MGI ZIP X5 User Manual 09 08 3 4 Folding Step 1 Disconnect the battery It c...

Page 6: ...witched on 4 3 Charging the Battery after Use Disconnect the battery by lifting the handle The battery can be left on or removed from the buggy for charging Plug the charger AC lead into a power point the Green LED illuminates to indicate the charger is power on Plug the charger output connection into the connector on the front of the battery the Red LED illuminates to indicate charging When the c...

Page 7: ...stop the buggy 5 The desired speed can be altered up or down while the buggy is moving 7 3 Turn the Buggy Off ZIP Buggy Battery Please note the following points regarding the Zip Buggy Battery Connecting the Battery onto the Buggy 1 Position the battery on the buggy and push the battery down to secure it Push the battery handle down to connect the battery to the buggy 2 To turn the buggy Top Box D...

Page 8: ...ops the buggy from creeping forward on a hilly terrain To activate the Electronic Park Brake press and hold the right hand button for 3 seconds The digital screen will display the words STOP on the screen To release the Electronic Park Brake simply tap the speed control button and the buggy will resume movement Tips on using the Electronic Park Brake The EPB will consume battery power when in use ...

Page 9: ...e 8 0 Adjusting and Aligning the Front Wheel Each buggy is checked for straight tracking prior to leaving the factory In the unlikely event the ZIP buggy is not tracking straight the front wheel can be adjusted to regain straight tracking as follows 1 Lock the swivelling front wheel 6 0 and run the buggy forward to see if the buggy veers left or right 2 Unlock the swivelling front wheel swivel it ...

Page 10: ...ogram PMP The PMP consists of work to be carried out by both the owner and authorised service centres To properly maintain the warranty of your MGI motorised buggy it is essential that this work is carried out If the work carried out by the authorised service centre is to replace parts that are part of the maintenance schedule the owner will be charged for the parts and labour If the work to be ca...

Page 11: ...service can be completed by either an authorised service centre or the owner of the buggy 10 5 Service Record for All Buggies 6 month inspection Date Invoice Serviced by Signature 1 year inspection Date Invoice Serviced by Signature 1 year inspection Date Invoice Serviced by Signature 2 year inspection Date Invoice Serviced by Signature 2 year inspection Date Invoice Serviced by Signature 3 year i...

Page 12: ...mail to discuss the right parts and instructions 13 0 Contacting MGI MGI Golf Head Office Address 11 Maurice Court Nunawading VIC Australia 3131 Phone 61 3 8872 6700 Local Toll Free 1300 644 523 excludes mobiles Email sales mgigolf com Web www mgigolf com 14 0 Contacting Local Agent Please refer to www mgigolf com to find the distributor in your country 15 0 FAQ Q My buggy is not tracking straight...

Page 13: ...sales mgigolf com International P 613 8872 6700 F 613 9873 1433 E international mgigolf com Follow us on Absolute attention has been taken to ensure this manual is correct at time of printing Specifications images and statistics may change at any time Visit www mgigolf com for the most current model information Printed March 2018 Version 1 3 ...

Reviews:

Related manuals for zip X5