Prodomus
12
Mounting
•
Remove all packaging material such as carton, foil etc.
•
WIpe the unit and all parts with a slightly damp cloth to remove production residues. Let dry
all completely before use.
•
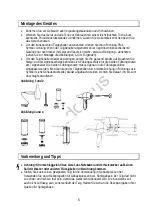
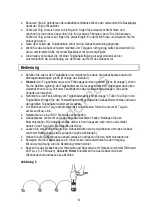
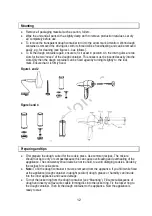
To remove the transparent dough container turn it to the arrow mark. Attention: Wenn dough
container is removed the driving disc with its thread will be freewheeling and can be removed
easily, e.g. for cleaning (see figures 1-4 as follows).
•
To fix the dough container again, ensure to fix it exact in position. On the driving disc are two
slots for the two “noses” of the dough container. This noses must be inserted exactly into the
slots.Only then the dough container can be fixed again by turning it slightly to the lock
mark. Ensure that it is firmly fixed.
Figure 1 and 2
Figure 3 and 4
Preparing and tips
•
First prepare the dough, suited for the cookie press. Use common recipes. The mixture
should not be too dry or compactbecause this can cause overloading and overheating of the
apppliance. The consistency should also be not too fluid, to avoid diverging cookies. Abide by
the recipes for cookie press.
•
Note: To fill the dough container it must be removed from the appliance. If you fill it while fixed
at the appliance (dough container in upright position) dough, grease or humidity can intrude
into the inner appliance and cause damage.
•
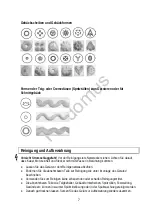
Turn of the locker ring from the dough container (see “Mounting”). Fill some tablespoons of
dough and insert your favourite cookie forming disc into the locker ring. Fix the locker ring to
the dough container. Then fix the dough container to the appliance. Now the appliance is
ready to start.


