PARRILLA GMB 100 User manual
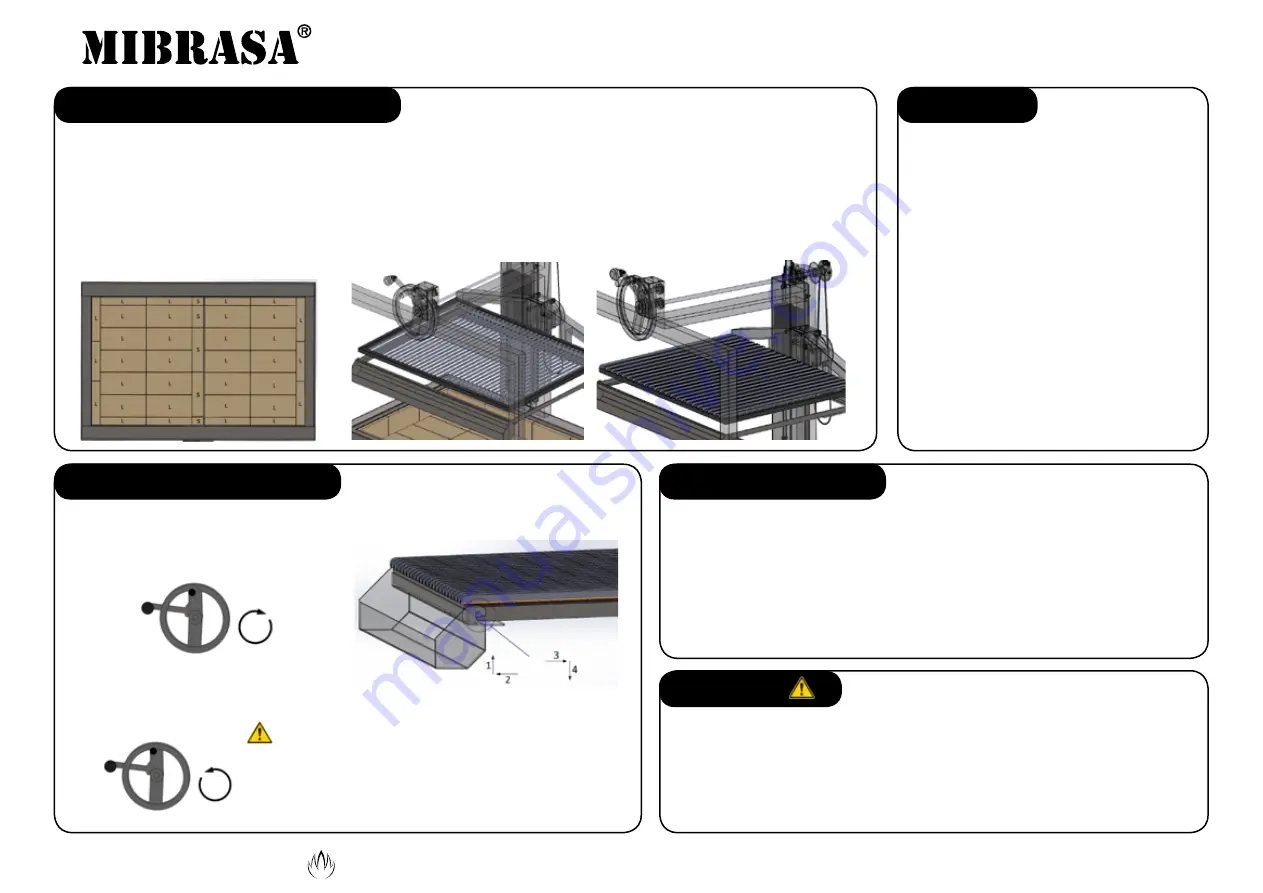
1. Refractory bricks
Remove the wedges between the
tiles. There are 34 large bricks
and 5 slim bricks. Check that the
bricks are correctly positioned with
the smooth side facing towards the
embers.
2. Wheel lock
Remove the safety lock from the elevating hand wheel.
3. Grill position
Assemble the grill on the support.
Round bar grill
V-shaped grill
- Grill overhang facing user
.
1. Adjusting grill height
To raise -
Turn wheel clockwise
To lower
- Turn the wheel anti-clock-
wise whilst pulling up the reverse lever.
Always maintain grip of the wheel
handle.
2. Grease collector
To remove the grease collector. Lift the
collector and pull towards you as shown in
steps 1 & 2.
To return the collector to its original position,
re-insert following steps 3 & 4.
1. To remove the ash, scoop out the cinders using the ash shovel provided and
dispose in a separate metal container.
2. Do not use water or chemical products to clean any area of the Parrilla.
3. Use the provided brush to remove burnt debris from the grill.
4. To clean stainless steel areas of the Parrilla use standard degrease
cleaning product.
Mibrasa Charcoal Ovens S.L | www.mibrasa.com | +34 972 601 942 | mibrasa
@
mibrasa.com
4. Get the PARRILLA started for first use
5. Lighting up
6. PARRILLA in operation
7. Maintenance & Cleaning
8. WARNINGS
Keep hands well
clear from under
the grill when in
motion.
The Mibrasa Parrilla is subject to technical and design changes.
Rev. 3/18
1. Several surface areas of the Parrilla can reach very high temperatures.
2. Allow all areas of the Parrilla to cool down before handling or moving.
3. Do not use alcohol, oil or other liquids to ignite or rekindle the hot coals. Only use
Mibrasa Ecofire lighters.
4. Keep hands well clear from under the grill when in motion.
1.
WARNING
Always fire up the charcoal
on the refractory brick surface.
2. Before lighting up, raise the grill to the
highest point (see step 6.1 Adjusting grill
height).
3. Load the charcoal and form a mound.
Place 2 Mibrasa Ecofire lighters for easy
lighting.
4. After 30 minutes or when the embers turn
white, the grill is ready for cooking.
5. Use the ember poker to evenly spread
the embers over the refractory surface.


