Rip Fence
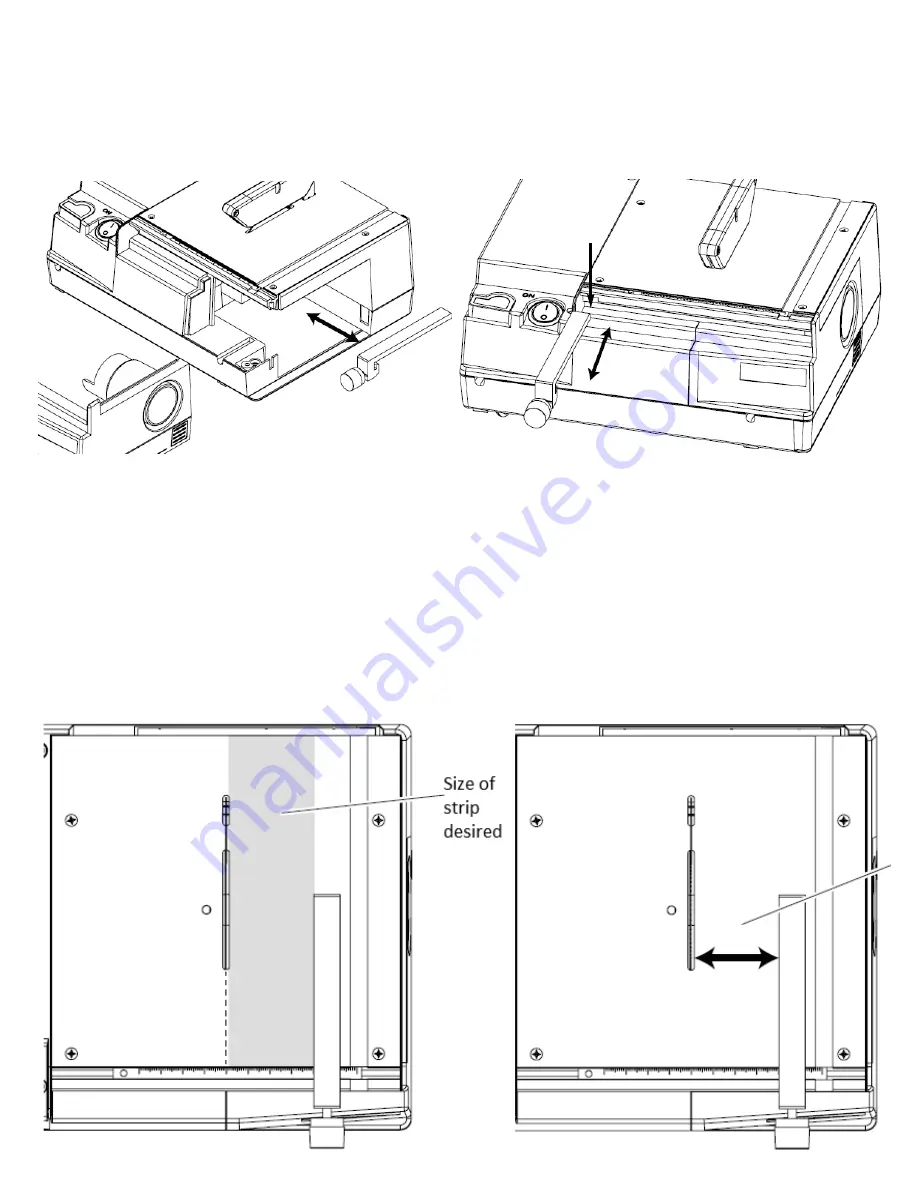
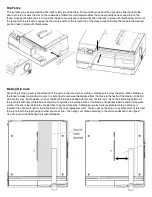
The rip fence may be mounted from the right or left side of the table. To mount the fence from the right side, slide the right side
door out a bit to access the slot on the underside of table; this slot accommodates the corresponding hook-shaped tab on the
fence. Engage the tab in the slot, then close the door; move fence to desired location and lock in place with thumbscrew. To mount
the fence from the left side, engage the tab into the notch at the far left side of the fence guide and move the fence to the desired
position; lock in place with thumbscrew.
Making Rip Cuts
Rip cutting is making cuts in the direction of the grain in the wood; cross cutting is making cuts across the grain. When setting up
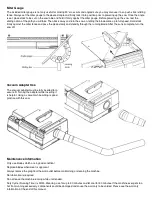
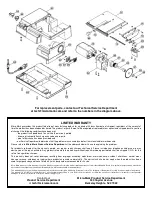
the fence to make longitudinal rip cuts, it is important to measure the distance from the fence to the teeth of the blade, not the flat
side. Here’s why: Some blades, such as the 80 tooth blade included with this saw, feature “set.” Set is the alternating pattern of
the teeth left and right of the blade’s centerline. It improves the cutting action of the blade, and reduces binding and burning when
cutting. It needs to be taken into consideration to get accurate cuts. A sliding gauge inch ruler segmented into 20 sections is
located in the horizontal slot of the table. Each of the lines represents .050”. You can set up the zero or any other mark of this ruler
to be in line with the tooth using another square or ruler. Then align your fence according to the distance desired to be ripped.
Use of a push stick while ripping is recommended.


