USER MANUAL
m crob t
RRC-1258 MKII
Ba1258B_RemoteRig_MkIIs-A30
Microbit 2.0 AB 2010. All rights reserved
a
User manual
Rev. A30
– 2014 Jan 21
147 of 228
Connections
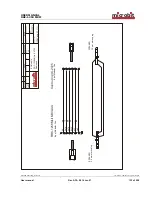
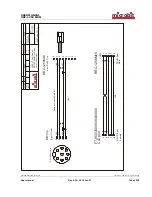
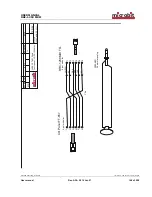
The cabling is quite simple and can be done with simple RJ and modular connectors. The 5
wire control cables are the same on control and radio end, but be aware of that the cables
must be connected as shown in the schematics.
Drawings of the connection cables can be found below.
Control-RRC:
The control cable Y9a should be connected between the Control panel and the RRC TTL
connector. The Y9a cable is included in the FT-857 package. The cable has a yellow mark
in the RRC end, it will not work if you try to use it connected backwards.
The original microphone can be connected direct to the RRC AUX/MIC connector.
The speaker is connected direct to the RRC SP-jack with a 3.5 mm stereo plug or to the
FT-857 front panel speaker jack.
Radio-RRC:
The control cable Y9a should be connected between the Radio-RRC and the Radio. The Y9a
cable is included in the FT-857 package. The cable has a yellow mark in the RRC end, it
will not work if you try to use it connected backwards.
Between the RRC AUX/MIC connector and the radios microphone jack you can connect the
standard screened patch cable (CAT5 or CAT6) included in the FT-857 package.
Power supply
Control-RRC:
The Control-RRC is supplied with a common 13,8 V (10-18V) power supply. The display and
speaker amplifier needs a lot of power so you need 1A.
Radio-RRC:
The Radio-RRC should be supplied from the same power supply as the radio to avoid
humming. Please put a small fuse on the cable if you connect it to a 30 Amp PS.


