background image

14

13

4.

5.

The instrument is all set up and ready to use.

Do not operate the piston until the entire unit is safely and fully 

mounted on the reservoir bottle.

Always wear rubber gloves while operating the instrument or handling 

the bottle, especially when working with hazardous liquids. 

When mounted to a reagent bottle, always carry the instrument carefully.

Fig.

 8.4

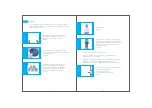
Fix the adapter.

(Fig. 8.4)

Fig.

 8.5

Fig.

 8.6

Mount the instrument. Screw it to the reservoir 

by applying gentle hand torque applied to the 

threaded platform base only. In case of removal, 

apply the same technique to the base, in the 

opposite direction.

(Fig. 8.5)

Do not press the piston down when the cap is on. 

Avoid splashing the reagent. 

The reagent can drip out 

from the discharge tube and cap.  

(Fig. 8.6)

Fig.

 8.1

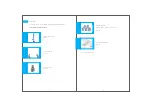
Setting Up

Wear protective clothing, protective gear for the eyes and hands. Follow all 

safety instructions and observe limitations of use and operating constraints. 

(Refer to sections - 2,3,4)

8.

1.

2.

3.

Fig.

 8.2

Adjust the length of the telescopic tube to 

fit your particular reservoir. If you require a 

longer tube, it is provided on request.

(Fig. 8.1)

Fix the telescopic tube. The tube’s ends have 

different diameters. Please select the correct side 

for your instrument.

(Fig. 8.2)

Fig.

 8.3

Choose the correct adapter for the bottle. 

The threaded platform base has a 30 mm 

screw thread. Five adapters are supplied to 

suit containers with a 28, 32, 38, 40, 45 mm 

and 30 mm (inbuilt adapter) screw neck.

(Fig. 8.3)

Summary of Contents for SCITUS

Page 1: ...29 Pakramau Kursi Road Lucknow 226026 UP India Call at 91 8081461996 91 9918625629 For queries info microlit com For feedback customercare microlit com www microlit com OPERATION MANUAL Bottle Top Dis...

Page 2: ...commended Reagents First Steps Setting Up Priming Volume Setting and Dispensing Error Limits User Calibration Procedure Maintenance Cleaning Disassembling and Assembling for Cleaning and Servicing Aut...

Page 3: ...her person Only dispense into appropriate vessels and avoid splashes Do not press the piston when the discharge tube closure is attached Do not remove the discharge tube while the dispensing cylinder...

Page 4: ...plosive liquids e g Carbon Disul de Suspensions e g of charcoal as the solid particles may clog or damage the instrument Liquids that attack PP cap The permissible concentration of dissolved Sodium Az...

Page 5: ...A B 2 A A B 2 A B 2 A B 2 B 2 A C 2 B 2 A A A B 2 B 2 B 2 B 2 A A A A List of Reagents Dimethylacetamide Covi Ox T70 Mixed Tocopherol B 2 B 2 B 2 B 2 B 2 B 2 B 2 B 2 B 2 B 2 B 2 B 2 B 2 B 2 B 2 B 2 B...

Page 6: ...2 B 2 B 2 B 2 B 1 C 3 C 2 C 2 A A A A A A A A A A A A A A A A A A A A A A A A A A List of Reagents Oleum Fuming Sulfuric acid Potassium dihydrogen phosphate B 2 B 2 B 2 B 2 B 2 B 2 B 2 B 2 B 2 B 2 B 2...

Page 7: ...e Adjustment Knob Middle Body Barrel Adapter Bottle Adapter Telescopic Tube 9 List of Reagents P B 2 Triethylamine B 2 B 2 B 2 B 2 B 2 B 2 B 2 B 2 B 2 B 2 B 2 B 2 B 2 B 2 Sulfuric acid 10 Sulfuric aci...

Page 8: ...age Verify that the package includes 1 Operation Manual 7 1 2 3 1 Bottle Top Dispenser Fig 7 1 1 Telescopic Tube Fig 7 2 1 Calibration Tool Fig 7 3 Fig 7 1 4 5 6 5 Bottle Adapters 28 mm 32 mm 38 mm 40...

Page 9: ...ress the piston down when the cap is on Avoid splashing the reagent The reagent can drip out from the discharge tube and cap Fig 8 6 Fig 8 1 Setting Up Wear protective clothing protective gear for the...

Page 10: ...ashing 9 1 2 3 4 Remove the Nozzle Cap Prime the unit with a few gentle up and down strokes taking the piston down to its lowest stop position and lifting it up Fig 10 1 Fig 10 2 Volume Setting and Di...

Page 11: ...ly with minimal force until the lower end Fig 10 5 Reattach the cap to the discharge tube Fig 10 6 Error Limits The error limits Accuracy and Coef cient of Variation mentioned below are in accordance...

Page 12: ...oclaving Prior to changing the valve Regularly when using liquids which form deposits e g crystallizing liquids Regularly when liquids accumulate in the cap All maintenance cleaning procedures should...

Page 13: ...ut with the help of calibration tool to disassemble the piston and shaft from the main housing Fig 14 2 Clean the cylinder with a bottle brush If necessary carefully remove deposits at the edge of the...

Page 14: ...ivery pipe is disassembled from the instrument Do not remove the delivery pipe out of the delivery pipe cover Delivery pipe housing will look as shown in Fig 14 10 1 2 3 4 Procedure to reassemble the...

Page 15: ...pull out the shaft Fig 15 3 26 Insert the piston completely into the cylinder and then reassemble the instrument Use the calibration tool to screwing the piston Fig 15 6 Snap the cap back to complete...

Page 16: ...rument has not been primed Filling tube is loose or damaged Liquid reservoir is empty The lling action is too fast The piston is leaking The discharge valve is leaking Draw the reagent slowly Prime th...

Reviews: