background image

Creating a Sorption Pump

VacPrep 061

1-14                                                    

Feb 2013

Creating a Sorption Pump

You can improve the vacuum in the VacPrep 061 by creating a sorption pump using a sample 
tube and a microporous material with a high surface area. The following steps describe how to 
create a sorption pump.

1. Partially fill a sample tube with material of a high surface area, such as aquarium charcoal, 

other forms of activated carbon, or zeolite. Avoid using fine powders.

2. Attach the sample tube to one of the degas stations.

3. Set the temperature controller to approximately 150 ºC.

4. Turn the appropriate VACUUM/GAS control knob to VAC and allow the sample tube to 

be evacuated for approximately one hour or until the vacuum gauge reading falls below 50 
millitorr (50 

mHg). 

5. Leave the VACUUM/GAS control knob in the VAC position and move the sample tube to 

a cooling station.

6. After the sample tube has cooled sufficiently, immerse the lower two-thirds of the tube 

into a liquid nitrogen bath.

7. The resulting sorption pump will reduce the pressure in the VacPrep to less than 1 millitorr 

(1 

mHg).

8. The vacuum gauge may be recalibrated with the sorption pump attached.

9. Turn the VACUUM/GAS control knob to GAS for about 30 seconds, then to OFF before 

removing the sorption pump from the fitting.

For sample tubes having a capacity greater than 6 cm

3

, and for tubes containing high 

surface area materials, a longer backfill time will be required.

Backfilling the sample tube increases its pressure to a level greater than atmospheric 
pressure. If the gas pressure is greater than the recommended maximum of 5 psig (35 
kPag), the sample tube could be ejected from the fitting or broken.

Summary of Contents for 061-00023-00

Page 1: ...VacPrep 061 Operator s Manual 061 42802 01 Feb 2013 ...

Page 2: ... Micromeritics Instrument Corporation 2002 2013 All rights reserved ...

Page 3: ...he following conditions 1 Certain products sold by MICROMERITICS are the products of reputable manufacturers sold under their respective brand names or trade names We therefore make no express or implied warranty as to such prod ucts We shall use our best efforts to obtain from the manufacturer in accordance with his customary prac tice the repair or replacement of such of his products that may pr...

Page 4: ......

Page 5: ... PREPARATION Operation 2 1 Front Panel Features 2 1 Rear Panel Features 2 2 Controlling the Temperature of Heating Stations 2 3 Sample Preparation 2 4 Cleaning Sample Tubes 2 4 Weighing Samples 2 6 Inserting and Removing Heating Station Adapters 2 8 TriStar and ASAP Series Sample Tubes 2 11 Inserting Adapters 2 11 Removing Adapters 2 12 Gemini Sample Tubes 2 13 Inserting Adapters 2 13 Removing Ada...

Page 6: ...ntents VacPrep 061 ii Feb 2013 Replacing Flexible Tubing 3 7 Cleaning and Replacing Vacuum Fittings 3 7 Connecting or Replacing Valve Inlet Tubing 3 9 Calibrating the Vacuum Gauge 3 9 4 ORDERING INFORMATION INDEX ...

Page 7: ...er the sample using an alternating combination of vacuum and flowing gas techniques The degasser has six heating stations for degassing samples and six cooling stations The desired degassing temperature is easily set and checked at the temperature controller located on the front of the instrument Control valves are readily accessible and provide a constant indication of the valve state A built in ...

Page 8: ...dentify notes of importance warnings and cautions Notes contain important information pertinent to the subject matter Warnings contain information that help you prevent actions that may cause personal injury Cautions contain information that help you prevent actions that may damage the analyzer ...

Page 9: ... to 35 ºC operating 0 to 50 ºC non operating Up to 90 relative non condensing Gases Used Helium nitrogen argon or any other pure gas that does not adsorb at room temperature Flow Rate flowing gas preparation Up to 50 cm3 min Vacuum System A vacuum source achieving better than 20 mHg at the instrument inlet and having a device to reduce oil vapor backstreaming is recommended The vacuum system must ...

Page 10: ...equipment which is not in working order When equipment has been damaged either during shipment or in use and you wish to return the equipment to Micromeritics for repair or replacement please follow the steps below 1 Tag or otherwise identify the defective equipment noting the defect and if possible the circumstances under which the defect occurred 2 Make reference to the sales order or purchase o...

Page 11: ...r 60 Hz Voltage selection and fusing are made at the power connector which is located on the rear panel of the unit 1 Make sure the power cord is disconnected from the degasser 2 Using a pointed object remove the fuse block and cover assembly from the power connector at the rear of the degasser 3 Pull the voltage selector card straight out of the power connector housing The power cord should be di...

Page 12: ...lector card into the power connector housing with the edge containing the desired voltage first and with the printed side facing the POWER ON OFF switch 6 Fuse the power line according to local safety practices Indicator Pin Voltage Fuse Fuse Fuses Cover Cover Cover Fuse Block Fuse Block Retaining Screw Fuse Block The power cord must be disconnected from the degasser when installing or replacing f...

Page 13: ... for the fusing desired 1 Remove the fuse block retaining screw 2 Lift the fuse block from the cover 3 Rotate the fuse block 4 Mount the fuse block to the cover 5 Replace the retaining screw c Insert appropriate fuse s for the input power source Refer to the chart below for the appropriate fuse rating 7 Insert fuse block and cover assembly into input power connector and snap it into place Once the...

Page 14: ...the reducer fitting to the outlet of the regulator shut off valve 4 Tighten the regulator shut off valve nut 5 Attach the copper tubing to the brass reducer fitting When the VacPrep leaves the factory stabilizing tubes are placed in heating stations 1 and 6 to prevent the heater block from shifting during shipment Be sure to remove these tubes before turning on the VacPrep Bottle Shut Off Valve Re...

Page 15: ...Experience with your samples will help you determine whether a change is required Table 1 2 Gas Flow Rate A flow rate of 10 15 cm3 min is the maximum flow rate that would generally be used in normal operation 9 Close the gas bottle shut off valve Check the pressure If it decreases gas is probably leaking at the fitting Tighten the fitting Then check the pressure again Flow Gauge Pressure cm3 min p...

Page 16: ...n the gas bottle shut off valve 12 Attach an adequate length of vacuum pump tubing that will fit over the 1 2 in degasser connector to a vacuum pump and to the port labeled on the back of the degasser Use hose clamps to keep the hose in place An appropriate vacuum pump is available from Micromeritics Refer to Ordering Information in Chapter 4 The vacuum pump system offered by Micromeritics include...

Page 17: ... the accessories kit Attach a fitting to the flexible tubing at any degas station that will be used for vacuum or vacuum backfill sample preparation Press the flexible tubing completely over the barbed nipple on the end of the fitting Loosely attach the knurled retaining nut ferrule and O ring If your sample fluidizes easily and you are using a Flow Control Valve install it at this time using the ...

Page 18: ...ng Gas Preparation Six stainless steel gas delivery tubes are included in the accessories kit Attach a gas delivery tube to the flexible tubing at any degas station that will be used for flowing gas preparation Attach the tube by pressing the flexible tubing completely over the ferrule at the end of the gas delivery tube ...

Page 19: ...AS control knobs to the OFF O position 3 Place the power switch for the attached vacuum pump in the ON position and allow the pump to run for at least two hours 4 Insert the small flat blade screwdriver included in the VacPrep 061 accessories kit through the opening on the back of the degasser and into the slot on the adjustment screw 5 Turn the adjustment screw to obtain a reading on the vacuum g...

Page 20: ...low 50 millitorr 50 mHg 5 Leave the VACUUM GAS control knob in the VAC position and move the sample tube to a cooling station 6 After the sample tube has cooled sufficiently immerse the lower two thirds of the tube into a liquid nitrogen bath 7 The resulting sorption pump will reduce the pressure in the VacPrep to less than 1 millitorr 1 mHg 8 The vacuum gauge may be recalibrated with the sorption...

Page 21: ...you to change the temperature set point Refer to Controlling the Temperature of Heating Stations page 2 3 for instructions VAC GAS Control Knobs Each heating station has a valve that selects vacuum or gas for each station Turn the control knob to the up position to open the valve for gas delivery the down position for vacuum and the center position for sample isolation Vacuum Gauge The vacuum gaug...

Page 22: ...ch Power On Off Switch Place the switch in the up position to turn on the degasser and in the down position 0 to turn off the degasser Gas Port The gas port is used to connect the gas supply to the degasser Vacuum Port The vacuum port is used to connect the external vacuum pump to the degasser ...

Page 23: ...ture PV Process Value and the set point SV Set Value Press to increase or to decrease the value until the desired temperature set point is displayed The keys may be held down to rapidly increase or decrease the setting Lights when power is being applied to heating stations Increases set point temperature Decreases set point temperature Displays current temperature Displays set point temperature Th...

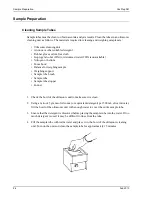
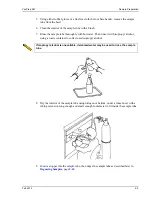
Page 24: ... for weighing sample Weighing support Sample tube brush Sample tube Sample tube stopper Funnel 1 Check the bowl of the ultrasonic unit to make sure it is clean 2 Using a ratio of 5 grams of Alconox or equivalent detergent per 500 mL of warm water fill the bowl of the ultrasonic unit with enough water to cover the entire sample tube 3 Ensure that the detergent is dissolved before placing the sample...

Page 25: ...it with isopropyl alcohol using a waste container to collect used isopropyl alcohol 8 Dry the interior of the sample tube using nitrogen or helium under a fume hood with a tubing extension long enough and small enough in diameter to fit inside the sample tube 9 Insert a stopper into the sample tube then degas the sample tube as described later in Degassing Samples page 2 14 If isopropyl alcohol is...

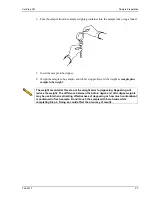
Page 26: ... weight Then remove the sample tube with stopper and the weighing support 3 Place an empty sample weighing container on the balance Zero the balance and allow it to stabilize 4 Slowly add the sample to the weighing container Record the weight as sample weight 5 Remove the rubber stopper from the sample tube To get an accurate weight of a degassed sample the gas in both the empty sample tube and in...

Page 27: ...he weight as sample plus sample tube weight The weight recorded at this step is the weight prior to degassing Degassing will reduce the weight The difference between the before degas and after degas weights may be useful when estimating effectiveness of degassing or how much contaminant is contained in fresh sample Do not touch the sample with bare hands while completing Step 4 Doing so could affe...

Page 28: ...tubes when you remove the sample tube You may store an adapter in the heating station from which it was removed or in a cooling rack Adapters constitute an isothermal shield and help to maintain uniform temperature throughout the sample bed Sample temperature however depends on several factors The thermal conductivity of the sample material The quantity of sample material The rate of gas flow thro...

Page 29: ... 1 Heating Station Adapters Analyzer Model Sample Tubes Adapter Model TriStar ASAP Series Gemini Bulb Tube Gemini Straight Wall Tube 1 4 3 8 or 1 2 in Stem 1 in Bulb P N 065 25815 00 3 8 in Stem 3 4 in Bulb P N 065 25811 00 3 8 in Stem P N 065 25812 00 ...

Page 30: ...Sample Preparation VacPrep 061 2 10 Feb 2013 TriStar 3Flex 1 4 3 8 1 2 in 9mm 12mm Stem P N 065 25815 00 ...

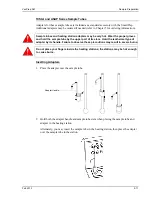
Page 31: ...tube stem when placing the sample tube and adapter in the heating station Alternately you may insert the sample tube in the heating station then place the adapter over the sample tube in the station Sample tubes and heating station adapters may be very hot Wear the proper gloves and hold the sample tube by the upper part of its stem Hold the isothermal type of adapter by its handle Failure to obse...

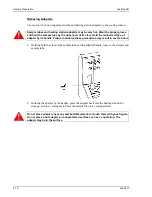
Page 32: ...ng station for storage or into a cooling rack Place the sample tube in a cooling station Sample tubes and heating station adapters may be very hot Wear the proper gloves and hold the sample tube by the upper part of its stem Hold the isothermal type of adapter by its handle Failure to observe these precautions may result in severe burns Do not place adapters near any combustible material or touch ...

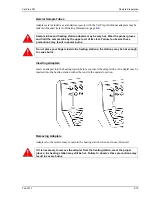
Page 33: ...ion Removing Adapters Adapters for the Gemini may remain in the heating station when not in use if desired Sample tubes and heating station adapters may be very hot Wear the proper gloves and hold the sample tube by the upper part of its stem Failure to observe these precautions may result in severe burns Do not place your fingers inside the heating stations the stations may be hot enough to cause...

Page 34: ... designed for low pressure backfilling only Flowing gas preparation The sample is heated as the operator flows gas into the sample tube to remove moisture and other contaminants The following topics describe the procedures to degas samples using each method Do not exceed 5 psi regulator pressure when backfilling sample tubes If the gas pressure is greater than the recommended maximum of 5 psig 35 ...

Page 35: ...d cracking catalysts and carbon may be difficult to prepare by vacuum preparation Such materials tend to fluidize and float up the sample tube toward the vacuum source Micromeritics recommends that such samples be first prepared by flowing gas preparation and if necessary then be subjected to vacuum preparation If sample has been accidentally sucked into the instrument follow the instructions for ...

Page 36: ...re not already in the OFF position 8 Turn the VAC GAS control knob for the sample s to be degassed to the VAC position and observe the sample If the analyzer begins to pull sample material out of the tube immediately turn the VAC GAS control knob to the OFF position 9 When the vacuum gauge reads 100 millitorr 100 mHg or less turn the VAC GAS control knobs for any previously evacuated stations to t...

Page 37: ...5 minutes then measure the surface area Repeat this process until the surface area no longer increases The length of time required to reach this point is the minimum amount of time required to degas the sample 12 After the sample is sufficiently degassed remove the sample tube from the heating station Leave the VAC GAS control knob in the VAC position The vacuum fitting for the sample tube may be ...

Page 38: ...t of the vacuum fitting Quickly insert a stopper into the sample tube 17 Place the vacuum fitting in a cooling station until the next sample is attached 18 Reweigh the sample tube with stopper and sample to ensure that the correct sample weight is recorded Backfilling the sample tube increases its pressure to a level greater than atmospheric pressure If the gas pressure is greater than the recomme...

Page 39: ...ng falls below 100 millitorr 100 mHg turn the VAC GAS control knobs for any other samples to be evacuated back to VAC 8 Repeat steps 2 through 7 until the sample is sufficiently degassed Do not exceed 5 psi regulator pressure when backfilling sample tubes If the gas pressure is greater than the recommended maximum of 5 psig 35 kPag the sample tube could be ejected from the fitting or broken Some f...

Page 40: ...ple tube out of the vacuum fitting Quickly insert a stopper into the sample tube 14 Place the vacuum fitting in a cooling station until the next sample is attached 15 Reweigh the sample tube with stopper and sample to ensure that the correct sample weight is recorded Keep the sample tube attached to the vacuum fitting while cooling to prevent contamination from the ambient atmosphere Backfilling t...

Page 41: ... a higher flow rate than 5 psi regulator pressure when using the flowing gas method A flow rate up to 50 cm3 min approximately 16 psi regulator pressure may be used to aid in purging moisture form the sample when using the flowing gas preparation only Heat is delivered to all six heating stations therefore to prevent burns keep your hands away from the interior of the heating stations Do not pierc...

Page 42: ...d loosely to allow a path for the escaping gas The end of the gas delivery tube may be hot enough to cause burns if it was stored in a heating station instead of a cooling station Wear the cotton gloves supplied in the accessories kit and handle the gas delivery tube carefully to avoid burns It is unnecessary to use a stopper with sample tubes having an inside diameter of only 5 mm 0 2 in ...

Page 43: ... it for various intervals determining the surface area after each interval For example degas the sample for 15 minutes then measure the surface area Repeat this process until the surface area no longer increases The length of time required to reach this point is the minimum amount of time required to degas the sample 9 After the sample is sufficiently degassed remove the sample tube from the heati...

Page 44: ...ling station 11 The sample tube should be cool enough to handle after several minutes Remove the tube from the cooling station Hold the stopper loosely in the tube and slowly pull out the gas delivery tube 12 As the gas delivery tube clears the stopper press the stopper into the sample tube to seal the tube against contamination ...

Page 45: ... particles of sample that may have adhered to it Then place the gas delivery tube in a cooling station until needed again 15 Reweigh the sample tube with stopper and sample to ensure that the correct sample weight is recorded The weight recorded at this step may be compared to the weight recorded before degassing to determine if adequate degassing has occurred ...

Page 46: ...Sample Preparation VacPrep 061 2 26 Feb 2013 ...

Page 47: ...ent heat is being supplied to the heating stations Blown fuse Replace fuse Refer to Selecting the Input Power page 1 5 A mistake was made in entering the temperature set point Enter the correct temperature set point on the temperature controller The thermocouple or other internal component is damaged or disconnected Call the appropriate service personnel Too much heat is being supplied to the heat...

Page 48: ...ice personnel No gas flow when the flow control valve is opened Sample material in the gas delivery tube is blocking gas flow Clean the gas delivery tube replace if necessary Refer to Cleaning and Replacing Gas Delivery Tubes page 3 6 The flexible tubing is twisted Remove twist replace the flexible tubing if necessary Refer to Replacing Flexible Tubing page 3 7 Gas pressure is set too low Increase...

Page 49: ... Vacuum port is loose Remove rear panel Gently tighten the port into the internal manifold block Internal leak Remove rear panel Check all ferrule connections Tighten connections if necessary Sample tube fitting is loose Tighten the sample tube fitting Sample tube fitting O ring is damaged Check O ring and replace if necessary Sample tube is broken or cracked Replace the sample tube One of the oth...

Page 50: ...r has burned out open circuit Action Observe the display The temperature will be displayed if it is decreasing If the temperature does not decrease the message will remain displayed Turn off power to the instrument and call the appropriate service personnel Cause Temperature has fallen substantially below temperature scale range or the temperature sensor has failed short circuit Action Observe the...

Page 51: ... cannot be unclogged replace it with a new one refer to Cleaning and Replacing Gas Delivery Tubes page 3 6 If bubbles do not appear check the valve inlet tubing refer to Connecting or Replacing Valve Inlet Tubing page 3 9 If gas flow is not present in other stations refer to the following table Table 3 2 Gas Flow Problems Gas delivery tubes and flexible tubing may be ordered in sets of six from Mi...

Page 52: ...ave adhered to the tube If a gas delivery tube becomes clogged or damaged it should be replaced as follows 1 Remove the gas delivery tube from the flexible tubing 2 Attach a new gas delivery tube by pressing the flexible tubing over the gas delivery tube Make sure that the flexible tubing completely covers the ferrule at the end of the gas delivery tube Gas Delivery Tube Flexible Tubing Ferrule ...

Page 53: ...f vacuum fittings should be wiped with a lint free cloth after each use to remove any particles of sample that may have adhered to the fitting If vacuum fittings become clogged or damaged they should be cleaned or replaced as follows 1 Remove the fittings to be cleaned or replaced from the flexible tubing Barbed Fitting Flexible Tubing 1 2 in or 12mm O ring and ferrule for 1 2 in or 12 mm sample t...

Page 54: ...and O ring Clean all components with IPA an ultrasonic bath may be used If the dust filter O ring is cracked or broken replace it Reattach the dust frit O ring and port nipple 4 Attach the cleaned or replacement fittings you removed in step 1 by pressing the flexible tubing completely over the barbed nipple on the end of the fitting Loosely attach the knurled retaining nut ferrule and O ring Ensur...

Page 55: ...ne of the spokes on the manifold If it is disconnected at either end connect it by pressing firmly into place If a spoke on the manifold is loose tighten it finger tight plus 1 2 turn with a wrench Do not overtighten because the gasket may become forced out of place The fitting would then leak 4 Replace the rear panel and vacuum pump tubing 5 Place the vacuum pump power switch in the ON position C...

Page 56: ......

Page 57: ...ple tube 003 51147 00 Slow Blow Fuse 2 5 A 100 200 VAC 003 51148 00 Slow Blow Fuse 1 25 A 220 240 VAC 003 51197 00 Slow Blow Fuse 1 25 A 220 240 VAC Type T time lag 230 02001 00 Copper Tubing 1 8 in 004 62030 58 Gas Regulator for use with helium or nitrogen 004 25549 00 Reducer Fitting 1 4 in for 1 8 in tubing 065 25811 00 Heating Station Adapter for Gemini Series analyzers bulb sample tube 065 25...

Page 58: ... six F 061 25810 00 Sample Connector Fitting for 1 4 3 8 and 1 2 in OD sample tube stem G 004 25022 00 O ring Buna N size 012 for sealing 3 8 in OD sample tube stem H 004 25469 00 O ring Buna N size 014 for sealing 1 2 in sample tube stem J 240 25803 00 Ferrule for 1 4 in OD sample tube stem K 240 25802 00 Ferrule for 3 8 in OD sample tube stem L 260 25843 00 Ferrule for 1 2 in OD sample tube stem...

Page 59: ...VacPrep 061 Ordering Information Feb 2013 4 3 P 004 25079 06 O ring 9mm tube Q 350 25843 01 Ferrule 9mm tube R 004 25013 02 O Ring 12mm Tube S 350 25843 00 Ferrule 12mm Tube ...

Page 60: ...Ordering Informatioin VacPrep 061 4 4 Feb 2013 ...

Page 61: ... 11 for TriStar sample tubes 2 11 Gemini inserting 2 13 inserting and removing 2 11 TriStar and ASAP Series inserting 2 11 TriStar and ASAP Series removing 2 12 types of 2 9 M Maintenance procedures 3 1 checking gas flow 3 5 Cleaning replacing gas delivery tubes 3 6 cleaning replacing vacuum fittings 3 7 connecting replacing valve inlet tubing 3 9 replacing flexible tubing 3 7 N Notes defined 1 2 ...

Page 62: ... 2 2 specifications 1 3 Vacuum fittings attaching 1 11 fittings replacing 3 7 gauge calibrating 1 13 Vacuum degas 2 14 preparation 1 11 2 15 Vacuum backfill degas 2 14 preparation 1 11 2 19 Valve inlet tubing replacing 3 9 Voltage selecting 1 5 W Warnings defined 1 2 Weighing samples 2 6 ...

Reviews: