


Installing the 5120 Analysis Program
SediGraph III 5120 Installation
12
Mar 2010
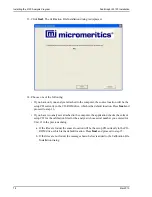
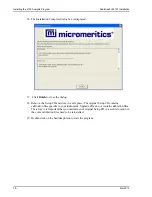
4. Click
OK
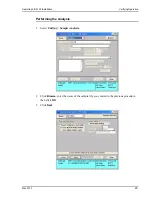
; the New Installation dialog is displayed.
5. The
Destination Folder
group box displays the amount of current disk space, the amount
of disk space required for the Micromeritics software, and the folder into which the
application will be installed.
If the default location is not acceptable, click
Browse
to choose the folder.
6. If you want to run the Micromeritics software from the desktop, select the checkbox just
below the Destination Folder group box to add an icon to the desktop.
7. The Micromeritics software icon is added to the Micromeritics folder by default. If you
prefer a different folder, enter or select one from the drop-down list.
8. The
Install this application for All Users
check box indicates whether users other than
the installer will be able to access the application from the Windows Start menu.
If the box is checked, the application can be accessed from the Windows Start menu by all
users who are logged onto Windows. If the box is not checked, the application can be
accessed from the Windows Start menu only by the user who installed the application.
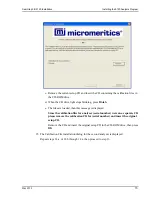
You may cancel the installation at any time by selecting Exit. If you do so, you must
start the installation program from the beginning to install the Micromeritics software


