


4
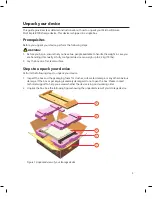
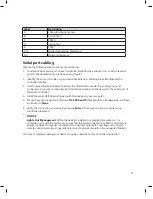
Label
Description
1
Packing box
2
Bottom foam
3
Device
4
Top foam
5
Accessory box
3. After unpacking the box, ensure you have:
a. 1 single enclosure device.
b. 2 power cords.
c. 1 crossover Ethernet cable.
d. 2 serial console cables.
e. 1 rack-mount kit (2 side rails with mounting hardware).
f. 1 tamper-proof T10 screwdriver.
g. 1 serial-USB converter for serial access.
h. 2 single QSFP-to-SFP adapters.
i. Getting Started Documentation.
If you did not receive any of the items listed above, contact technical support. The next step is to
rack-mount your device. See the
Rack-mount your device
section for details.
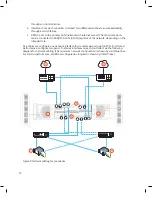
Rack-mount your device
This section includes the steps required to install your Microsoft Azure StorSimple 8100 storage
device in a standard 19-inch rack with front and rear posts. This device has a single primary
enclosure.
The installation consists of multiple steps, each of which is discussed in the following procedures.
Site preparation
The device must be installed in a standard 19-inch rack that has both front and rear posts. To
prepare for rack installation, ensure that:
• The device is resting safely on a flat, stable, and level work surface (or similar).
• The site where you intend to set up has standard AC power from an independent source or a
rack power distribution unit (PDU) with an uninterruptible power supply (UPS).
• You have two people available to handle the weight in case you are handling the device
manually. A fully configured enclosure can weigh up to 32 kg.
• One 2U slot is available in the rack where you intend to mount the device.


