© 2014 Microsoft
Page 72
Take a panorama
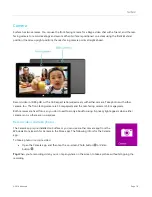
You can capture unique immersive panoramas using the Camera app. Here’s how:
1.
Open the Camera app and point the camera at your starting point for the panorama.
2.
Tap the Panorama button .
3.
Slowly tilt or rotate the camera in any direction. When you align the new image with the existing images,
the camera automatically takes the next image.
4.
When you’ve taken all the pictures you want in your panorama, tap the check mark.
The Camera app stitches together the images and saves the panorama in your camera roll (panorama files in the
Camera Roll folder have a .Pano file extension).
For best results
, keep the camera in the same place as you tilt and rotate it, as if it’s on a tripod. Move slowly
and steadily when lining up the image, and then pause to capture it. If your body blocks the viewfinder, keep the
camera in the same place and step around it until you’re out of the way. See
watch a video showing best practices for taking a panorama.
Use the Camera, Photos, or OneDrive apps to view your panoramas. You can share links to your panoramas on
OneDrive—see
View photos and videos (Camera Roll)
There are lots of ways to see the photos and videos you’ve taken with the Camera app:
Camera
app
: Swipe to the right to look through your recent photos and videos. You can also swipe
down from the top edge of the screen, and then tap
Camera roll
.
Photos
,
File
Explorer
, or the
OneDrive app
: Go to the Pictures folder, and then to the Camera roll
folder.
You can choose to have the photos and videos that you take with Surface automatically uploaded to OneDrive.
To find out how, see


