5
Output Tray Notice
The Paper Stopper is designed to prevent the paper stacks falling in a mess after they were
scanned and output into the output tray. Before scanning a stack of papers, please follow the
steps below to fix the Paper Stopper into the right position in the tray, in order to keep output
papers stay neatly in the tary after the scan.
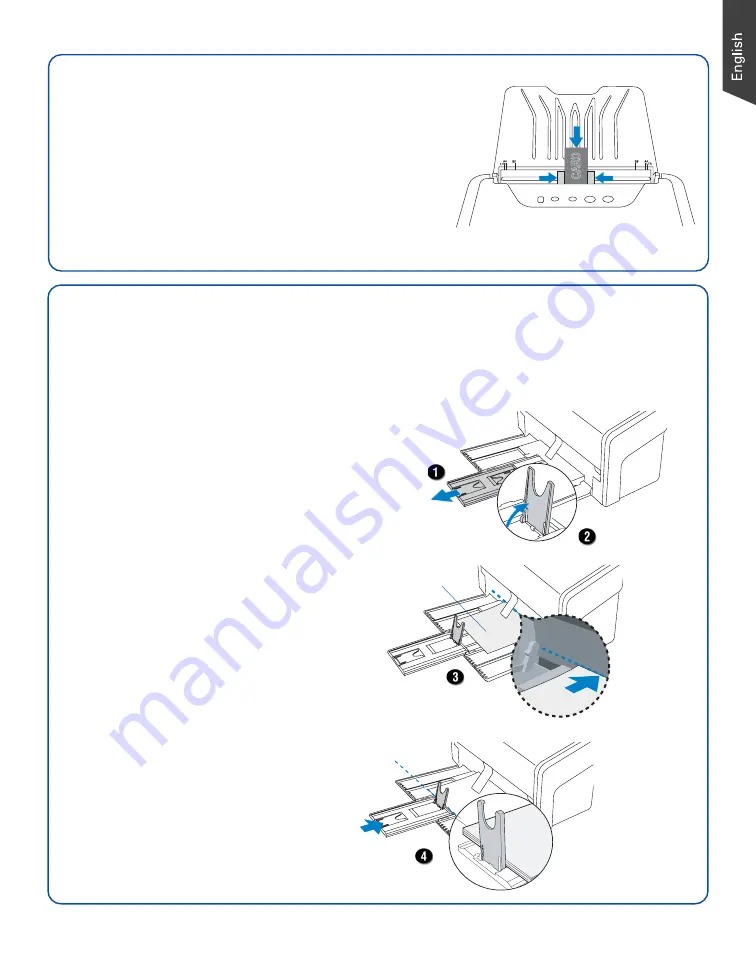
1. Pull out the Output Tray Extender.
2. Lift up either the Paper Stopper 1
or 2, depending on the length of
the paper.
3. Take out one piece of paper from
the stacks and put it in the output
tray, laying it completely flat and
bringing the top or bottom edge of
it into contact with the bottom of
the scanner.
4. Push back the Output Tray
Extender until the Paper Stopper
touches the edge of the paper.
Finally, load the papers to be
scanned into the feed tray to start
your scanning.
NOTE: The settling position for the
Paper Stopper on the tray must be
equivalent to the length of the paper.
Incorrect positioning of the Paper
Stopper will result in disorders and
mess for the after-scanned outputs.
Be sure the stopper
is lightly against the
edge of the paper.
Load the paper inside
the space between
the stopper and the
output slot of the
scanner.
Align the
paper against
the side of
output slot
located at
the bottom
of the
scanner.
NOTE
: When the card is loaded, launch ScanWizard DI. Then,
click the
Custom Scan
button and select “Card” to start your
card scanning.
To Load Cards
1. Slide the Guide Arms toward the center of the feed tray
and free up the enough space to put the card inside.
2. Load and center the card onto the scanner’s Document
Feed Tray, with the front side facing up and the top
edge directing toward the feeder.


