3
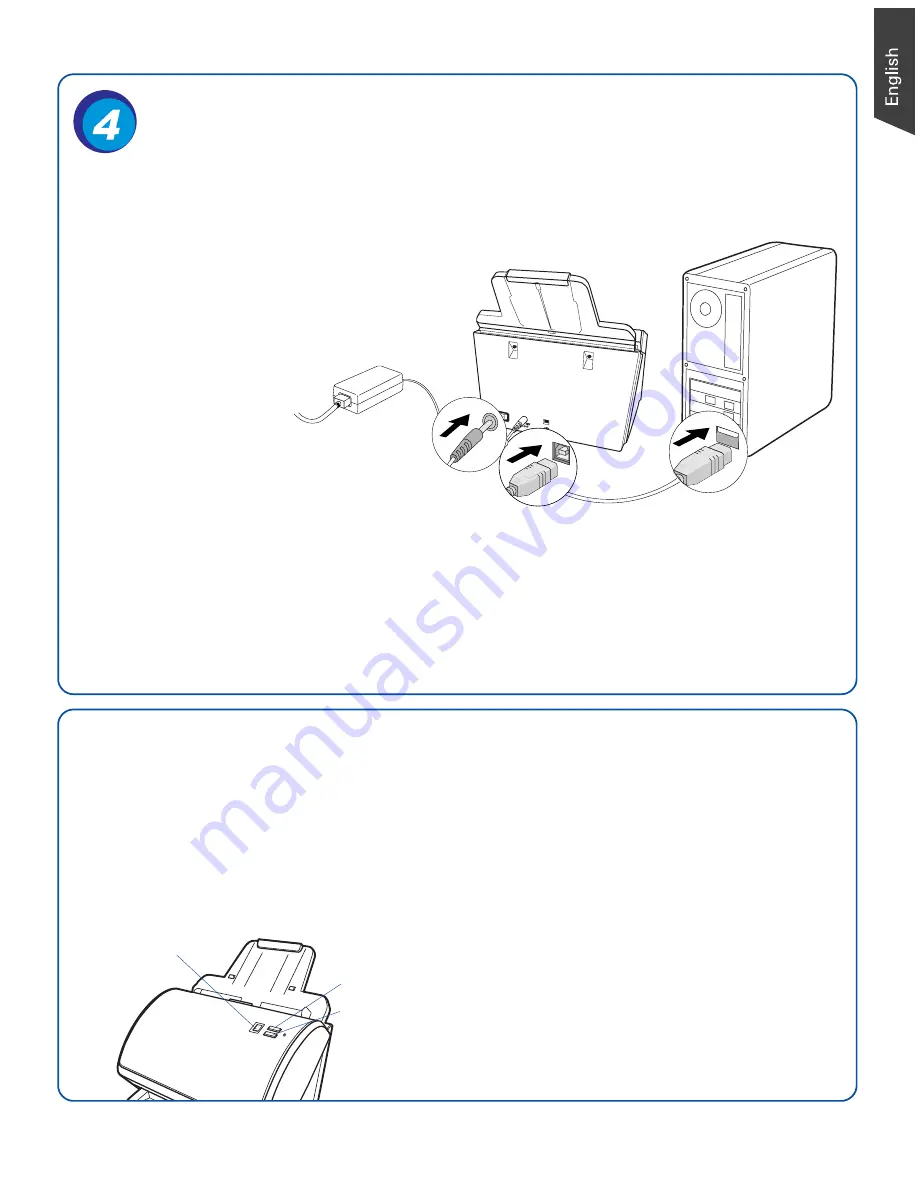
Connect Scanner
To the Hi-Speed USB cable
C.
Connect one end of the cable to your computer.
D.
Connect the other end of the cable to the scanner’s USB port.
E.
Turn the power switch at the back panel of your scanner to “On”; once the scanner is
detected by your system, the LED (green) will brighten, and the scanner is ready to scan.
C
B
A
D
Customize the Function Button
The FileScan 3125c is equipped with one Select and one Enter buttons, used to automate a
number of customized and predefined operations, such as scanning to a file, sending an image
to your printer, scanning for OCR, etc. Customizing is done through the
Save Settings to
Function Button
command in the ScanWizard DI, refer to the FileScan 3125c User’s Manual for
more details.
Enter button
Select button
LED Display:
Show the selected
function number.
•
Select:
Toggle through the number lists of
your preferred functions.
•
Enter:
Start scan and carry out the result of
the selected function number.
To the power adapter
A.
Connect the power adapter to the back of the scanner.
B.
Plug one end of the power cord into
the power adapter, and plug
the other end of the power cord into
a wall outlet or other power source.


