background image

Microtek  ADF-650/651  Installing  and  Getting  Started          3

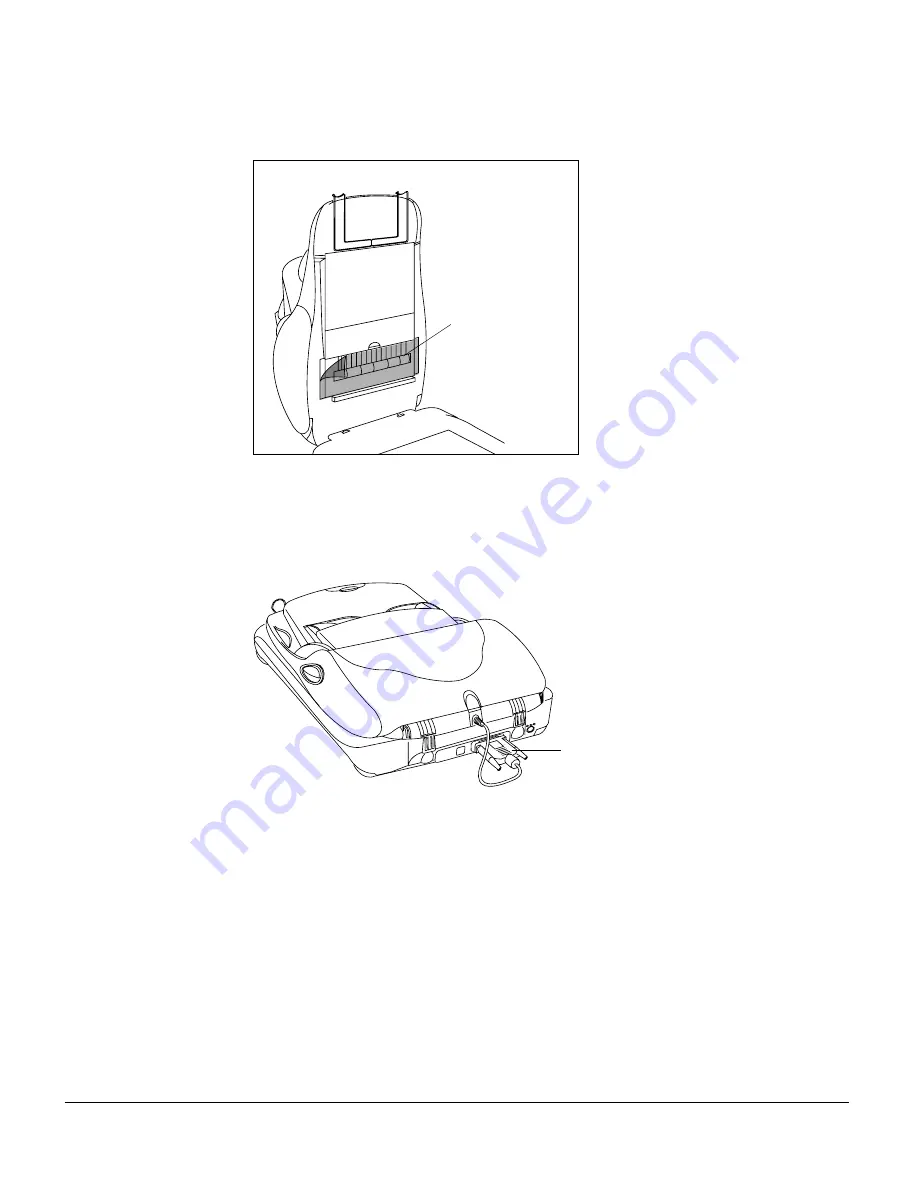
6. Remove the protective film from the transparent cover of the scan sensor area,

then lower the ADF-650/651.

7. Plug the feeder's connector into the 15-pin Accessory port at the back panel of the

scanner. Secure the connector by tightening the retaining screws.

8. Turn on your scanner, and wait for the light on the scanner’s front panel to stop

blinking and stay on steady. Your system will detect the scanner with ADF-650/
651 automatically, indicating that the ADF-650/651 is ready to scan.

15-pin
connector

Protective  film

Summary of Contents for ScanMaker 5950

Page 1: ...is designed for the ScanMaker 5600 ScanMaker 6700 and ScanMaker 6800 while the ADF 651 is designed for the ScanMaker 5800 and ScanMaker 5900 Copyright 2002 Microtek International Inc http www microtek...

Page 2: ...tically to the scanner then pull upward to remove 5 Hold the ADF 650 651 firmly on both sides in a vertical position with its hinge studs and connector at the bottom With the feeder vertically positio...

Page 3: ...ector into the 15 pin Accessory port at the back panel of the scanner Secure the connector by tightening the retaining screws 8 Turn on your scanner and wait for the light on the scanner s front panel...

Page 4: ...type b Click the Scan Type button then select Black White as your output image type c Click the Purpose button then select OCR Text Tray Flap Note The ADF 650 651 is not designed for scanning photos...

Page 5: ...d the previewed sheet along with the paper stack on the document feed tray You are now ready to scan the stack 4 Click and hold the Scan to button in the ScanWizard 5 software When the options menu ap...

Page 6: ...d before they are saved under a single file name Take note that this will not work if the chosen output file format is PDF This file format can only be saved and assigned with individual file names fo...

Page 7: ...ay pull it out in either direction forward or backward You can also open the transparent cover of the scan sensor area at the bottom of the feeder to pull out the jammed paper Maintenance Cleaning the...

Page 8: ...height 2 84 72 11mm Weight 4 69lb 2 13kg Power 12V 0 5A continuous Consumption 6W 5V 0 1A Operating 50 Fto95 F 10 Cto35 C Environment 10 to85 relativehumidity Cleaning the Rollers Prolonged use of the...

Reviews: