ScanMaker i900 Installing and Getting Started 21
C. Scanning Transparent Film
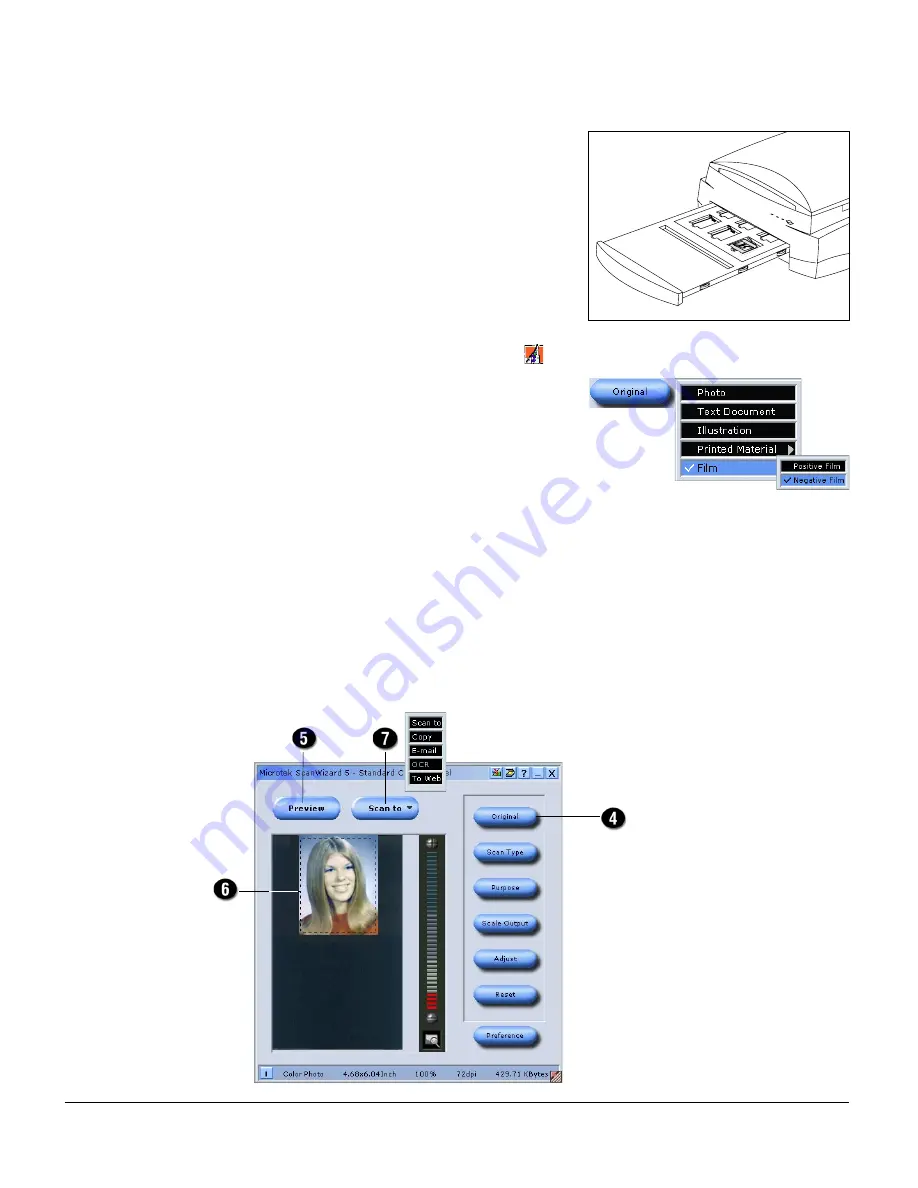
1. Select the film you wish to scan.
Follow the procedures for positioning
transparent film section to load the film
you wish to scan.
2. Insert the film holder whole assembly into
the transparency bay of the scanner. And
make sure nothing is on the scanner glass
surface.
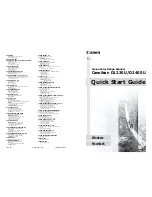
3. Double-click the ScanWizard 5 icon (
) on your desktop to launch the
ScanWizard 5 Standard Control Panel*.
4. Click the Original button, choose Positive
Film or Negative Film, depending on the
material you wish to scan.
5. Click the Preview button to perform a
preliminary view of the entire image.
6. In the preview window, you can resize the scan frame (floating dotted line) around
the image by dragging on the edge or corner of the scan frame to determine the
final size of the actual scan.
7 Click the Scan to button to scan the image.
After the scan, the scanned and processed image can be saved as a file, opened in
an image-editing program, sent to a printer, attached in an e-mail, or uploaded to a
website.
Resize dotted line
scan frame for size
of the actual scan
*
When ScanWizard 5 launches, a
reflective original overview will be
carried out automatically. You can
disable this auto-preview function by
clicking on the Preferences button,
uncheck the option “Automatically
previews scan bed when launching
ScanWizard 5” from the dialog box.
If unchecked, no auto-preview image
is carried out when ScanWizard 5 is
launched.


