Chapter 7 Installation
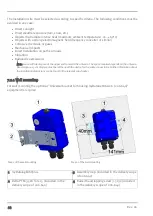
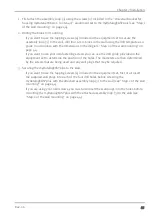
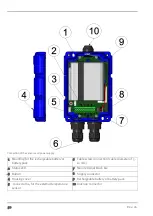
1. First attach the assembly loop (3) using the screws (2) included in the "Universal bracket for
housing myDatanet 86x126 (206.640)" equipment set to the myDatalogEASYplus (see "Step 1
of the wall mounting" on page 44).
2. Drilling the holes for mounting:
If you want to use the tapping screws (4) included in the equipment set to secure the
assembly loop (3) to the wall, drill four 6-mm holes in the wall using the drill template as a
guide in accordance with the dimensions in the diagram "Step 2 of the wall mounting" on
page 44.
If you want to use your own fastening screws you can use the drill guide provided in the
equipment set to determine the position of the holes. The diameters are then determined
by the screws that are being used and any wall plugs that may be required.
3. Securing the myDatalogEASYplus to the wall:
If you want to use the tapping screws (4) included in the equipment set, first of all insert
the supplied wall plugs into each of the four drill holes before screwing the
myDatalogEASYplus with the attached assembly loop (3) to the wall (see "Step 2 of the wall
mounting" on page 44).
If you are using your own screws, you must also insert the wall plugs into the holes before
mounting the myDatalogEASYplus with the attached assembly loop (3) to the wall (see
"Step 2 of the wall mounting" on page 44).
Rev. 06
45
Summary of Contents for myDatalogEASYplus
Page 2: ......
Page 8: ...Chapter 18 Contact information 139 8 Rev 06 ...
Page 9: ...Chapter 2 Declaration of conformity Chapter 2 Declaration of conformity Rev 06 9 ...
Page 10: ......
Page 22: ......
Page 40: ......
Page 62: ......
Page 101: ...Chapter 9 User interfaces 9 2 2 4 GPRS SIM tariff Selected SIM tariff Rev 06 101 ...
Page 102: ......
Page 110: ......
Page 112: ......
Page 118: ......
Page 120: ......
Page 136: ......
Page 138: ......

