Chapter 8 Installation
8.2.4 Zero point adjustment
The zero point adjustment serves to compensate deviations of the sensor values from a reference
measurement without having to adjust the configuration of the installation height (see "Sensor offset"
parameter in the "Measurement channels" on page 83 configuration section).
8.2.4.1 Zero point adjustment with the help of setup mode
Note:
As the data is only generated every 10sec. during setup mode, this process is only suitable if
the fill level is as consistent as possible during the zero point adjustment.
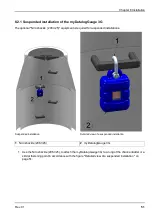
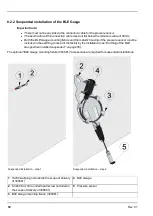
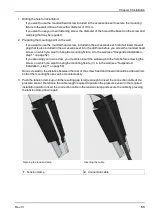
1. Place the pressure sensor and the BLE Gauge in the final installation position (see "Suspended
installation of the BLE Gauge " on page 52).
2. Activate the required measurement channel in the "Measurement channels" configuration section by
selecting the mode and specifying the serial number of the BLE Gauge (see "Measurement channels"
on page 83).
Note:
If you have purchased the myDatalogGauge 3G as a set (data logger including up to 2 BLE Gauge
sensor modules), the serial numbers of the BLE Gauge are already saved in the memory of the data
logger. In this case, it suffices to select "Automatic" mode. The saved serial number is displayed in the
input field for the serial number, although it cannot be changed.
3. Enter the installation height of the pressure sensor in the input field for the "Sensor Offset" parameter
(see "Measurement channels" on page 83).
4. Ensure that the "Trimming" parameter is set to 0 (see "Measurement channels" on page 83).
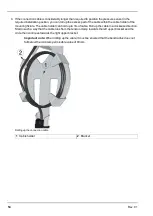
5. Insert the activation module in the sensor recess of the myDatalogGauge 3G (see "Inserting the
activation module" on page 61).
6. To establish a connection, activate setup mode (see "Setup mode" on page 41) using the reed switch.
7. Wait for setup mode to be completed. That a device is in setup mode is indicated in the list of
sites/applications by a speech bubble with the "Setup" inscription. The speech bubble is hidden again if
setup mode was completed successfully. The background colour of the speech bubble changes from
white to red if a problem is detected. In both cases, this can take up to 8min. .
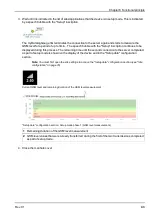
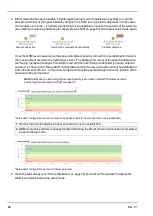
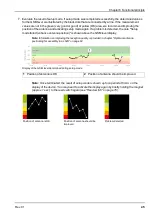
8. Open the site settings (see "Site configuration" on page 79) and click on "Setup data" to display the
GSM level and fill level determined during setup mode.
Rev. 01
57
Summary of Contents for myDatalogGauge 3G
Page 2: ......
Page 10: ...2 2 BLE Gauge 10 Rev 01 ...
Page 11: ...Chapter 2 Declaration of conformity Rev 01 11 ...
Page 12: ......
Page 13: ...Chapter 3 Ex certification Chapter 3 Ex certification 3 1 BLE 3G Gateway ATEX Rev 01 13 ...
Page 14: ...14 Rev 01 ...
Page 15: ...Chapter 3 Ex certification Rev 01 15 ...
Page 16: ...16 Rev 01 ...
Page 17: ...Chapter 3 Ex certification 3 2 BLE Gauge Rev 01 17 ...
Page 18: ...18 Rev 01 ...
Page 19: ...Chapter 3 Ex certification Rev 01 19 ...
Page 20: ...20 Rev 01 ...
Page 134: ......
Page 140: ......
Page 152: ......
Page 154: ......

