background image

 Page 16 

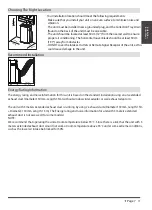
Store the unit when not in use 


·  Drain the unit’s water collection tray according to the instructions in the following section. 
·  Run the appliance on FAN mode for 12 hours in a warm room to dry it and prevent mold.
·  Turn off the appliance and unplug it.
·  Clean the air filter according to the instructions in the previous section. Reinstall the clean, dry 
   filter before storing. 
·  Remove the batteries from the remote control.
NOTE: Be sure to store the unit in a cool, dark place. Exposure to direct sunshine or extreme heat 
can shorten the lifespan of the unit. 
NOTE: The cabinet and front may be dusted with an oil-free cloth or washed with a cloth dampened 
in a solution of warm water and mildliquid dishwashing detergent. Rinse thoroughly and wipe dry. 
Never use harsh cleansers, wax or polish on the cabinet front. Be sure to wring excess water from 
the cloth before wiping around the controls. Excess water in or around the controls may cause 
damage to the unit. 

Troubleshooting Tips

Problem

Possible Causes

Solution

Unit does not turn

on when pressing

ON/OFF button

P1 Error Code

In COOL mode: room 
temperature is lower than 
the set temperature

Reset the temperature

The Water Collection Tray is full. Turn off the 

unit, drain the water from the Water Collection 

Tray and restart the unit.


The air filter is blocked with

dust or animal hair

The unit is low on 

refrigerant

Temperature setting is too

high
The windows and doors in

the room are open
The room area is too large

Unit does not cool

well

Exhaust hose is not 

connected or is blocked

There are heat sources

inside the room

Turn off the unit and clean the filter according 

to instructions

Call a service technician to inspect

the unit and top off refrigerant 

Decrease the set temperature

Make sure all windows and doors are closed 

Double-check the cooling area

Turn off the unit, disconnect the hose, check for 

blockage and reconnect the hose

Remove the heat sources if possible

The unit is noisy

and vibrates too

much

The unit makes a

gurgling sound

The ground is not level

Place the unit on a flat, level surface

The air filter is blocked with

dust or animal hair

Turn off the unit and clean the filter according 

to instructions

This sound is caused by the

flow of refrigerant inside

the unit

This is normal

Troubleshooting

 Tips

Summary of Contents for 21615024

Page 1: ...ice la client le est disponible pour vous aider En cas de probl me avec votre achat ou pour obtenir plus d informations propos de ce produit veuillez composer notre num ro sans frais CONSERVEZ CE GUID...

Page 2: ...ore the unit when not in use Preparation Design Notice Ambient Temperature Range For Unit Operating Exhaust Hose Installation Choosing The Right Location Tools Needed Accessories Window Installation K...

Page 3: ...e and injury or property damage Make sure that the outlet you are using is grounded and has the appropriate voltage The power cord is equipped with a three prong grounding plug to protect against shoc...

Page 4: ...ensure that they do not play with the appliance Children must be supervised around the unit at all times If the supply cord is damaged it must be replaced by the manufacturer its service agent or simi...

Page 5: ...anything other than your fingers Do not remove any fixed covers Never use this appliance if it is not working properly or if it has been dropped or damaged Do not operate or stop the unit by insertin...

Page 6: ...ol are subject to change without prior notice Cool 17 35 C 62 95 F Dry Heat pump heat mode Heat electrical heat mode 13 35 C 55 95 F 5 30 C 41 86 F control panel handle both sides horizontal louver bl...

Page 7: ...use damage to the unit 30cm 30cm 12inch 12inch 50cm 19 7 inch Energy Rating Information The unit with 3 meters extended exhaust duct is running by using 2 exhaust ducts Diameter 150mm Length 1 5m Diam...

Page 8: ...2 pc Foam Seal B Adhesive 2 pc Foam Seal C Non adhesive NOTE Slight variations in design may occur Window Installation Kit Unit adaptor Window slider adaptor Exhaust hose Exhaust hose assembly Hook H...

Page 9: ...the non adhesive foam seal C strip to match the width or height of the window Insert the seal between the glass and the window frame to prevent air and insects from getting into the room 2 Insert the...

Page 10: ...slider 2 Screws Security Bracket NOTE To ensure proper function DO NOT overextend or bend the hose Make sure that there is no obstacle around the air outlet of the exhaust hose in the range of 500mm...

Page 11: ...not contain some indicators or buttons The actual shape shall prevail Indicator Function Indicator Function HIGH fan speed light MED fan speed light LOW fan speed light ION light SLEEP light Degrees C...

Page 12: ...n repeats call for service E4 Display panel communication error Fan Ion button Control the fan speed Press to select the fan speed in four steps LOW MED On some models HIGH and AUTO The corresponding...

Page 13: ...by 1 C 1 F or 2 F 30 minutes The temperature will then increase cooling or decrease heating by another 1 C 1 F or 2 F after an additional 30 minutes This new temperature will be maintained for 7 hour...

Page 14: ...in If the unit does not receive the Follow Me Temp Sensing signal during any 7 minutes interval the nit will exit the Follow Me Temp Sensing mode NOTE This feature is unavailabe under FAN or DRY mode...

Page 15: ...ain and make sure the end of the hose is down to let the water flow smoothly When the continuous drain hose is not used ensure that the drain plug and knob are installed firmly to prevent leakage Safe...

Page 16: ...ressing ON OFF button P1 Error Code In COOL mode room temperature is lower than the set temperature Reset the temperature The Water Collection Tray is full Turn off the unit drain the water from the W...

Page 17: ...nment Signal Receiving Range RG57H2 B BG C EF M Remote Control Specifications O O O O 5 C 60 C 23 F 140 F Remote controller lllustration CAUTION INGESTION HAZARD Contains small batteries Keep out of r...

Page 18: ...Remote controller lllustration...

Page 19: ...Remote controller lllustration...

Page 20: ...Remote controller lllustration...

Page 21: ...Remote controller lllustration...

Page 22: ...Remote controller lllustration...

Page 23: ...Remote controller lllustration...

Page 24: ...Remote controller lllustration...

Page 25: ...Remote controller lllustration...

Page 26: ...Remote controller lllustration...

Page 27: ...Remote controller lllustration...

Page 28: ...Remote controller lllustration...

Page 29: ...Remote controller lllustration...

Page 30: ...Air Conditioner Limited Warranty Air Conditioner Limited Warranty...

Page 31: ......

Page 32: ......

Reviews: