Service Manual_2018-V2.0
35
10.4 Open door alarm(None)
10.5 Function Selection
1
)
When the refrigerator is working, keep pressing the
gear setting button “SET”
for 3 seconds
(takes effect when releasing the button), the refrigerator will be in standby mode, the standby indicator will
light up and all loads will stop working;
2
)
When the refrigerator is in standby mode, press the
gear setting button “SET”
, the refrigerator
will enter normal operation mode, the standby indicator will light off and the refrigerator will operate
normally;
10.6 Fault code and solutions
Fault code
Fault content
Steps for maintenance methods
Indicator
light 1 and
indicator
light 2
Temperature
sensor fault in
refrigerating
chamber
Step 1: Check whether the terminal of temperature sensor in main
control board is welll stuck, pull out the terminal and re-stick it in place
Step 2: Check to see if ther
e’re foreign matters on the terminal
Step 3: Inspect the refrigerating sensor whether contact is bad, and
resend contact the fast connector
Step 4: Replace main control board
Indicator
light 1 and
indicator
light 3
Defrost sensor
fault in freezing
chamber
Step 1: Check whether the terminal of defrost sensor in main control
board is welll stuck, pull out the terminal and re-stick it in place.
Step 2: Check to see if
there’re foreign matters on the terminal.
Step 3: Inspect the defrost sensor whether contact is bad, and resend
contact the fast connector
Step 4: Replace main control board
Indicator
light 1 and
indicator
light4
Ambient
temperature
sensor fault
Step 1: Check whether the terminal of temperature sensor in main
control board is welll stuck, pull out the terminal and re-stick it in place
Step 2: Check whether the sensor wiring harness are connected.
Step 3: Replace main control board.
Step 4: Remove the temperature sensor at the hinge, and replace the
temperature sensor.
10.7 Defrosting function
1
)
Defrost the freezing chamber as per the accumulative operation time of the Compressor
2
)
If power failure occurs abruptly to the Compressor and the defrosting sensor in freezing chamber is less
than 0
o
C
after powering on, then first conduct defrosting once. If more than 0
o
C
, then defrosting is not
needed. After that, conduct defrosting according to using condition and ambient temperature in a period
between 6 and 24 hours as per the accumulative operation time of the Compressor.
10.8 Test mode
Test items
Testing Method
Expected result
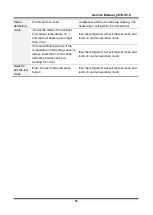
Select to
enter into
Press the temperature-adjusting
button for 15s continuously, enter
LED indicators on Gear 1, 3 and 5 light up and
other LED indicators light on, then the
Summary of Contents for 22031020003641
Page 5: ...Service Manual_2018 V2 0 5 1 Significant update notes None...
Page 18: ...Service Manual_2018 V2 0 18 6 5Main control board schematic diagram...
Page 20: ...Service Manual_2018 V2 0 20 7 3 Circulating route of cooling air...
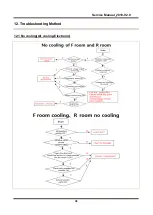
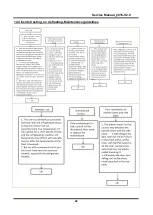
Page 38: ...Service Manual_2018 V2 0 38 12 Troubleshooting Method 12 1 No cooling Air cooling Electronic...
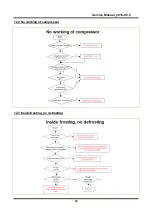
Page 39: ...Service Manual_2018 V2 0 39 12 2 No working of compressor 12 3 Inside frosting no defrosting...
Page 40: ...Service Manual_2018 V2 0 40 12 4 Inside frosting no defrosting Maintenance guidelines...
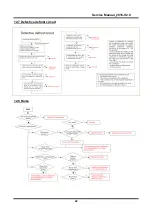
Page 41: ...Service Manual_2018 V2 0 41 12 5 Light is not on 12 6 Fan failure...
Page 42: ...Service Manual_2018 V2 0 42 12 7 Defective defrost circuit 12 8 Noise...
Page 43: ...Service Manual_2018 V2 0 43 12 9 Air duct not operated electronically None...
Page 44: ...Service Manual_2018 V2 0 44 13 Figures and details of repair parts See this section in the TSP...

