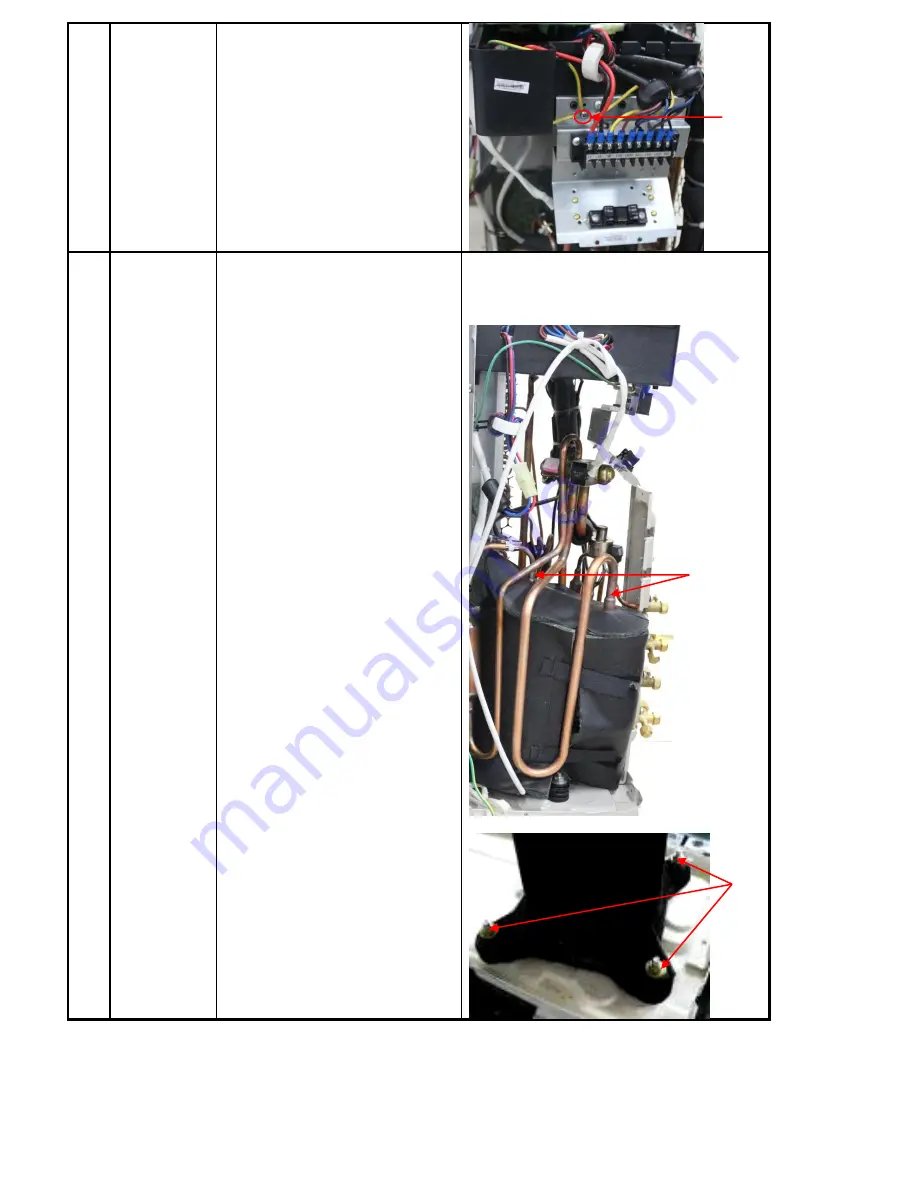
8)
Disconnect the grounding
wire
(yellow-green)
after
removing the big handle and the
right-rear panel.
9) Remove the PCB board.
4
Compressor
How to remove the compressor.
1) Perform work of item 1,2,3.
2) Remove the electrical
control box and partition
plate.
3) Extract refrigerant gas.
4) Remove the sound
insulation material and
crankcase heating cable.
5) Remove terminal cover of
compressor, and disconnect
wires of compressor thermo
and compressor from the
terminal.
6) Remove the discharge pipe
and suction pipe with a
burner.
7) Remove the hex nuts and
washers fixing the
compressor to bottom plate.
8) Lift the compressor.
⑥
⑦
⑧
Summary of Contents for M2OC-18HFN1-M
Page 19: ...8 Wiring Diagrams 8 1 Wiring diagram of 1 drive 2 outdoor M2OC 18HFN1 M M2OD 18HFN1 M...
Page 20: ...PCB board of M2OC 18HFN1 M M2OD 18HFN1 M...
Page 21: ...IPM board of M2OC 18HFN1 M...
Page 22: ...IPM board of M2OD 18HFN1 M...
Page 23: ...8 2 Wiring diagram of 1 drive 3 outdoor M3OD 27HRDN1 M M3OC 30HRFN1 M...
Page 24: ...PCB board of M3OC 30HRFN1 M...
Page 25: ...IPM board of M3OC 30HRFN1 M...
Page 26: ...PCB board of M3OD 27HRDN1 M...
Page 27: ...IPM board of M3OD 27HRDN1 M...
Page 28: ...8 3 Wiring diagram of 1 drive 4 outdoor M4OC 36HRFN1 M...
Page 29: ...PCB board of M4OC 36HRFN1 M...
Page 30: ...IPM board of M4OC 36HRFN1 M...
Page 31: ...PFC board of M4OC 36HRFN1 M...
Page 66: ...IPM for dual tri zone IPM for qua zone P N for dual tri zone...
Page 67: ...P N for qua zone...
Page 68: ...bridge rectifier for dual tri zone bridge rectifier for qua zone...
Page 69: ...Remark Measure the DC voltage between and port The normal value should be 190V 250V...
Page 71: ...Two ports of the inductance Inductance...
Page 72: ......
Page 77: ......
Page 79: ......
Page 81: ......
Page 83: ......
Page 96: ...6 EXV check Disconnect the connectors...
Page 98: ...Red Blue Red Yellow...
Page 99: ...Brown Orange Brown White...
Page 114: ...Screws of front panel Screws of right rear panel Screws of top cover...
Page 128: ......


