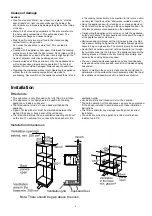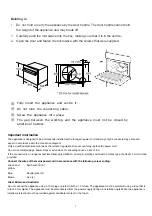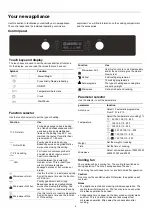
background image

9

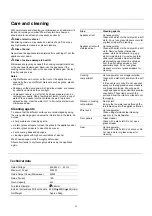
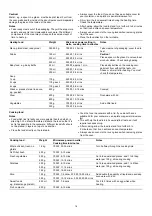
Accessories

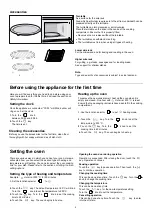
Before using the appliance for the first time

Here you will find everything you need to do before using your 

oven to prepare food for the first time. First read the section on 

Safety information.

Setting the clock

Heating up the oven

Cleaning the accessories

Before you use the accessories for the first time, clean them 

thoroughly with hot soapy water and a soft dish cloth.

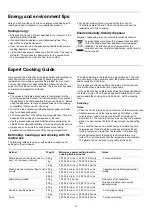
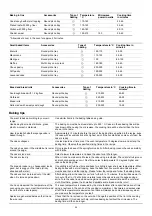
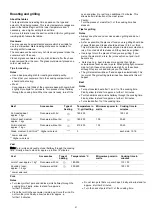
Setting the oven

There are various ways in which you can set your oven. Here we 

will explain how you can select the desired type of heating and 

temperature or grill setting. You can also select the oven cooking 

time for your dish. Please refer to the section on 

Setting the time-

setting options.

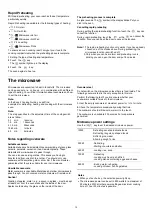
Setting the type of heating and temperature

Example : 

 Hot air at 200 °C for 25 minutes.

1.

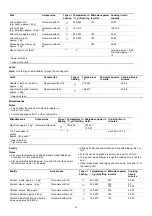
Turntable


As a surface for the wire rack. 

Food which particularly requires a lot of heat from underneath can be 

prepared directly on the turntable.
The turntable can turn clockwise or anti-clockwise. 
Place the turntable on the drive in the centre of the cooking 

compartment. Ensure that it is properly fitted.

Never use the microwave without the turntable.

The turntable can withstand max. 5 kg.

The turntable must turn when using all types of heating.

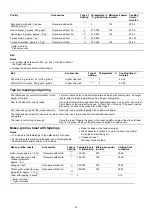
Lower wire rack


For the microwave and for baking and roasting in the oven.

Higher wire rack


For grilling, e.g. steaks, sausages and for toasting bread.
As a support for shallow dishes.

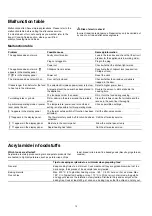
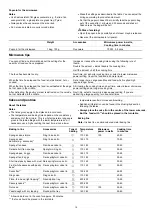
Once the appliance is connected, "00:00" will blink, buzzer will  

1.


     key.

The time is set.

between 00:00 and 23:59 . 

2.

ring once. Set the clock.

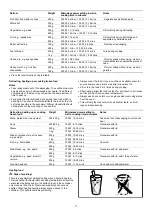
To remove the new cooker smel

l, heat up the oven when it is 

empty and closed. One hour with 

Hot air at 230 °C is ideal. 

Ensure that no packaging remnants have been left in the cooking

compartment.

1.

Use the function selector            to set 

  heating mode.

2.

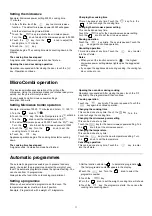
Opening the oven door during operation

Operation is suspended. After closing the door, touch the 

Pausing operation

Changing the cooking time

Cancelling operation

This can be done at any time. Touch

Turn the  

Set the function selector 

The oven begins to heat up.


4.

Turn the             knob to set the 

 minutes.

3.

Turn the            knob

temperature to 230 °C.

Touch the

Touch the

 key. Turn the    

Touch the

 key.

 cooking  time  to  60

Touch the

 key.

The oven begins to heat up.

          to set the cooking 

Turn the 

 knob 

2.

Touch the

key. The default temperature 180  C will blink. 

Turn the                knob to set the temperature to 200     .

°

°C

3.

4.

time to 25 minutes.

Touch the

knob to change the cooking time.

Touch the 

the 

key

.

Touch the        key.

 key.

key. Operation continues.

 key to pause operation. Then touch  the 

key to continue operation.

This can be done at any time. Touch  th e 

 key  to enter 

into the off state. 

Changing the temperature

Note:

Type and quantity of accessories is subject to actual demand.

This can be done at any time. 

Touch  the 

 key  for the new temperature setting.

Turn  the  

 k  n  o   b to set the temperature. 

     knob to set the 

     to       


Summary of Contents for MCO44BL

Page 1: ...ese instructions carefully before using your combination oven and keep it carefully If you follow the instructions your will provide you with many years of good service Midea Instruction MODEL Built in Combination Oven combination oven MCO44BL ...

Page 2: ......

Page 3: ... 9 Setting the oven 9 Setting the type of heating and temperature 9 Rapid preheating 10 The microwave 10 Notes regarding ovenware 10 Microwave power settings 10 Setting the microwave 11 MicroCombi operation 1 Setting Microwave Combi operation 11 Automatic programmes Setting a programme Defrosting programmes Setting the time setting options 13 Setting the cooking time 13 Setting the clock 13 Childp...

Page 4: ... anyone other than a out any service or repair involves the removal of a cover which microwave energy in sealed containers 6 WARNING Liquids and other foods must not be heated since they are liable to explode keep an eye on the oven due containers to the possibility of ignition ovens use in microwave and keep the door closed in the appliance order to stifle any flames delayed eruptive boiling ther...

Page 5: ... to avoid the possibility of 22 WARNING Accessible parts may use Young children become hot during should be kept away 23 Steam cleaner is not to be used 25 Surface of a storage drawer can get hot become hot during use touching of age shall be kept away unless supervised 26 WARNING The appliance and its accessible parts Care should be taken to avoid heating elements Children less than 8 years conti...

Page 6: ... harsh abrasive cleaners sharp metal scrapers to clean the door glass since they can surface which may of the glass behind a overheating This is not appliances with decorative door 30 The appliance is intended to be used WARNING When the appliance is adult combination mode children should only use the oven under 32 operated in the supervision due to the temperatures generated built in 5 ...

Page 7: ...rt the weight of the appliance and could break Microwave popcorn Never set the microwave power too high Use a power setting no higher than 600 watts Always place the popcorn bag on a glass plate The disc may jump if overloaded Liquid that has boiled over must not be allowed to run through the turntable drive into the interior of the appliance Monitor the cooking process Choose a shorter cooking ti...

Page 8: ...DPSEBODF XJUI UIF DPOOFDUJPO EJBHSBN 0OMZ B RVBMJGJFE FMFDUSJDJBO XIP UBLFT UIF SFMFWBOU SFHVMBUJPOT JOUP BDDPVOU NBZ SFQMBDF UIF QPXFS DPSE P OPU VTF NVMUJQMF QMVHT QPXFS TUSJQT PS FYUFOTJPOT 0WFSMPBEJOH DBVTFT B SJTL PG GJSF G UIF DPOOFDUJPO JT OP MPOHFS BDDFTTJCMF GPMMPXJOH JOTUBMMBUJPO BO BMM QJO JTPMBUJOH TXJUDI XJUI B DPOUBDU HBQ PG BU MFBTU NN NVTU CF QSPWJEFE RQQHFW WKH ZLUHV RI WKH PDLQV ...

Page 9: ... baked items on the baking tray 50 C can Baked casseroles and grilled dishes work out best using this setting Poultry goes brown and crispy Grill Select between the levels high medium or low This is ideal if you wish to grill several steaks sausages pieces of fish or slices of bread Microwave Hot air Use this function to roast meals quickly And at the same time use the function of 3D Hot air Baked...

Page 10: ...ling e g steaks sausages and for toasting bread As a support for shallow dishes Once the appliance is connected 00 00 will blink buzzer will 1 key The time is set between 00 00 and 23 59 2 ring once Set the clock To remove the new cooker smell heat up the oven when it is empty and closed One hour with Hot air at 230 C is ideal Ensure that no packaging remnants have been left in the cooking compart...

Page 11: ...rform the following test if you are unsure whether your ovenware is suitable for use in the microwave 1 Heat the empty ovenware at maximum power for to 1 minute 2 Check the temperature occasionally during that time The ovenware should still be cold or warm to the touch The ovenware is unsuitable if it becomes hot or sparks are generated Microwave power settings Use the key to set the desired micro...

Page 12: ...5 This can be done at any time Changing the temperature Turn to set the the knob This can be done at any time temperature 190 C display Changing the cooking time Changing the microwave power setting Cancelling operation This can be done at any time Turn the This can be done at any time 3 1 2 3 4 In the off state touch the function The default microwave power 900W will appear And the cooking time w...

Page 13: ...e food even though thick pieces of meat may still be frozen in the middle The giblets can be removed from poultry at this point Programme no Weight range in kg Defrost Auto Menu Programme no Category Item P 01 Vegetables Fresh vegetables P 03 P 05 P 02 Side dishes Potatoes peeled cooked Side dishes Potatoes roasted If you hear a beep turn the food The combi microwave oven starts the next fase auto...

Page 14: ...tching it on accidentally The oven will not react to any settings The timer and clock can also be set when the childproof lock has been switched on Switching on the childproof lock Requirement No cooking time should be set and the function selector is in the off position The symbol appears in the display The childproof lock is activated Switching off the childproof lock The symbol on the display g...

Page 15: ...h concentrations of alcohol Wash new sponge cloths thoroughly before use Allow all surfaces to dry thoroughly before using the appliance again Area Cleaning agents Appliance front Hot soapy water Clean with a dish cloth and dry with a soft cloth Do not use glass cleaners or metal or glass scrapers for cleaning Appliance front with stainless steel Hot soapy water Clean with a dish cloth and dry wit...

Page 16: ...the turntable drive Clean the rollers under the turntable and the recess in the oven floor thoroughly A particular operating mode or power level cannot be set The temperature power level or combined setting is not possible for this operating mode Choose permitted settings appears in the display panel The thermal safety switch off function has been activated Call the after sales service appears in ...

Page 17: ...es service Always use an oven cloth or oven gloves when taking accessories or ovenware out of the cooking compartment Defrosting heating up and cooking with the microwave The following tables provide you with numerous options and settings for the microwave The times specified in the tables are only guidelines They may vary according to the ovenware used the quality temperature and consistency of t...

Page 18: ...eas 300 g 300 W 10 15 mins Stir carefully during defrosting 600 g 300 W 10 mins 100 W 10 15 mins Fruit e g raspberries 300 g 300 W 7 10 mins Stir carefully during defrosting and separate any defrosted parts 500 g 300 W 8 mins 100 W 5 10 mins Butter defrosting 125 g 300 W 1 mins 100 W 2 4 mins Remove all packaging 250 g 300 W 1 min 100 W 2 4 mins Loaf of bread 500 g 300 W 6 mins 100 W 5 10 mins Tur...

Page 19: ...s Menu plated meal ready meal 350 500 g 700 W 5 10 mins Take meal out of packaging cover food to heat Drinks 150 ml 900 W 1 2 mins Caution Place a spoon in the glass Do not overheat alcoholic drinks Check during heating 300 ml 900 W 2 3 mins 500 ml 900 W 3 4 mins Baby food e g baby bottle 50 ml 300 W approx 1 min Place baby bottles on the cooking com partment floor without the teat or lid Shake or...

Page 20: ...oking time The food has become too dry Next time set a shorter cooking time or select a lower microwave power setting Cover the food and add more liquid When the time has elapsed the food is not defrosted hot or cooked Set a longer time Large quantities and food which is piled high require longer times When the time has elapsed the food is overheated at the edge but not done in the middle Stir it ...

Page 21: ...the base of the springform cake tin After baking loosen the cake carefully with a knife The cake is too dark Select a lower temperature and bake the cake for a little longer The cake is too dry When it is done make small holes in the cake using a toothpick Then drizzle fruit juice or an alcoholic beverage over it Next time select a temperature 10 degrees higher and reduce the baking time The bread...

Page 22: ...he meat with a fork the juices will run out and it will become dry Dark meat e g beef browns more quickly than lighter coloured meat such as veal or pork When grilling light coloured meat or fish these often only brown slightly on the surface although they are cooked and juicy on the inside The grill element switches off and on again automatically This is normal The grill setting determines how fr...

Page 23: ...g Ovenware with lid 210 230 100 60 80 Smoked pork on the bone approx 1 kg Ovenware without lid 300 45 50 Neck of pork 2 cm thick 3 1st side approx 15 20 2nd side approx 10 15 Lower wire rack Higher wire rack Lamb Accessories Type of heating Temperature C Microwave power in watts Cooking time in minutes Saddle of lamb on the bone approx 1 kg Ovenware without lid 210 230 40 50 Leg of lamb boned medi...

Page 24: ...or the weight of the joint For small roasts select a higher temperature and a shorter cooking time For larger roasts select a lower temperature and a longer cooking time How to tell when the roast is ready Use a meat thermometer available from specialist shops or carry out a spoon test Press down on the roast with a spoon If it feels firm it is ready If the spoon can be pressed in it needs to be c...

Page 25: ...th thin base 220 230 10 15 Pizza with deep pan base 220 230 3 13 18 Mini pizza 220 230 10 15 Pizza baguette 220 230 2 13 18 Chips 220 230 8 13 Croquettes 210 220 13 18 Rösti stuffed potato pockets 200 220 25 30 Part cooked rolls or baguette Lower wire rack 170 180 13 18 Fish fingers 210 230 10 20 Chicken goujons nuggets 200 220 15 20 Lasagne approx 400 g Lower wire rack 220 230 12 17 Preheat the c...

Page 26: ......

Page 27: ......

Page 28: ...ecommend a routine service call every years for the life of the appliance FOR SPARE PARTS OR TO FIND THE ADDRESS OF YOUR NEAREST STATE SPARE PARTS CENTRE IN AUSTRALIA MIDEA HOME APPLIANCES AUSTRALIA PTY LTD After sales service No 1800 88 60 10 11 75 Lorimer Street Docklands Melbourne 3008 3 ...

Reviews: