Maintenance and
Disassembly
Page 70
Procedure
Illustration
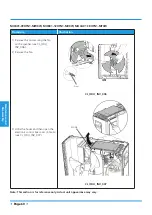
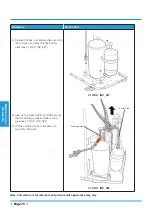
3) Remove the hex nuts and washers securing
the compressor, located on the bottom
plate (see
CJ_ODU_INV_021).
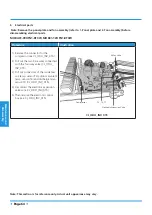
4) Heat up the brazed parts and then remove
the the discharge pipe and the suction
pipe (see
CJ_ODU_INV_022).
5) Lift the compressor from the base pan
assembly with pliers.
CJ_ODU_INV_021
CJ_ODU_INV_022
Note: This section is for reference only. Actual unit appearance may vary.
Discharge Pipe
Suction Pipe
Summary of Contents for MISSION2 3D INVERTER Series
Page 2: ......
Page 4: ......
Page 11: ...Specifications Page 7 MOB01 09HFN1 MW0W MOB01 12HFN1 MV0W MOCA01 18HFN1 MT0W...
Page 12: ...Specifications Page 8 MOD01 23HFN1 MT0W...
Page 15: ...Specifications Page 11 PCB board of MOD01 23HFN1 MT0W...
Page 16: ...Specifications Page 12 IPM board of MOD01 23HFN1 MT0W...


