Measure the inner width
of the side curtain
Fig.20
or
Fig.21
Step 4. Repeat on the other side.
Fig.22
INSTALLATION INSTRUCTIONS
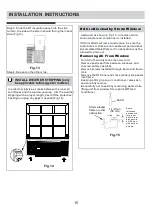
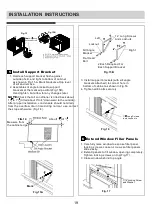
Step 3. Slide the R1 insulation panel into the side
curtain, the side with pattern should facing the indoor
side.(Fig.22).
INSTALL WEATHER STRIPPING (only
applicable to Energy star models )
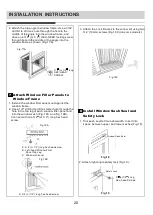
In order to minimize air leaks between the room air
conditoner and the window opening, trim the weather
stripping with a proper length, peel off the protective
backing and plug any gaps if needed (Fig.23).
Fig.23
INSTALL R1 HARDWARE (only
applicable to Energy star models )
In order to minimize air leaks and ensure optimal
insulation, it is necessary to install the included R1
hardware to the side curtain. Follow the instructions
below.
Step 1. After the unit is installed to the window,
measure the inner width of the side curtain as shown
(Fig.20).
10
Step 2. Remark a line on the provided R1 insulation
panel according to a length 1/8 (3mm) less than the
measured width in step 1, then cut the R1 insulation
panel along the line (Fig.12).
9
Install Chassis into Cabinet
and Install Front to Unit
1. Lift air conditioner and carefully slide into
cabinet leaving 6 inches protruding.
2. DO NOT push on controls or finned coils.
3. Be sure chassis is firmly seated towards rear
of cabinet.
4. Installation of front is the reverse of removal
outlined in Section 1.
21
Summary of Contents for MW06DRWBA1RCM
Page 1: ...210 285 80g...

