Service manual, 2016-12
26
/
42
4.
Remove the starter and protector
Unplug the starter and protector (you can use a
screwdriver to pry it slowly)
5.
The reverse process can complete installation.
/
8.7
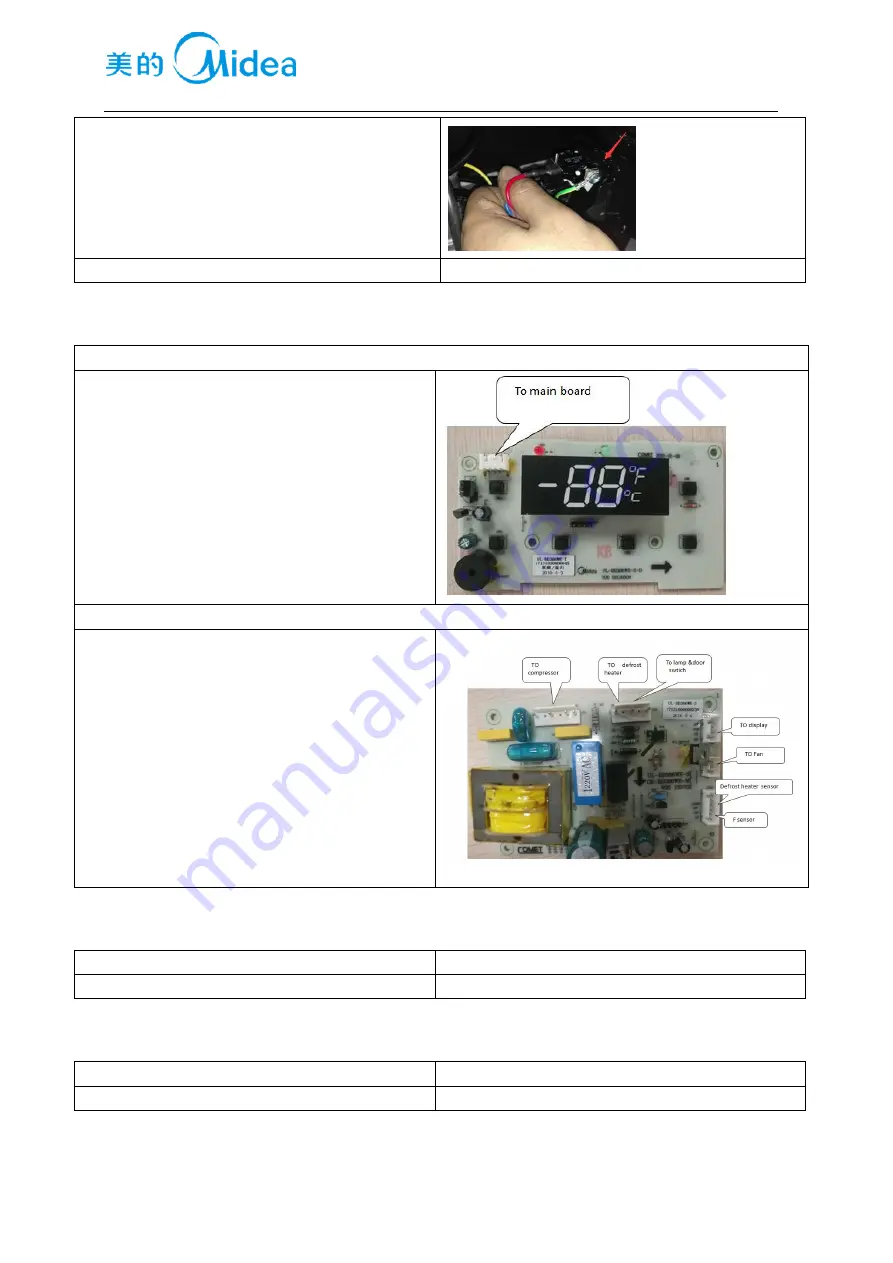
Display and main control panel
Display
1)use slotted screwdriver to prize up the display
PCB assembly slightly, to get the display PCB
assembly
2)use cross screwdriver to remove the 4 pcs screws,
to dismantle the display PCB
3)Unplug the wiring connector, change the display
PCB, the reverse operation is for assembly
main control panel
1)
Use cross screwdriver to remove the 2 screws, to
get the main PCB assembly
2)
Use slotted screwdriver to prize up the cover of
main PCB box slightly
3)
Use cross screwdriver remove the 1 pc screw of
main PCB,and dismantle the main PCB
4)
Unplug the wiring connector,change the main
PCB, the reverse operation is for assembly
8.8
Bar counter(None)
Disassembly and installation of bar counter
None
Disassembly and installation bar doorseal
None
8.9
Water dispenser(None)
Disassembly and installation of water valve
None
Disassembly and installation of water tank
None
Summary of Contents for UL-BD386WE-SQ
Page 5: ...Service manual 2016 12 5 42 1 Safety Warning Code 1 1Warning for operation safety ...
Page 6: ...Service manual 2016 12 6 42 ...
Page 7: ...Service manual 2016 12 7 42 ...
Page 8: ...Service manual 2016 12 8 42 1 2Safety instruction for refrigerant ...
Page 15: ...Service manual 2016 12 15 42 ...
Page 17: ...Service manual 2016 12 17 42 Down view Open Door Maximum open angle of door 135o ...
Page 34: ...Service manual 2016 12 34 42 11 Troubleshooting Method 11 1 No refrigeration ...
Page 35: ...Service manual 2016 12 35 42 11 2 Compressor failure ...


