


4
HARDWARE INSTALLATION
Be certain to follow standard anti-static procedures when handling any of Midian’s products. For installation
instructions into a particular radio, please consult Midian’s application notes for the TVS-2 and VPU-15 if
available.
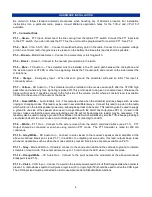
P1 – Connector Side
P1-1 – Green
– PTT Input – Disconnect the line coming from the radio’s PTT switch. Connect the PTT Input lead
to the PTT switch. If you do not break the PTT line the unit must be programmed for common PTT. See P1-9.
P1-2 – Red
– VIN +5.5-15 VDC – Connect to switched battery point in the radio. Connect to a regulated voltage
point in a vehicular radio if engine noise is present on the battery line. Keep this lead as short as possible.
P1-3 – Brown
– Mode/Code Select – Connect to a momentary or latching switch.
P1-4 – Black
– Ground – Connect to the nearest ground plane in the radio.
P1-5 – Blue
– TX Audio In – The scrambler must be installed in the TX audio path between the microphone and
the insertion point of CTCSS or other tone signaling. Break the TX audio path and connect to the side nearest the
microphone.
P1-6 – Orange
– Emergency Input – When taken to ground the scrambler will send an ENI. This input is
continually active.
P1-7 – Yellow
– RX Audio In – The scrambler must be installed in the receive audio path after the CTCSS high
pass filter and where any tone signaling is picked off. This point needs to be given a constant level; otherwise the
trigger will not work. If possible connect to the high-side of the volume control where a constant level is available.
Connect to the source of the audio at the break.
P1-8 – Green/White
– Audio Enable Out - This output is active when the scrambler produces beeps such as when
ringing or changing modes. This lead may be used in several different ways. Connect this lead to a point in the radio,
which will turn on the radio’s speaker power amp, allowing beep tones to be heard. This lead may also be used to supply
a ground to one side of the speaker when used in conjunction with the Alert Tone Output (see P2-13). If used in this
manner, make sure that the power amp output stage and Q2 will not be damaged (a resistor may be necessary). This
lead may also be used to supply a ground to the cathode of an LED which will blink any time the TVS-2 beeps, providing a
visual silent indicator. Be sure to use a current limiting resistor if connecting to an LED.
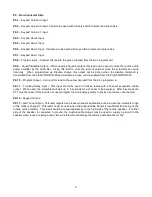
P1-9 – White
– PTT Out – Connect to the wire removed from the switch mentioned above (see P1-1). PTT
Output should be connected even when using common PTT mode. The PTT transistor is rated for 200 mA
continuous.
P1-10 – Gray/White
– RX Audio Out – Connect to side closest to the receiver's speaker driver amplifier at the
above mentioned break point (see P1-7). In addition to outputting receive audio, this lead outputs beep tones
whenever applicable, such as when the mode switch is pressed. Beep tones are also available on P2-13.
P1-11 – Gray
- Mode LED Out – If desired, connect to the anode of an LED and the cathode to ground to indicate
scramble or clear mode. This output will source up to 15 mA to drive the LED when in scramble mode.
P1-12 – Orange/White
– TX Audio Out – Connect to the point nearest the modulator at the above-mentioned
breakpoint (see P1-5).
P1-13 – Violet
– COR Input – Connect to a point in the radio receiver squelch circuit that changes state when carrier is
present. A radio whose squelch circuit gives a logic low (0V) or logic high (5V) should be used to drive the COR input.
The COR input lead must be connected in order to use Advanced and Standard Mute functions.


