miniDSP Ltd, Hong Kong /
www.minidsp.com
/ Features and specifications subject to change without prior notice
10
6. Save your configuration
Save your initial configuration to a file. A
configuration
is the set of all audio processing parameters.
For more information on configurations, see
Working with configurations
starting on page 37.
7. Make audio connections
Remove power from the processor.
Now connect the miniDSP C-DSP 8x12 into your system. See
Hardware connectivity
starting on page 13
for details.
Ensure that all power is turned off when making audio connections
.
8. Go online
Apply power to the processor. (Leave other equipment turned off at this stage.) Connect the USB cable
to your computer, click on the
Connect
button, and select the
Synchronize Config
option. If all goes
well, you are now in
online mode
–
any changes that you make in the plugin user interface will be
immediately sent to the processor.
Before proceeding, click on each Configuration preset button (Config 1, 2, etc.) to ensure that all
presets have been synchronized.
9. Initial audio check
1.
Power on your connected equipment, first on the input side (e.g. head unit), then on the output
side (e.g. power amps).
2.
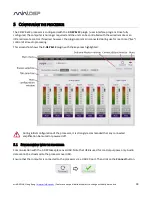
Turn the volume on your C-DSP 8x12 down low (view the Master Volume display in the plugin
while turning the knob on the wired remote counter-clockwise) and start playing music or a pink
noise test signal.
3.
Gradually increase the volume until you hear audio quietly coming from the speakers.
4.
Verify that the plugin is performing the intended function. (For example, for a two-way crossover,
confirm that the tweeter plays high frequencies and the woofer plays low frequencies.)
10. Fine-tune your configuration
With your initial setup running, you can now proceed to fine-tune and optimize your system. You will
need to perform acoustic measurements and use the configuration screens to adjust processing
parameters.
Save your configuration on a regular basis while working on fine-tuning it. Configurations can be saved
to different files to archive different versions and to enable auditioning of alternative configurations.
Regular saving will also help ensure that you do not lose your work if you inadvertently reset the
processor to default settings.
11. Continue to operate offline
With the processor configured, you can continue to operate in
offline mode
—
that is, without the
computer connected. To do so, quit the plugin or disconnect the USB cable. The processor will
continue to operate without the computer.
Note: you can still change settings in the plugin user interface while in offline mode
–
these will be
synchronized back to the processor next time you connect and select the
Synchronize Config
option.


