background image

Important Safety Instructions


1. Read Instructions – Be sure to read all of the safety and operating  
instructions before operating this product. 
 2. Retain Instructions – The safety instructions and owner's manual  
should be retained for future reference. 
3. Heed Warnings – All warnings on your Miditech product and in the  
Owner'sManual should be followed. 
4. Follow Instructions – All operating and use instructions should be 
followed. 
5. Moisture – Water and moisture are detrimental to the continued 
good health of your Miditech product. Do not install or operate your  
Miditech product near sources of water or moisture such as sinks, 
damp basements, leaky roofs, etc. 
6. Heat – Your Miditech product should be situated away from sources  
of heat such as heaters or radiators. 
7. Grounding –Precautions should be taken so that the grounding  
capabilities of the unit are not undermined. The Audiolink Pro 24/96  
provided with a cord with an equipment grounding conductor and  
grounding plug. This plug must be plugged into an outlet that is 
properly installed and grounded in accordance with all local rules and 
ordinances. Do not modify the plug provided with the equipment. If the 
plug will not fit into your outlet, have a proper outlet installed by a 
qualified electrician. 
8. Power Cord Protection – Power supply cords should be routed so  
that theyare unlikely to be walked on or pinched by items placed upon  
or against them. Pay particular attention to protecting the plugs, outlets 
and the point at which the cord exits your Miditech product. 
9. Servicing–Do not attempt to service this unit yourself, as opening  
the case will expose you to hazardous voltage or other dangers. All  
servicing should be referred to qualified service persons.

15

Summary of Contents for Audiolink Pro 24/96

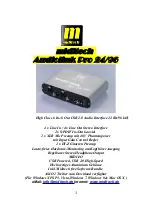
Page 1: ...r mit Input Gain Control Regler 2 x HI Z Gitarren Preamp Latenzfreies Hardware Monitoring am Kopfh rer Ausgang Regelbarer Stereo Headphone Output MIDI I O USB Powered USB 2 0 High Speed Hochwertiges A...

Page 2: ...dramatisch Wir w nschen Ihnen viel Spass bei diesem H rgenuss Im Verlauf dieser Bedienungsanleitung werden wir einige Hinweise zur Installation und Funktion des Audiolink Pro 24 96 geben Technische D...

Page 3: ...dB 0 02 0 14 Noise level dB A 96 2 Dynamic range dB A 96 1 THD 0 0061 THD Noise dB A 81 4 IMD Noise 0 013 Stereo crosstalk dB 80 0 IMD at 10 kHz 0 042 Frequency response From 20 Hz to 20 kHz dB 0 47 0...

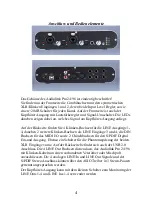
Page 4: ...4 daneben 2 weitere Klinken Buchsen als LINE Eing nge 3 und 4 die DIN Buchsen f r das MIDI I O sowie 2 Chinchbuchsen f r den S PDIF Digital Ein und Ausgang Ebenso ein Schalter f r die Phantomspeisung...

Page 5: ...miditech de finden Sie unter Downloads neben dieser Bedienungsanleitung auch einen Windows MME ASIO 2 Treiber f r das Audiolink Pro 24 96 der f r den Betrieb des Audiointerfaces erforderlich ist Bitt...

Page 6: ...seite bet tigen Nur am XLR Eingang Ein Instrument E Gitarre oder E Bass wird in der Mitte der Combo Buchse eingesteckt Mit dem Gain Reglern neben den XLR Klinken Eing ngen regeln Sie den Eingangspegel...

Page 7: ...ngsfrei LINE Eing nge 3 und 4 6 3mm Klinke R ckseite An diesen zus tzlichen Stereo Eingang k nnen Sie ein LINE Ger t wie einen CD Spieler MP3 Player oder ein Keyboard mit seinem analogen Output anschl...

Page 8: ...phantom power and input gain control 2 x HI Z guitar preamps Low latency hardware monitoring for LINE In 1 4 and LINE Out 1 4 Adjustable Stereo headphone output MIDI I O USB powered USB 2 0 high spee...

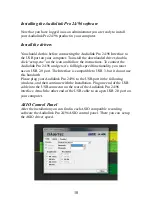
Page 9: ...s musical instruments etc Installation Complete installation consists of logging in as an administrator installing the Windows drivers into your system connecting the audio interface to a USB port and...

Page 10: ...d gets it s full high speed functionality you must use an USB 2 0 port The Interface is compatible to USB 3 but it do not use this bandwith Please plug your Audiolink Pro 24 96 to the USB port in the...

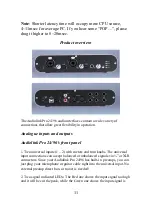
Page 11: ...k Pro 24 96 s front panel 1 Two universal inputs 1 2 with meters and trim knobs The universal input connections can accept balanced or unbalanced signals via or XLR connectors Since your Audiolink Pro...

Page 12: ...e the LEDs will show which it is Audiolink Pro 24 96 s rear panel 1 Power Supply Jack DC 6 9V input If Power Supply on the USB port is not enough please use the an external Power Adapter for power sup...

Page 13: ...omer Service If you experience any trouble with your Miditech hardware please go to the supportarea of our website at www miditech de and check out the FAQ s we have there If you can t find a solution...

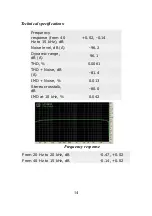
Page 14: ...z to 15 kHz dB 0 02 0 14 Noise level dB A 96 2 Dynamic range dB A 96 1 THD 0 0061 THD Noise dB A 81 4 IMD Noise 0 013 Stereo crosstalk dB 80 0 IMD at 10 kHz 0 042 Frequency response From 20 Hz to 20 k...

Page 15: ...Grounding Precautions should be taken so that the grounding capabilities of the unit are not undermined The Audiolink Pro 24 96 provided with a cord with an equipment grounding conductor and groundin...

Reviews: