background image

2

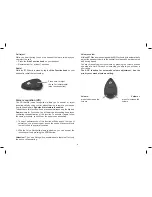
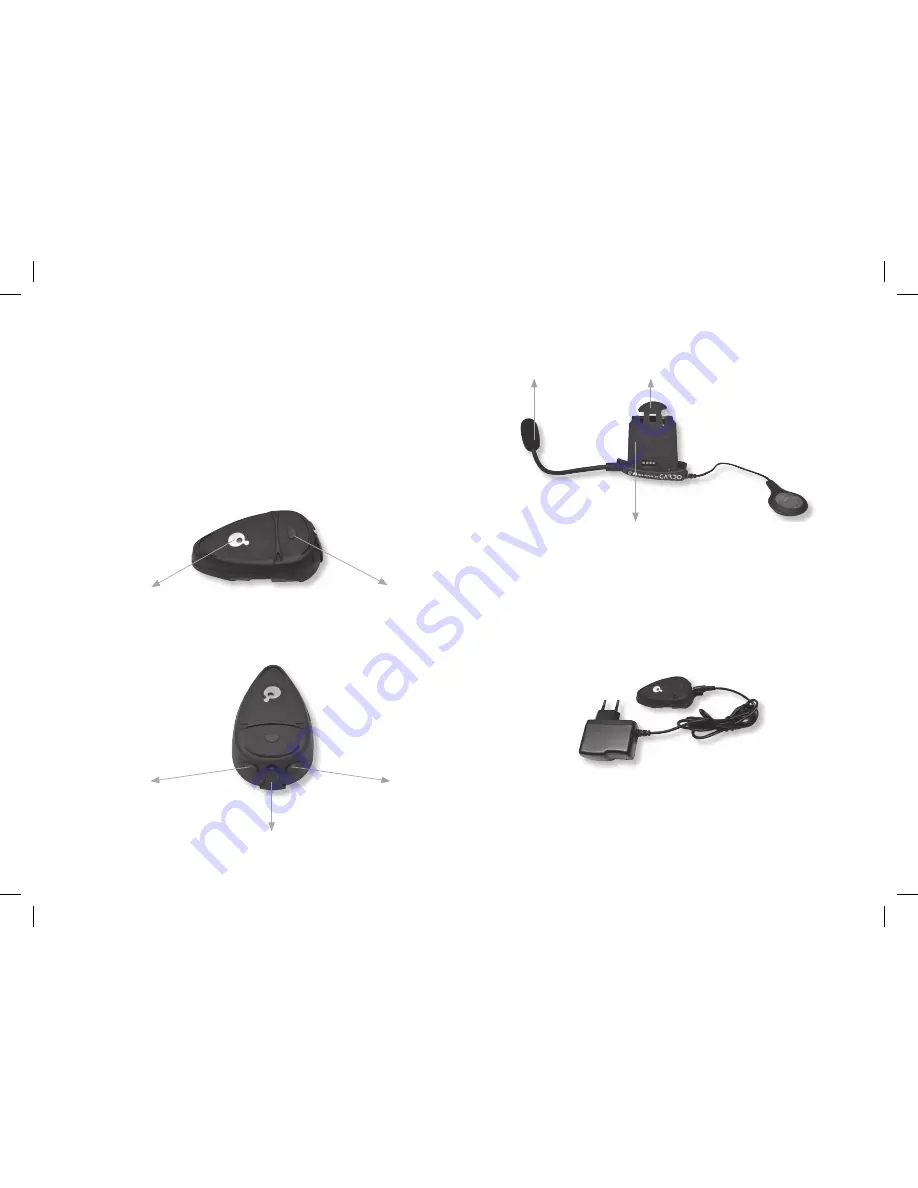
Detailed view of the BT-Rider

Main unit

Buttons

The  buttons  on  the  communication  units  lets  you  enable  Bluetooth 

connection  and  telephone  functions  They  can  be  activated  in  two 

different modes: 

•  Short pressure: push the button less than one second

•   Longer pressure: push the button for more than 3 seconds


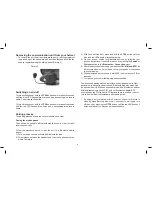
Fixing plate with microphone and speaker

Charging batteries

Make sure that both units are fully charged prior to initial use. Allow at 

least 4-5 hours for a full charge before using for the fi rst time. Normally 

3-4 hours will suffi ce for complete charge. 

Charge the unit by inserting the wall-charger into the charging socket 

(lift the rubber cover to insert the plug).

•  The red LED on the BT-Rider will turn on when charging begins. 

Allow the headset to charge until the red LED turns off. 

•  When  the  charge  is  complete,  release  the  headset  from  the 

charger.

Microphone

back-plate of the clamp (press on 

arc to release the headset unit)

Sliding-plate of the clamp

Earphone

center CTRL button 

side Function key

for call reject, call ter-

mination and redial 

Charging socket

Volume -

Summary of Contents for BT RIDER

Page 1: ......

Page 2: ...e a cellular phone transceiver or navigation system with Bluetooth inside or via Bluertooth adapter BPA 100 refer to chapter Pairing process for further information 2 The headset function uses the AGC...

Page 3: ...least 4 5 hours for a full charge before using for the first time Normally 3 4 hours will suffice for complete charge Charge the unit by inserting the wall charger into the charging socket lift the ru...

Page 4: ...cation to an ideal position i e to the spot where the attached speaker sits opposite your ear and the microphone is located in front of your mouth Picture 3 You may need to re position the clamp repea...

Page 5: ...ss and hold the CTRL button until the blue and red LEDs begin alternating rapidly 4 On your phone search for Bluetooth devices by following your phone s instructions Usually this is done by selecting...

Page 6: ...profile Initiating calls from the phone s keypad a Dial the phone number on the keypad of your phone b Press Talk or Send on your phone to dial the number Voice dialling Make sure your phone is on bu...

Page 7: ...e beep tones ascending 2 The best performances of this function will depend on the type of helmet you use close or open and on the speed Make some tests in order to find the optimal condition 2 With t...

Page 8: ...cognition being turned on Descending tone high low Headset or Voice Recognition being turned off 1 tone acknowledge tone for call rejected or other key entries HEADSET FUNCTIONS MOBILE PHONE If you wa...

Page 9: ...ers are not permitted to make any changes or modifications to the device Modifications which are not expressly approved by the producer invalidate the warranty card Designed and Manufactured for Midla...

Page 10: ......

Reviews: