


7 |
P a g e 1 0 - 3 3 1 - 2 R E V A
MNChinook 200M Instructions
Mechanical Assembly Procedure
1)
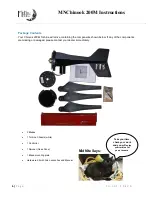
Unpacking -
Inspect the contents of the box and ensure that all items are present and free from
damage. If any of the components are missing or damaged, please contact your dealer immedi-
ately.
2)
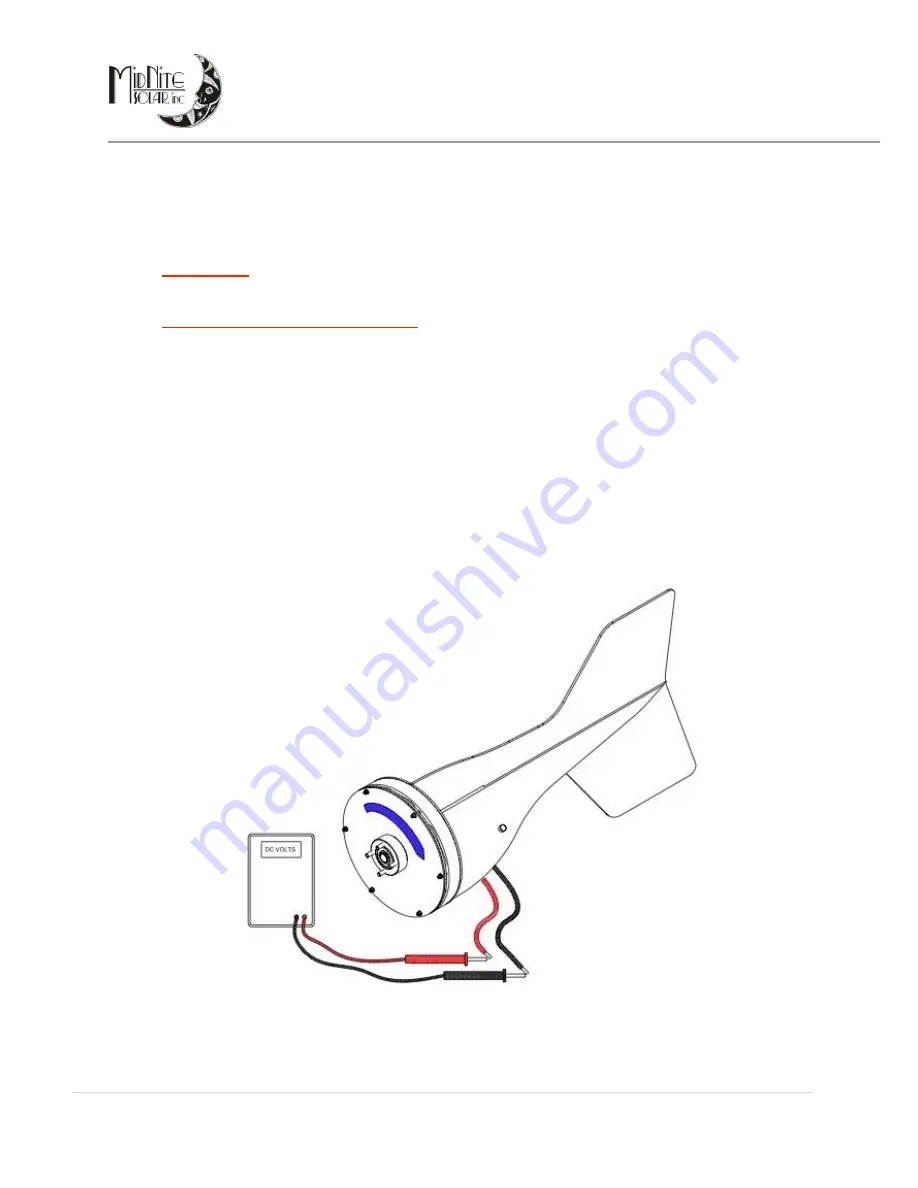
Check Magnet Rotor & Continuity -
Ensure that the magnet rotor is free turning and does not
scrape or rub on the coil disc as it rotates. You may feel a slight resistance from the bearings at this
stage. The bearing units used in the magnet rotor assembly are factory lubricated and sealed for
life. It will take approximately 100 hours of normal operation for the bear
ing seals to ‘Break-in’ and
the lubrication to be distributed correctly around the bearing raceways and ball cages. During this
period you may notice a reduced performance caused by the additional friction of the bearing seals.
In operating temperatures of
–10 degrees Centigrade or lower, this ‘Break-in’ period will be
extended by a further 50 hours of normal operation. Connect a digital multi-meter to the positive
(red) and negative (black) output leads extending from the yaw pivot. With the multi-meter set to
detect DC Volts, a voltage should be displayed when the magnet rotor is spun. This voltage will
vary with the speed of rotation. If the magnet rotor rubs, or no voltage is detected when turning the
magnet rotor, please contact your dealer immediately.