•
53
•
Chapter 9: Troubleshooting
The troubleshooting tips in this section will help you resolve most testing and printing problems. For
problems with the printer, digital temperature gun, or the PC software application, refer to their manu-
als or call Midtronics Customer Service for assistance. (See
Patents, Limited Warranty, Service
.)
Screen does not power on during testing (no text/graphics)
Check the connection to the jar.
The jar voltage might be too low (less than 1 volt) to test.
The analyzer’s battery pack might need to be recharged or replaced.
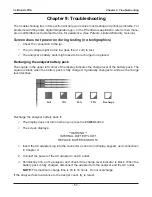
Recharging the analyzer battery pack
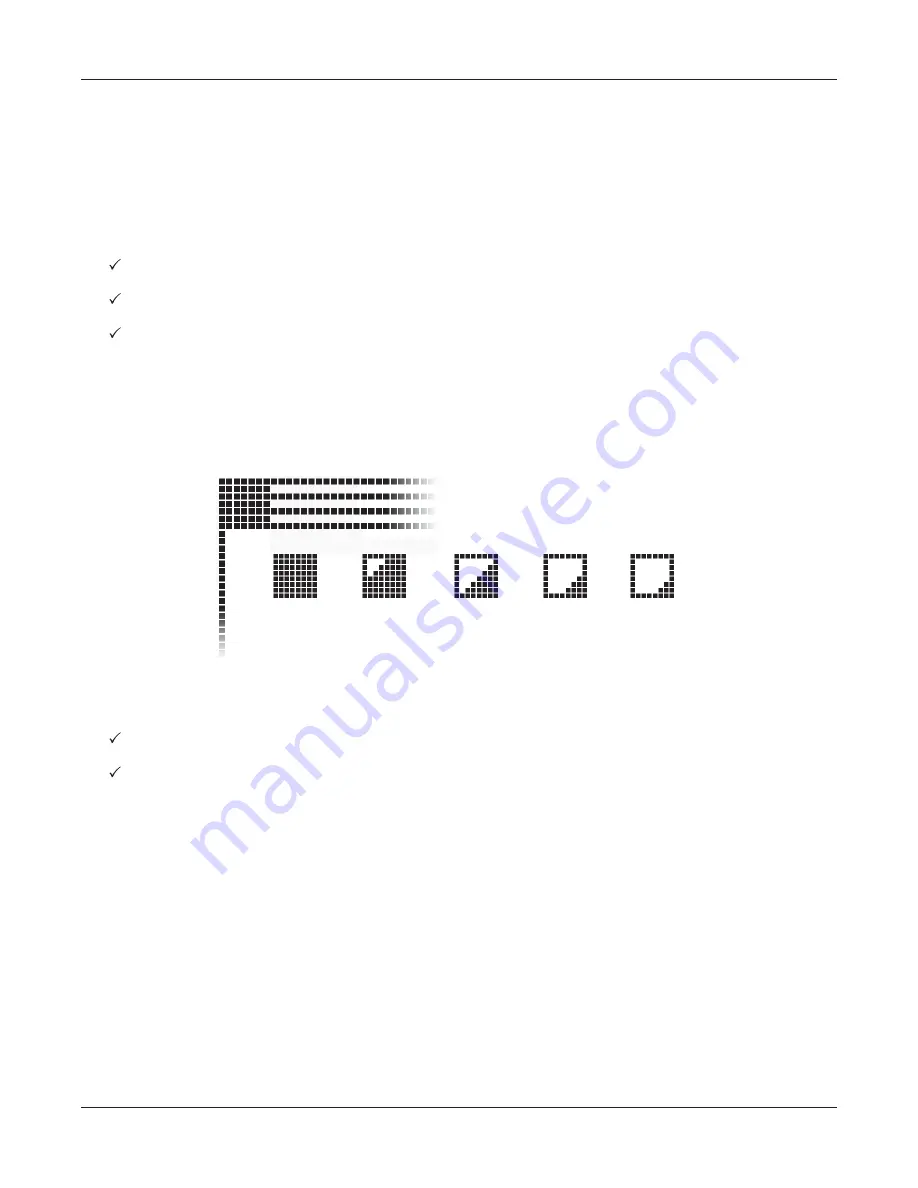
The square in the upper left corner of the display indicates the charge level of the battery pack. The
square is black when the battery pack is fully charged. It gradually changes to white as the charge
level declines.
Recharge the analyzer battery pack if:
The display does not turn on when you press the
POWER
button.
The screen displays:
**WARNING**
INTERNAL BATTERY LOW!
REPLACE BATTERIES SOON!
1. Insert the AC adapter plug into the connector as shown in
Display, keypad, and connections
in
Chapter 2
.
2. Connect the power of the AC adapter to an AC outlet.
3. Periodically turn on the analyzer and check if the charge level indicator is black. When the
battery pack is fully charged, disconnect the adapter from the analyzer and the AC outlet.
NOTE:
The maximum charge time is 16 to 18 hours. Do not overcharge.
If the analyzer fails to advance to the next jar count, try to retest.
Full
75%
50%
25%
Recharge
Chapter 9: Troubleshooting
Celltron ULTRA

