background image

• 

 55  

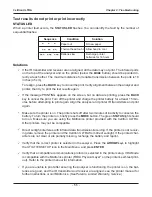
Test results do not print or print incorrectly

STATUS LED

When a printer fault occurs, the 

STATUS


LED


fl

 ashes. You can identify the fault by the number of 

sequential 

fl

 ashes:

Solutions

  If the IR transmitter and receiver are not aligned, all the data may not print. The infrared ports 

on the top of the analyzer and on the printer (below the 

MODE

 button) should be pointed di-

rectly at each other. The maximum distance for reliable transmission between the ports is 18 
inches (45 cm).

To realign, press the 

BACK

 key to cancel the print. Verify alignment between the analyzer and 

printer; then try to print the test results again.

  If the message PRINTING appears on the screen, but no data are printing, press the 

BACK


key to cancel the print. Turn off the printer and charge the printer battery for at least 15 min-
utes before attempting to print again. Align the analyzer and printer IR transmitters and print 
again.

  Make sure the printer is on. The printer shuts off after two minutes of inactivity to conserve the 

battery. To turn the printer on, brie

fl

 y press the 

MODE

 button. The green 

STATUS

 light should 

turn on. Make sure you are using the Midtronics printer provided with the Celltron ULTRA. 
Other printers may not be compatible.

  Direct sunlight interferes with infrared data transmission/receiving. If the printer is not receiv-

ing data, remove the printer and the Celltron ULTRA from direct sunlight. If the printed char-
acters are not clear or are partially missing, recharge the battery and reprint.  

  Verify that the correct printer is selected in the 

analyzer

. Press the 

ARROW

 keys

 to highlight 

the UTILITIES SETUP icon in the Main Menu, and press 

ENTER

.

  Verify that a compatible communications protocol is selected in the printer setup. IrDA Mode 

is compatible with the Midtronics printer (“IRDA Physical Layer” on the printer’s self-test print-
out). Refer to the printer manual for information.

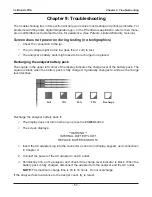
  If you are unable to print after ensuring the analyzer is functioning, the printer is on, the bat-

teries are good, and the IR transmitter and receiver are aligned, see the printer manual for 
further instructions or call Midtronics. (See 

Patents, Limited Warranty, Service

.) 

Sequence

Condition

Solution

Paper ou

t

Thermal head too hot

Fit new paper

Allow head to cool


*    *    *


**  **  **

***  ***  ***

Batteries low

Recharge printer 
batteries for 16 hours

Chapter 9: Troubleshooting

Celltron ULTRA

Summary of Contents for Celltron ULTRA

Page 1: ...efurbished and purchasing new Financing options such as Financial Rental and Leasing are also available on application TMG will assist if you are unsure whether this model will suit your requirements Call TMG if you need to organise repair and or calibrate your unit If you click on the Click to Call logo below you can all us for FREE TMG Corporate Website TMG Products Website Disclaimer All tradem...

Page 2: ...Universal Stationary Battery Analyzer For testing stationary batteries used in UPS systems power utility and telecommunications industries INSTRUCTION MANUAL Battery Management Innovation ...

Page 3: ...This page intentionally left blank ...

Page 4: ...heck boxes 12 Alphanumeric selections 12 Menu structure 12 Chapter 3 Determining a reference value 24 Before you test a string 24 Options in determining a reference value 24 Testing a sample of jars 25 Using the average in STRING SUMMARY 25 Chapter 4 Utilities 26 Selecting a warn fail threshold WARNING 26 Selecting Celsius or Fahrenheit TEMP 26 Selecting a manual or automatic test start mode MODE ...

Page 5: ...ng the number of POSTS PER JAR 31 Using a reference value from the database BATTERY MANAGER 32 Using REFERENCE DEVELOPER to calculate a reference value 32 Selecting a REFERENCE value 32 Selecting what to measure VOLT CONDUCTANCE 33 Selecting the string TEMPERATURE 33 Saving the BATTERY SETUP 33 Adding jar model information to the database 34 Changing a reference value 34 Adding a jar model 34 Chap...

Page 6: ...2 Retesting after immediately testing the jar post or strap 42 Retesting after testing the string 42 Adding a placeholder for a missing or dead jar battery 42 When testing a string 42 When testing is finished 43 Chapter 7 Test results and reports 44 Viewing test results 44 String test results 44 Jar and strap test results 44 Interpreting test results 45 String summary for a string of 12 V jars 45 ...

Page 7: ...DC voltmeter 52 AC voltmeter 52 Scope 52 1 Auto setup 52 2 Run hold 52 3 Time Display 52 4 FFT display 52 Current 52 Chapter 9 Troubleshooting 53 Screen does not power on during testing no text graphics 53 Recharging the analyzer battery pack 53 Replacing the analyzer battery pack 54 Probe tip is bent or stops retracting 54 FILE NOT FOUND 54 Data is corrupt on the memory card 54 Test results do no...

Page 8: ...n trained Do not disconnect the battery cables from power systems during the test without authorization Do not place yourself in an electrical circuit Avoid simultaneous contact with the jar and with frame racks or hardware that may be grounded Do not operate the Celltron ULTRA with the battery charger AC adapter attached Battery posts terminals and related accessories contain lead and lead compou...

Page 9: ...e without knowing the load to which the jars supply power Midtronics recommends that you compare test results to a conductance reference value For more information about determining a reference value refer to Chapter 3 Test range The analyzer has an operating range of 0 to 20 000 S This range includes jars that have about 5 to 6000 Ah of reserve capacity Data storage The analyzer s SD memory card ...

Page 10: ...le 3 Maximum number of stored test results jars 2 straps Number of posts per jar Total straps for a 2 strap configuration Max number of jars 2 2 120 4 4 60 6 6 40 8 8 30 Chapter 1 Introduction Celltron ULTRA ...

Page 11: ...h infrared receiver for data transmitted by the Celltron ULTRA includes battery charger output 10 2 Vdc 800 mA for charging the printer s NiMH batteries Infrared IR receiver and CD with PC software IR receiver that attaches to a PC serial port and software that enables you to view and save test data on a PC AC adapter 120 Vac 60 Hz Optional adapter 110 to 240 Vac 50 60 Hz Charger for the analyzer ...

Page 12: ...scrolls right 7 BACK C key Press to clear cancel entries or go back 8 Alphanumeric keys Press to ENTER selections or user defined names in screens that allow direct entry of data 9 RETEST key Press to retest a set of jar posts or a strap just after you test it 10 PRINT key Press to send test data to IR printer 11 POWER button 12 SD Secure Digital card Removable memory storage for test data 13 Seri...

Page 13: ...w the screen or the selection box that contains them To indicate that there are more items the symbols appear to the right of the first item on the list To select from a list use the ARROW keys to scroll to the item and press ENTER Check boxes Lists that fit the screen have check boxes before each item Use the ARROW keys to place the check in the box next to your selection or use the numeric keys ...

Page 14: ...ric keys to create a new name Press ENTER to begin selecting your test parameters STRING INFO scrolling parameters list NEW STRING NAME The string name you created appears at the top of the param eters list The name is highlighted enabling you to change it before selecting your test parameters TECH ID 1 default name Press ENTER to create a technician ID of up to 20 alphanumeric characters The ID w...

Page 15: ...e threshold for a jar LOW VOLTAGE scrolling numeric The range 1 000 to 22 000 depends on the VOLTS PER JAR JARS ONLY Press ENTER to select a test mode MODE check boxes JARS ONLY Test only the jars on the string JARS 1 STRAP Test jars and their connections on the string JARS 2 STRAPS Test jars and their connections on the string POSTS PER JAR Press ENTER to select the number of posts per jar POSTS ...

Page 16: ...scrolling alphanumeric Select from an alphabetical list of over 200 models or select USER DEFINED approx 64 available to create a name for an unlisted model REFERENCE DEVELOPER Press ENTER to have the analyzer compute a reference value REF DEVELOPER scrolling numeric Select a percentage of jars on the string on which to base a reference from 0 to 100 REFERENCE scrolling alphanumeric The default is...

Page 17: ...ature of the string Conductance measurements change with jar tem perature To compensate the ULTRA uses the temperature you select to adjust the percentage of the reference value TEMP UNITS check boxes DEGREES F DEGREES C TEMPERATURE scrolling numeric Range 0 to 50 C 32 to 122 F AC RIPPLE Press ENTER to select the string s AC ripple AC RIPPLE scrolling numeric Select from 0 000 to 99 999 volts DC F...

Page 18: ... You are then returned to the BATTERY SETUP menu OPEN icon To use a saved test setup press ENTER The parameters list will appear however you cannot change certain parameters without erasing string test data for completed tests STRING INFO scrolling Scroll to the string name to start the test WARNING The analyzer will warn you that a test using the string name setup was already performed If you wan...

Page 19: ...u that formatting will erase all disk data Press ENTER to continue or the BACK key to cancel TEST icon The analyzer will test using the parameters file last used or saved If there is no test setup in memory the analyzer will use the default parameters If the cables are not connected before you select the TEST option the screen prompts you to connect to a jar or strap Press ENTER after you connect ...

Page 20: ...s option to create a placeholder in the test results for a dead or missing bat tery when you are finished testing STRING INFO scrolling Select a string name and press ENTER to display the string s test results JAR ID number letter scrolling Scroll to the jar number after which you want to insert a placeholder and press ENTER If you have selected JARS 1 STRAP or JARS 2 STRAPS as the test mode you m...

Page 21: ... ENTER to select a percentage of the reference value below which a jar and string must fall to generate a warning or failure notice STRING INFO scrolling Select a site name and press ENTER STRING INFO scrolling STRING WARN Press ENTER STRING INFO scrolling numeric Select from 0 to 100 STRING FAIL Press ENTER STRING INFO scrolling numeric Select from 0 to 100 JAR WARN Press ENTER STRING INFO scroll...

Page 22: ...jar results screen AUTO START This mode begins a test automatically when you connect to the jar CLOCK icon Press ENTER to set the date and time CLOCK ADJUST scrolling The date format is DD MM YYYY Day Month Year A 24 hour clock keeps the time DISPLAY icon Press ENTER to adjust the display contrast and the amount of time the screen background stays illuminated DISPLAY OPTIONS scrolling CONTRAST LEV...

Page 23: ...n The UPDATE utility installs ULTRA software upgrades from an SD memory card MAIN MENU icon Displays the Main Menu DMM icon Press ENTER to display the digital multimeter menu DC VOLTS icon Press ENTER DC VOLTMETER The DC voltmeter measures from real time DC voltage from 0 to 25 Vdc AC VOLTS icon Press ENTER AC VOLTMETER The AC voltmeter measures real time AC voltage from 0 to 10 Vac SCOPE icon SCO...

Page 24: ...st of over 200 models or select USER DEFINED 64 available for an unlisted model EDIT MFGR scrolling Selected manufacturer name Accept the manufacturer name by scrolling past it or select it to create a user defined name MFGR ID Edit the manufacturer name EDIT MODEL Selected model name Accept the model name by scrolling past it or select it to create a user defined name MODEL ID Edit the model name...

Page 25: ...ars Refer to Testing a sample of jars to establish a reference value in this chapter Test the jars in the string and use the highest conductance value as a reference value Use the average from STRING SUMMARY after you test the string Refer to Using the aver age in STRING SUMMARY in this chapter Use REFERENCE DEVELOPER to determine a reference value based on a selected per centage of jars on the st...

Page 26: ... 30 jars from one manufacturer with the same make model power rating age within 6 months and service history 2 Record this information about the jars Jar manufacturer Model number Date of manufacture Date of installation Condition in which the jar operates such as charge voltage volts per cell temperature and DC current through the jar Visible warnings such as leaking acid corrosion or distorted j...

Page 27: ...s as a warning An exclamation mark appears if the jar or string is failing Table 4 Defaults for a jar and string in service STRING WARN 70 JAR WARN 70 STRING FAIL 60 JAR FAIL 60 1 Press the ARROW keys to highlight the WARNING icon in the UTILITIES SETUP menu and press ENTER 2 Press the ARROW keys to select a STRING NAME and press 3 Press the ARROW keys to scroll to a selection STRING WARN STRING F...

Page 28: ... at the factory you may need to make changes based on your time zone 1 Press and hold the POWER button until the analyzer turns on 2 Press the ARROW keys to highlight the UTILITIES SETUP icon and press ENTER NOTE If you select an option you do not want press ENTER to return to the Main Menu 3 Use the ARROW keys to highlight the CLOCK icon and press ENTER 4 To highlight the characters you want to c...

Page 29: ...keys to highlight the LANGUAGE icon and press ENTER 3 Press the ARROW keys or use the numeric keypad to move the dot to the option button of your choice 4 Press ENTER to accept Using UPDATE to install new software This utility enables you to update the analyzer s software using an SD card Contact your Midtronics sales representative or Midtronics Customer service for information about the current ...

Page 30: ...essage from reappearing insert the card containing the file open an existing file or create a new file on the card Creating a string name FACTORY TEST A string name stores your test parameters eliminating the need to reenter data each time you test The default name is FACTORY TEST or the last name created which you can overwrite with any 20 character combination of letters numbers or symbols using...

Page 31: ...he number of jars you can test depends on whether you are testing JARS ONLY JARS 1 STRAP or JARS 2 STRAPS and number of POSTS PER JAR Table 5 Maximum of jars per string JARS ONLY Max number of jars JARS 1 STRAP Max number of jars JARS 2 STRAPS Max number of jars 480 jars for 2 posts 240 jars for 2 posts 120 jars for 2 posts 240 jars for 4 posts 120 jars for 4 posts 60 jars for 4 posts 160 jars for...

Page 32: ...or a 14 V jar 14 7 V 4 000 to 11 000 V for an 8 V jar 8 4 V 8 000 to 22 000 V for a 16 V jar 16 8 V Selecting a test mode JARS ONLY The default is JARS ONLY 1 Press the ARROW keys to highlight JARS ONLY JARS 1 STRAP or JARS 2 STRAPS in the STRING INFO list and press ENTER 2 Press the ARROW keys or use the numeric keypad to check the box next to JARS ONLY JARS 1 STRAP or JARS 2 STRAPS 3 Press ENTER...

Page 33: ...testing you can use REFERENCE DEVELOPER to calculate a value based on an average of the top 30 of the jars in the string or on a percentage of your choice 1 Press the ARROW keys to highlight BATTERY MANAGER and press ENTER 2 Press the ARROW keys to highlight REFERENCE DEVELOPER and press ENTER 3 Press ENTER to accept the default or press the ARROW keys or use the numeric keypad to select the perce...

Page 34: ...MPERATURE The default is 25 C 77 F Conductance measurements vary by jar temperature To compensate the analyzer uses the TEMPERATURE value to adjust the percentage of the reference value you set in the UTILITIES SETUP as the WARN FAIL threshold The percent is compensated to 25 C 77 F Compensation is adjusted at 0 7 per degree Celsius between 0 C and 35 C The kit includes an infrared temperature sen...

Page 35: ...or use the numeric keypad to select a new reference value and press ENTER 6 To save press the DOWN ARROW to select SAVE AND CONTINUE and press ENTER Adding a jar model 1 Press the ARROW keys to highlight the BATTERY MANAGER in the Main Menu and press ENTER 2 Press the ARROW keys to select a manufacturer and press ENTER 3 Press the ARROW keys to select one of the numbered USER DEFINED names and pre...

Page 36: ...ars or many jars and straps in a string Probes are best for quick testing of jars and straps on a string and for making contact with small posts or straps Cables keep your hands free to use the analyzer s keypad and to retest without reconnecting If you choose a probe cable set do one of the following Select AUTO START in the UTILITIES SETUP menu to keep both hands free to hold the probes Have som...

Page 37: ...ou tested and C is the third set of posts you tested on that jar Figure 1 shows an example of the labels for a jar when testing the posts from left to right If the jars you are testing have one set of posts the analyzer does not assign a letter For example J23 means the jar has one set of posts Figure 1 Labels for a jar with 6 posts J23C J23B J23A Figure 2 Label for a strap S23B Strap labels The a...

Page 38: ...dition of a jar ask for help from someone familiar with the jar s history before you test Identifying jars and straps To make sure the test results correlate to the same jar or strap each time you test identify the jars and straps on the string with a sticker label Determining a test pattern To make testing a consistent and fluid process determine a test pattern before connecting to the jar The te...

Page 39: ... to Attaching the cable to jar posts and Attaching the cable to a strap in this chapter The test pattern for a string First test at the jar post then at the strap After testing the jar posts and straps test the next jar in the direction in which the straps and jar cables connect the jars Figure 4 The numbers on the jars indicate the direction you should test based on the connections The straps con...

Page 40: ...e probes in the same positions as the clamps in the illustrations Guidelines Do not place clamps or probes on stainless steel hardware such as bolt heads washers or threaded posts Stainless steel hardware can yield low conductance values If you have to test on stainless steel record it in your testing records The jars might have grease on the terminals and connections to prevent corrosion You do n...

Page 41: ... the BATTERY SETUP menu and press ENTER 3 Press the ARROW keys to select a test setup and press ENTER 4 The analyzer will alert you that testing for that string was completed TESTING OF STRING IS COMPLETE TO SET UP AND TEST A NEW STRING PRESS C THEN SELECT NEW 5 Scroll through the list and verify or change parameters 6 Scroll to SAVE AND CONTINUE to exit or SAVE AND TEST to test a string NOTE If y...

Page 42: ... the black terminal on the next jar Refer to Figure 6 Figure 6 Attaching the cable to a strap 3 Choose one of the following based on the number of posts the jars have If the jar has more than one set of posts attach the black and red clamps or probes to the next set of posts on the jar If the jar has one set of posts test the jar connected to the jar you just tested Follow the steps in Attaching t...

Page 43: ...n in the Main Menu and press ENTER 4 Press the ARROW keys to highlight the JAR DATA icon and press ENTER 5 Press the ARROW keys to scroll to the string file that has the jar or strap you want to retest and press ENTER 6 Press the ARROW keys to scroll to the jar or strap you want to retest 7 Press the RETEST key 8 After retesting the analyzer will display the new results To retest another jar or st...

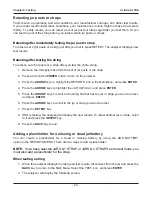
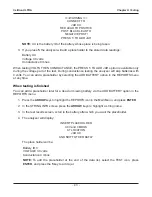
Page 44: ...ion in the REPORTS menu at any time When testing is finished You can add a placeholder later for a dead or missing battery via the ADD BATTERY option in the REPORTS menu 1 Press the ARROW keys to highlight the REPORTS icon in the Main Menu and press ENTER 2 In the STRING INFO screen press the ARROW keys to highlight a string name 3 In the test results screen scroll to the battery after which you w...

Page 45: ... to the second screen and BACK again 5 Press BACK to exit to the REPORTS menu Jar and strap test results To view the test results for individual jars and straps that were displayed as you tested the string 1 Press the ARROW keys to highlight the REPORTS icon in the Main Menu and press ENTER 2 Press the ARROW keys to highlight the JAR DATA icon and press ENTER 3 Press the ARROW keys to display resu...

Page 46: ...ence value for the jar J4 fourth jar tested with the lowest conductance value HIGH JAR J1 90 Percentage of the reference value for the jar with the highest conductance value J1 first jar tested STRING J1 86 The string s average compared to the highest jar i e the string s 775 avg mhos divided by the measured 900 mhos of highest jar TEMPERATURE 72 C Temperature selected in BATTERY SETUP AVG VOLTAGE...

Page 47: ...ARN threshold percentage of the reference value FAIL WARN The analyzer uses letter designations if the jar has more than one set of posts A first set of posts tested on the jar B second set of posts tested on the jar Results for JARS AND STRAPS with 4 posts In μOhm column Resistance measurements in microhms of strap connections JAR STATISTICS JAR VOLTS MHOS REF 1 2 263 900 90 2 2 262 890 89 3 2 26...

Page 48: ...OLTS ONLY in BATTERY SETUP or if you selected VOLTS THEN CONDUCTANCE but did not complete the conductance measurement 1 6μΩ PRINT C END G VOLTS GOOD 2 263VDC REF S1 1000 TEMP 25 C Jar is above low voltage warning threshold Strap resistance in microhms Temperature selected in BATTERY SETUP Reference value selected in BATTERY SETUP First strap tested 900 PRINT C END G GOOD VOLTS GOOD 90 2 263VDC 0 0...

Page 49: ...or jar maintenance IEEE standard 1188 1996 Recommended Practice for Maintenance Testing and Replacement of Valve Regulated Lead Acid VRLA Jars for Stationary Application 60 Fail Replace the jars Refer to your company jar replacement procedures or IEEE standard 1188 1996 Archiving test results Archiving test data on site can help you Compare results for changes or trends in string performance Recog...

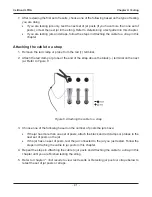
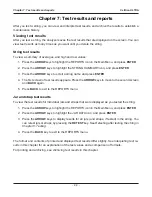
Page 50: ...he BACK key to end Printing the JAR DATA results 1 Turn on the printer by pressing the MODE button 2 Press the ARROW keys to highlight the REPORTS icon and press ENTER 3 Press the ARROW keys to highlight the JAR DATA icon and press ENTER 4 Press the ARROW keys to select the string name and press ENTER 5 Press the ARROW keys to select a jar or strap screen and press ENTER 6 Align the analyzer s IR ...

Page 51: ...ter which the Main Menu appears Transferring files to a PC from the memory card The Celltron ULTRA uses an SD memory card to store test data which can be uploaded to a PC An SD card reader which connects to a USB port is included in the kit The files have the extension csv and open in Microsoft Excel You can purchase SD memory cards at any office supply or computer store Starting with the Revision...

Page 52: ...ly keeps track of the number of tests performed Select the TEST COUNTER icon and press ENTER to see the total number of tests performed since the analyzer was first used Finding the analyzer software VERSION Select the VERSION icon and press ENTER to display the serial numbers of the analyzer cable flash memory and EEPROM firmware versions The information will be helpful when you call Midtronics f...

Page 53: ...10 Vac The voltmeter displays millivolts as a value with an analog meter graphic Scope The scope provides a real time voltage trace with a range of 0 to 25 Vdc Scope options include 1 Auto setup Press 1 to enable the scope to autorange 2 Run hold Press 2 to toggle between RUN mode measure and display signal or HOLD mode freeze signal 3 Time Display Press 3 to place the scope in time mode The horiz...

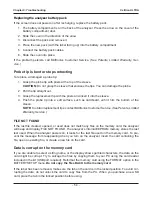
Page 54: ...vel of the battery pack The square is black when the battery pack is fully charged It gradually changes to white as the charge level declines Recharge the analyzer battery pack if The display does not turn on when you press the POWER button The screen displays WARNING INTERNAL BATTERY LOW REPLACE BATTERIES SOON 1 Insert the AC adapter plug into the connector as shown in Display keypad and connecti...

Page 55: ...ct Midtronics Customer Service See Patents Limited Warranty Service FILE NOT FOUND If the last file created opened or used does not match any files on the memory card the analyzer will beep and display FILE NOT FOUND The analyzer s internal EEPROM memory stores the last test used When the analyzer powers on it looks for the last file used on the memory card To pre vent the message from reappearing...

Page 56: ...The green STATUS light should turn on Make sure you are using the Midtronics printer provided with the Celltron ULTRA Other printers may not be compatible Direct sunlight interferes with infrared data transmission receiving If the printer is not receiv ing data remove the printer and the Celltron ULTRA from direct sunlight If the printed char acters are not clear or are partially missing recharge ...

Page 57: ...tion Power Requirements 9 6 V 1800 mAh NiMH internal swappable battery and charger Specifications Celltron ULTRA Display LCD FSTN 66 52 mm x 33 25 mm 2 62 in x 1 31 in 128 x 64 pixels 40 degree viewing angle contrast ratio 8 green LED backlight Keypad Stainless steel dome polycarbonate overlay 1 000 000 actuations Data Transfer Infrared protocol half duplex IrDA protocol RS 232 printer SD flash ca...

Page 58: ...mited warranty applies only to the Celltron ULTRA analyzer and does not cover any other equipment static damage water damage overvoltage damage dropping the unit or damage resulting from extraneous causes including owner misuse Midtronics is not liable for any incidental or consequential damages for breach of this warranty The warranty is void if owner attempts to disassemble the unit or to modify...

Reviews: