Moisture plus
54
Depending on the amount of water,
evaporation of residual water can take
up to 30 minutes.
The oven compartment is heated up
and the remaining water is evaporated,
causing condensation to form in the
oven compartment and on the door.
Be sure to wipe away the
condensation from the door and oven
compartment once the compartment
has cooled down.
To start residual water evaporation
immediately
Risk of injury caused by steam.
Steam can cause severe scalding.
Do not open the door during a burst
of steam.
Select a function or an automatic
programme that uses moisture.
The request
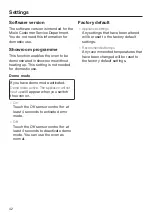
Evaporate res. moisture
appears.
Confirm with
OK
.
A time appears.
The Evaporate residual water process
will then start. You can follow the time
counting down in the display.
The time indicated will depend on the
amount of residual water left in the
steam injection system. During the
evaporation process, this time may be
adjusted by the system according to
the amount of water currently present.
At the end of the residual water
evaporation process, a buzzer will
sound and
Finished
will appear.
A cooking process using an operating
mode or an automatic programme with
moisture can now be run.
Whilst residual water is evaporating,
moisture will condense on the door
and in the oven compartment. This
moisture needs to be removed after
the oven compartment has cooled
down.
To skip residual water evaporation
Skipping the residual water
evaporation process can, in certain
cases, cause water to overflow into
the oven compartment.
It is best not to cancel the
evaporation process.
Select a function or an automatic
programme that uses moisture.
Evaporate res. moisture
appears.
Select
Skip
.
You can now select a function to start a
cooking process or run an automatic
programme with added moisture.
You will be prompted to carry out the
evaporation of the residual moisture
process the next time you select a
function or an automatic programme
that uses moisture and when you
switch the oven off.
Summary of Contents for 11 190 803
Page 84: ...Installation INSTALLATION 84 Side view A H 71xx 43 mm H 72xx 47 mm ...
Page 105: ......
Page 106: ......


