

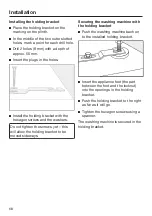


Installation
*INSTALLATION*
72
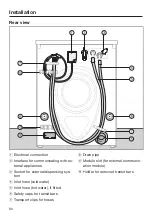
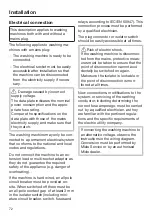
Electrical connection
This description applies to washing
machines both with and without a
mains plug.
The following applies to washing ma-
chines with a mains plug:
- The washing machine is ready to be
connected.
- The electrical socket must be easily
accessible after installation so that
the machine can be disconnected
from the electricity supply if neces-
sary.
Damage caused by incorrect
supply voltage.
The data plate indicates the nominal
power consumption and the appro-
priate fuse rating.
Compare the specifications on the
data plate with those of the mains
electricity supply and make sure that
they match.
The washing machine may only be con-
nected to a permanent electrical system
that conforms to the national and local
codes and regulations.
Do not connect the machine to an ex-
tension lead or multi-socket adapter as
they do not guarantee the required
safety of the appliance (e.g. danger of
overheating).
If the machine is hard wired, an all pole
circuit breaker must be provided on-
site. When switched off there must be
an all-pole contact gap of at least 3 mm
in the isolator switch (including mini-
ature circuit breaker, switch, fuses and
relays according to IEC/EN 60947). This
connection process must be performed
by a qualified electrician.
The plug connector or isolator switch
should be easily accessible at all times.
Risk of electric shock.
If the washing machine is disconnec-
ted from the mains, protective meas-
ures must be taken to ensure that the
point of disconnection cannot acci-
dentally be switched on again.
Make sure the isolator is lockable or
the point of disconnection is mon-
itored at all times.
New connections, modifications to the
system, or servicing of the earthing
conductor, including determining the
correct fuse amperage, must be carried
out by a qualified electrician, as they
are familiar with the pertinent regula-
tions and the specific requirements of
the electric utility company.
If converting the washing machine to
an alternative voltage, observe the
instructions in the wiring diagram.
Conversion must be performed by
Miele Service or by an authorised
Miele dealer.
Summary of Contents for 51508264IRL
Page 92: ......
Page 93: ......
Page 94: ......
Page 96: ...M Nr 11 881 460 00 en GB PWM 508 Mop Star 80 ...


