


^
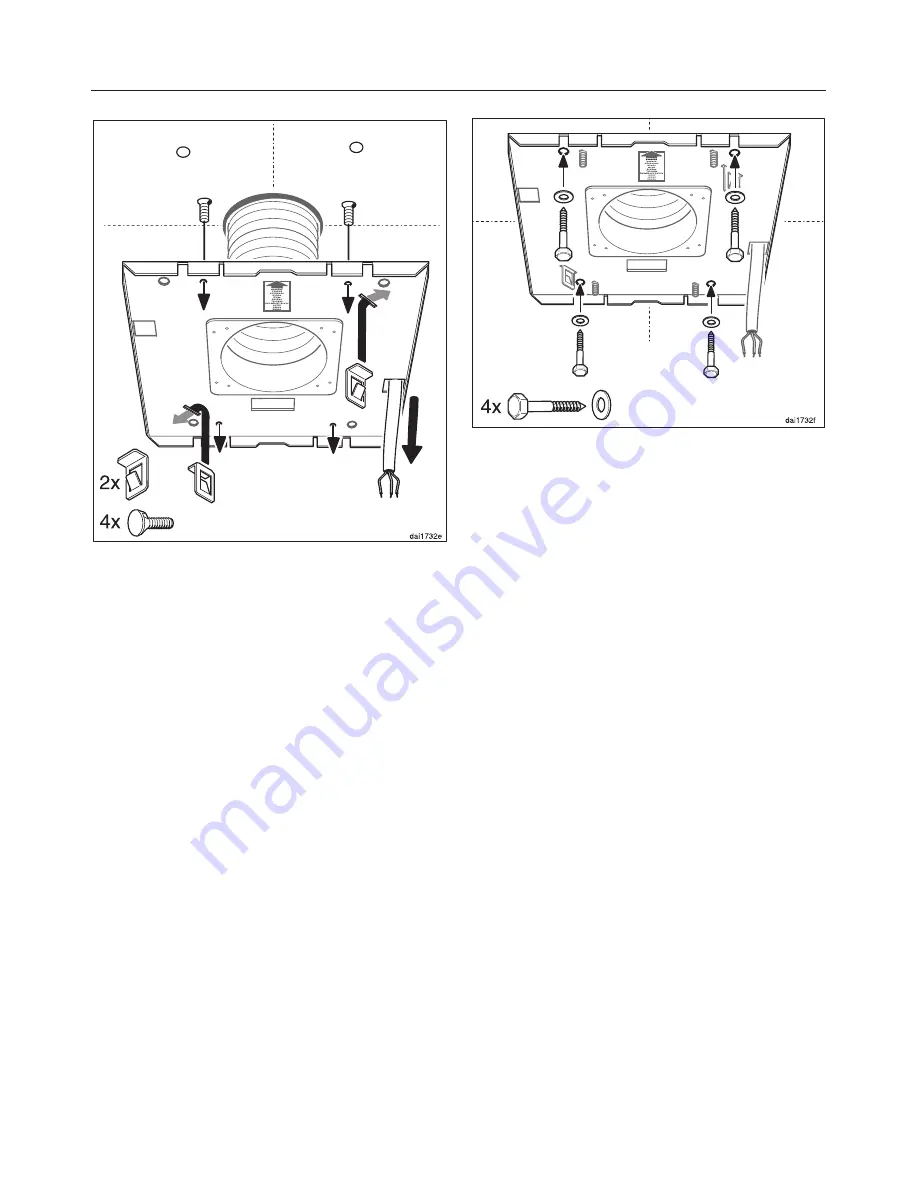
Insert the short edge of the two
spring clips into their slots from
below and pivot them 90° so that the
tab faces the center of the mounting
brake.
^
Pull the power cord through the
mounting plate.
^
Insert the four countersunk screws
M 6 x 20 into the recessed holes from
above.
^
Tape the screws from above to
prevent them from being pushed
upwards when the nuts are tightened.
^
Screw the mounting plate through the
ceiling and into the structural framing
using 8 x 60 lag bolts and washers.
Once tight, make sure that the
mounting plate can safely support
the weight of the hood.
Installation
26
Summary of Contents for DA 220-3
Page 8: ...Guide to the appliance 8 ...
Page 18: ...18 ...
Page 19: ...Installation Instructions ...
Page 32: ...M Nr 06 438 010 00 Alteration rights reserved 4304 ...


