Technical Information
21
H 408x BM
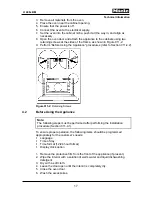
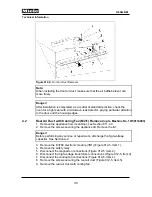
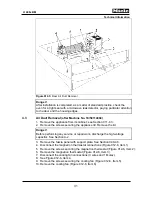
3. Disconnect the connections to the safety switches (Figure 011-6, Item 1).
4. Insert a pointed tool into the openings in the side panel of the appliance
and push in on the door lock notches (Figure 011-6, Item 2).
Note:
Should the door lock notches break off during disassembly, the door lock can
be fastened again using a flat screw (mat. no. 04274261). See Figure 011-6,
Item 3 (the side panel will have to be removed).
If the door lock needs to be removed again in the future, the side panel will
also have to be removed again to access the screw.
5. Pull the side panel outward a few inches.
6. Push the door lock toward the back of the appliance and remove.
Figure 011-6:
Door Lock Removal
4.9
Door Switch Adjustment
To ensure proper function of the safety switches, the door switches have to
be adjusted again after work on the door lock is completed.
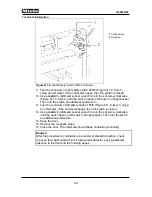
Two door locks are located behind the control panel, at the left and right, with
a total of five safety switches. Each door lock is equipped with a standard
safety switch - 1F6/6 (left) (Figure 011-8, Item 1) and 3F6/6 (right) (Figure
011-8, Item 3) - and switched behind it a monitor switch, 2F6/6 (left) (Figure
011-8, Item 2) and 4F6/6 (right) (Figure 011-8, Item 4). Two contact pins at
the upper edge activate the switches.
If the standard safety switch fails, in shut position, and the contact pins do not
activate the monitor switch, current is directed via the 12-amp fine-wire fuse
Danger!
After installing the door lock,
adjust the door switches.
See Section 011-4.9.
After installation is
completed, as a matter of
standard practice, check the
oven for a tight seal with a
microwave leak detector,
paying particular attention to
the door and the housing
edges.
Summary of Contents for H 4080 BM
Page 1: ...TECHNICAL INFORMATION H 408x BM Speed Ovens 2013 Miele USA ...
Page 15: ...Technical Information 15 H 408x BM 011 Casing Door Lock ...
Page 25: ...Technical Information 25 H 408x BM 012 Air Duct Magnetron ...
Page 43: ...Technical Information 43 H 408x BM 020 Door ...
Page 47: ...Technical Information 47 H 408x BM 031 Oven Cavity Wave Distribution ...
Page 52: ...Technical Information 52 H 408x BM 032 Convection Fan Heaters ...
Page 58: ...Technical Information 58 H 408x BM 040 Control Panel Electrical System ...


