Technical Information
24
H 408x BM
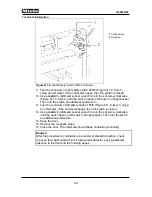
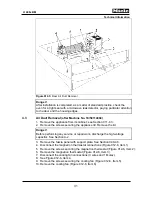
Figure 011-9:
Right Safety Switch 3F6/6 and Screw
9. Test the continuity of right safety switch 3F6/6 (Figure 011-9, Item 1)
using an ohmmeter. If the ohmmeter beeps, then the switch is closed.
10. Use a
metric
8-millimeter socket wrench to turn the set screw clockwise
(Figure 011-9, Item 2) until the switch opens (ohmmeter no longer beeps).
Then turn the switch an additional quarter-turn.
11. Test the continuity of left safety switch 1F6/6 (Figure 011-8, Item 1) using
an ohmmeter. If the ohmmeter beeps, then the switch is closed.
12. Use a
metric
8-millimeter socket wrench to turn the set screw clockwise
until the switch opens (ohmmeter no longer beeps). Then turn the switch
an additional quarter-turn.
13. Open the door.
14. Remove the magnetic strips.
15. Close the door. The ohmmeter should beep (indicating continuity).
Danger!
After the procedure is completed, as a matter of standard practice, check
the oven for a tight seal with a microwave leak detector, paying particular
attention to the door and the housing edges.
1
Safety switch
2
Set screw
Summary of Contents for H 4080 BM
Page 1: ...TECHNICAL INFORMATION H 408x BM Speed Ovens 2013 Miele USA ...
Page 15: ...Technical Information 15 H 408x BM 011 Casing Door Lock ...
Page 25: ...Technical Information 25 H 408x BM 012 Air Duct Magnetron ...
Page 43: ...Technical Information 43 H 408x BM 020 Door ...
Page 47: ...Technical Information 47 H 408x BM 031 Oven Cavity Wave Distribution ...
Page 52: ...Technical Information 52 H 408x BM 032 Convection Fan Heaters ...
Page 58: ...Technical Information 58 H 408x BM 040 Control Panel Electrical System ...


