Technical Information
39
H 408x BM
4.15 Checking
High-Voltage
Capacitor A4 for Grounding
1. Remove the appliance from its cabinet; see Section 011-4.3.
2. Remove the screws securing the appliance lid. Remove the lid.
Danger!
Before performing any service or repair work, discharge the high-voltage
capacitor. See Section A-2.
3. Pull both connectors off the high-voltage capacitor.
4. Measure the resistance between one terminal and the metal housing of
the capacitor. This measured value must be infinite
∞
.
5. Repeat the measurement for the second terminal.
Danger!
After installation/repair is completed, as a matter of standard practice, the
appliance has to be checked for a tight seal with a microwave leak detector,
paying particular attention to the door and the housing edges.
4.16
Diode V1 Test
1. Remove the appliance from its cabinet; see Section 011-4.3.
2. Remove the screws securing the appliance lid. Remove the lid.
Danger!
Before performing any service or repair work, discharge the high-voltage
capacitor. See Section A-2.
3. Remove the diode (assembly) from the appliance.
4. Connect the V1 diode in series on the positive lead between a 9-volt
battery and a voltmeter, as shown in Figure 012-12, Item A. A properly
functioning diode should provide a voltage of about 4.5 to 6.5 volts DC
(depending on the condition of the battery).
5. Reverse the position of the diode. Connect the V1 diode in series on the
positive lead between a 9-volt battery and a voltmeter, as shown in Figure
012-12, Item B. A properly functioning diode should not allow voltage to
pass through the circuit when placed in this position. The voltmeter
should display 0.
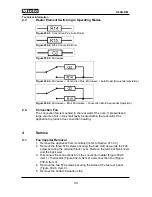
Figure 012-12:
Diode V1 Test Circuit
Danger!
After installation/repair is
completed, as a matter of
standard practice, the
appliance has to be checked
for a tight seal with a
microwave leak detector,
paying particular attention to
the door and the housing
edges.
Summary of Contents for H 4080 BM
Page 1: ...TECHNICAL INFORMATION H 408x BM Speed Ovens 2013 Miele USA ...
Page 15: ...Technical Information 15 H 408x BM 011 Casing Door Lock ...
Page 25: ...Technical Information 25 H 408x BM 012 Air Duct Magnetron ...
Page 43: ...Technical Information 43 H 408x BM 020 Door ...
Page 47: ...Technical Information 47 H 408x BM 031 Oven Cavity Wave Distribution ...
Page 52: ...Technical Information 52 H 408x BM 032 Convection Fan Heaters ...
Page 58: ...Technical Information 58 H 408x BM 040 Control Panel Electrical System ...


