background image

Slow Roasting

119

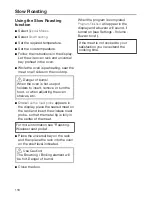
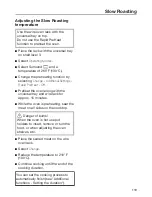
Adjusting the Slow Roasting

temperature

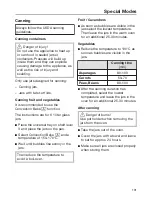
Use the wire oven rack with the

universal tray on top.

Do not use the Rapid PreHeat

function to preheat the oven.

Place the rack with the universal tray

on shelf level 3.

Select 

Operating Modes

.

Select Surround 

 and a

temperature of 265°F (130°C).

Change the preheating function by

selecting 

Change

 - 

Additional Settings

 -

Rapid PreHeat

 - 

Off

.

Preheat the oven along with the

universal tray and wire rack for

approx. 15 minutes.

While the oven is preheating, sear the

meat on all sides on the cooktop.

Danger of burns!

When the oven is hot use pot

holders to insert, remove or turn the

food, or when adjusting the oven

shelves, etc.

Place the seared meat on the wire

oven rack.

Select 

Change

.

Reduce the temperature to 210°F

(100°C).

Continue cooking until the end of the

cooking duration.

You can set the cooking process to

automatically finish (see "Additional

functions - Setting the duration").

Summary of Contents for HR 1622

Page 1: ...Operating Instructions 30 Induction Range To prevent accidents and damage to the range you must read all instructions supplied before installing or using the appliance en US CA M Nr 09 898 021 ...

Page 2: ...ve moved the range slide the locking latch onto the anti tip device until you feel it lock into place Do not use the range if the anti tip device has not been properly installed and engaged Failure to observe the information contained in the installation instructions can lead to serious or fatal injuries for children and adults All ranges can tip Injury to persons could result Install anti tip dev...

Page 3: ...iClips with wire rack HFCBBR30 2 34 Rotisserie HDGR30 37 Cooktop safety features 38 Safety shut off 38 Overheat protection 38 Residual heat indicator 38 Pan Pan size sensors 38 System lock 39 Demo mode for dealers 39 Oven safety features 40 System lock for the oven 40 Safety shut off 40 Cooling fan 40 Vented oven door 40 Safety Door Lock for Self Clean 40 PerfectClean treated surfaces 41 Self Clea...

Page 4: ... 51 Level 1 51 Level 2 51 Turning off the booster TwinBooster 51 Keeping Warm 51 Setting the keeping warm function 51 Turning off 52 Residual heat indicators 52 Operating the oven 53 Energy saving tips 53 Quick Guide 54 Cooling fan 54 Settings 55 Accessing the Settings menu 55 Changing and saving settings 55 Settings overview 56 Language 58 Time of day 58 Display 58 Clock Type 58 Clock Format 58 S...

Page 5: ...e temperature 64 Showroom Program 65 Demo Mode 65 Factory default 65 Lift panel 65 MyMiele 66 To add an entry 66 Editing MyMiele 67 Deleting entries 67 Sorting entries 67 Alarm Timer 68 Using the Alarm 68 Setting the alarm 68 Changing an alarm 68 Deleting an alarm 68 Using the Timer 69 Setting the timer 69 Resetting the timer 70 Canceling the timer 70 Guide to the modes 71 Additional functions 74 ...

Page 6: ... the Moisture Plus function 81 Setting the temperature 81 Setting the number of bursts of steam 81 When to add the bursts of steam 81 Changing the type of heating 82 Injecting bursts of steam 83 Automatic burst of steam 83 1 2 or 3 Bursts of steam 83 Evaporating residual moisture 84 Starting residual moisture evaporation immediately 85 Skipping residual moisture evaporation 85 Gourmet Center 86 Ma...

Page 7: ...ting a Favorite 104 Starting a Favorite 105 Changing Favorites 106 Changing cooking stages 106 Changing the name 107 Deleting a Favorite 107 Bake 108 Roast 110 Wireless Roast Probe 111 How it works 111 When to use the wireless roast probe 112 Important notes regarding the wireless roast probe 112 Using the wireless roast probe 114 Time left display 115 Using residual heat 116 Slow Roasting 117 Usi...

Page 8: ...36 Wireless Roast Probe 136 Stubborn soiling 136 Self Cleaning the oven interior 137 Preparing for the Self Clean program 138 Starting the Self Clean program 138 Starting the Self Clean program 138 Delaying the start of the Self Clean program 139 At the end of the Self Clean program 139 The Self Clean program is canceled 140 Removing the door 142 Reinstalling the door 143 Removing the shelf runner...

Page 9: ...ation instructions carefully before installing and connecting the appliance Read the operating instructions before using the range for the first time To prevent accidents and damage to the appliance always observe both the installation instructions and operating instructions Both documents contain important information about installation safety use and maintenance Miele cannot be held liable for d...

Page 10: ...tic conditions Use the oven for baking roasting broiling defrosting canning and drying food Use the stovetop to prepare food and keep it warm Any other use is not permitted Risk of Fire Do not use this oven to store or dry combustible materials Persons who lack physical sensory or mental abilities or experience with the appliance should not use it without supervision or instruction by a responsibl...

Page 11: ...allowed to clean or maintain the range without supervision Please supervise any children in the vicinity of the range and do not let them play with the appliance Risk of burns The skin of children is more sensitive to high temperatures than that of adults External parts of the oven such as the door glass vent and control panel become hot Do not allow children to touch the oven when it is in operat...

Page 12: ...astic wrappings bags etc are disposed of safely and kept out of the reach of children Burn hazard Keep the spaces above and behind the range clear of any items that could draw the attention of children Otherwise they can be tempted into climbing onto the appliance Danger of injury Never allow children to hang or lean on any part of the appliance ...

Page 13: ...tions not expressly approved by Miele may void the user s authority to operate the oven A damaged range can be dangerous Always check for visible signs of damage Never use a damaged appliance Reliable and safe operation of the range can only be guaranteed if it is connected to the public power supply The electrical safety of the range can only be guaranteed when it is properly grounded Compliance ...

Page 14: ... safety and may lead to appliance malfunctions Do not open the appliance housing under any circumstances This appliance must not be installed and operated in mobile installations e g on a ship Any repairs not performed by a Miele authorized service technician will void the warranty Defective components should be replaced by Miele original parts only Only with these parts can the manufacturer guara...

Page 15: ...leeve of the water intake hose must not be damaged or become kinked This will cause it to leak The integrated Waterproof System offers protection against water damage if the following conditions are met The range is properly installed connected to electric and water supply The range is repaired immediately whenever damage is detected The water supply is shut off during extended periods of non use ...

Page 16: ...oking Doing so can result in food poisoning or sickness Use only dry heat resistant potholders Moist or damp potholders used on hot surfaces may result in steam burns Do not let potholders come in contact with oil or grease Do not substitute dish towels or other bulky items for potholders Do not let potholders touch hot heating elements Loose fitting or hanging garments present a fire hazard Wear ...

Page 17: ... use water on cooktop grease fires Turn the cooktop off Smother or use a dry chemical or foam type extinguisher on any fire or flame Smother the fire or flames or use a dry chemical extinguishing agent or foam fire extinguisher Never store flammable liquids and materials in above or under an oven or near cooking surfaces The high temperatures radiated could cause objects near the oven to catch fir...

Page 18: ...ol in your recipes Alcohol evaporates at high temperatures but may in rare circumstances combust on the hot heating elements Plastic or aluminum foil cookware melts at high temperatures and can damage the range or start to burn Do not use any plastic or aluminum foil cookware Exception You can use oven safe plastic cookware in the oven Heed the cookware manufacturer s instructions When residual he...

Page 19: ...e flow of combustion and ventilation air Do not let metal objects aluminum foil pans come in contact with the heating element Make certain that the power cords of small appliances do not come in contact with or get caught in the oven door When baking frozen pizzas or pies place them on the wire rack lined with parchment paper Do not use the baking tray or the roasting pan for frozen foods with a l...

Page 20: ...e they can get hot Do not allow solid or liquid sugar or pieces of plastic or aluminum foil to get onto the burners when they are hot as they can damage the ceramic surface when it cools down If this should occur turn off the appliance and scrape off all the sugar plastic or aluminum residues while still hot using a shielded scraper blade Wear oven gloves Allow the burners to cool down and clean t...

Page 21: ...move spills and splatters promptly Also make sure that the bottom of any cookware is clean dry and free of grease before placing it on the cooktop Because induction heating works so quickly the temperature of the cookware bottom can quickly reach the ignition point of oils and fats Never leave the cooktop unattended when it is on Do not heat oils and fats for longer than one minute and never use t...

Page 22: ...re that is too small leaves part of the hot burner uncovered which may cause burns due to touching or ignite clothing The use of cookware of the right size also makes for better use of the heated areas Wet sponges or clothes can cause burns due to hot steam if they are used to wipe spilled food off a hot burner Some cleansers can emit hazardous vapors if they are applied to a hot surface Be carefu...

Page 23: ...ey are correctly fitted after cleaning and never operate the oven without the shelf runners inserted There is a seal around the oven interior which seals the inside of the door Take care not to rub damage or move the gasket Do not use oven cleaners Commercial oven cleaners or oven liners of any kind should not be used in or around any part of the oven Debris should be removed before running the Se...

Page 24: ... the following two conditions 1 This device may not cause harmful interference and 2 this device must accept any interference received including interference that may cause undesired operation The high temperatures used during self cleaning will damage accessories that are not designed for cleaning in the Self Clean program Please remove these accessories from the oven before starting the Self Cle...

Page 25: ...Guide to the range 25 Cooktop a Burner with booster 7 11 18 28 cm b Burner 4 7 10 16 cm c Burner with booster 7 9 16 23 cm d Burner 5 1 2 8 14 20 cm e Display with burner indicators ...

Page 26: ...e heater elements and convection fan turn off when the door is opened during use c Browning Broiling element d Storage for wireless roast probe e Oven interior lighting f Rotisserie motor g TwinPower convection fan with heating element h Shelf runners with 6 levels i Data plate The data plate is located behind the toe kick j Door ...

Page 27: ...r button To lift up the control panel d Timer sensor button To set the timer e Light sensor button To turn the oven cavity lighting on and off f Back sensor button To go back one step at a time g Display To display time of day and information for operation h On Off button in the cut out To turn the appliance on and off ...

Page 28: ...levels AutoBoost The burner knobs are backlit with an illuminated ring Symbols in the cooktop display Symbol Description Burner ready for use Keep warm function to Power level Auto Heat up TwinBooster level 1 Booster TwinBooster level 2 Missing or unsuitable cookware see Induction Residual heat The system lock has been activated Demo mode activated Demo mode deactivated ...

Page 29: ...n in the display or if a cooking process is running you can enter a timer duration e g when boiling eggs on the cooktop or an alarm time i e a specific time at any point see Alarm Timer If the time of day display is turned off the Timer sensor will not react until the oven is turned on Light For turning the oven interior lighting on and off If a menu appears in the display or if a cooking process ...

Page 30: ...Menu 12 00 The top line shows what menu level you are currently in Options within a menu are separated by a vertical line If there is not enough space to show the whole path additional options are indicated by The Time of Day Alarm and Timer are shown in the top right hand corner of the display The middle row shows the current menu and options You can scroll to the right or left by swiping your fi...

Page 31: ...d buzzer volume are selected using a bar chart This symbol indicates that there is additional information and advice about using the oven Select OK to access the information The system lock or sensor lock is active see Settings System Lock The oven cannot be operated Alarm Timer Core temperature when using the wireless roast probe ...

Page 32: ...pplied with installation instructions operating instructions an anti tip device including screws for fastening the range various accessories Standard and optional accessories Accessories vary depending on model All ovens are supplied with shelf runners a universal tray and a wire rack Depending on the model your range may also be supplied with other accessories listed here All accessories and clea...

Page 33: ...ple The runners can be removed for cleaning purposes See Cleaning and Care Universal tray and Wire oven rack Universal tray HUBB30 1 Wire oven rack HBBR30 2 Non tip safety notches are located on the shorter sides of these accessories These prevent the trays being pulled completely out of the side runners when you only wish to pull them out partially Always place the wire oven rack on the runner wi...

Page 34: ...s apart during installation or removal Hold the FlexiClips with wire rack with both hands and position it in front of the desired level Insert the FlexiClips with wire rack onto the level 1 and slide it along the struts of the level 2 until it clicks into place If the FlexiClips with wire rack jams when sliding it onto the level pull it out using some force and reinsert To removing the FlexiClips ...

Page 35: ...rippings from the meat or poultry are collected under the insert reducing spattering in the oven The drippings can then be used for gravy and sauces The surface has been treated with PerfectClean enamel for easy cleaning Round baking form HBF27 1 This circular form is suitable for cooking fresh or frozen pizzas flat cakes tarts and baked goods The surface has been treated with PerfectClean enamel ...

Page 36: ... 3 4 35 cm They have the same width and height Matching lids are also available separately Depth 8 1 2 22 cm Depth 13 3 4 35 cm HUB61 22 HUB61 35 HBD60 22 HBD60 35 Wireless Roast Probe The oven is equipped with a wireless roast probe that enables you to monitor the temperature of the cooking process simply and accurately see Roasting Wireless roast probe The roast probe is kept in the front frame ...

Page 37: ...cted to the motors in the back wall of the oven The rotisserie can support a maximum weight of 11 lbs 5 kg Use of kebab device as well as meat clamps possible Opener The opener allows you to open the cover of the over light Miele Oven Cleaner Miele oven cleaner is suitable for removing stubborn soiling It is not necessary to preheat the oven before use Ceramic and stainless steel cleaner 250 mL Re...

Page 38: ...tion will be turned off The power level that is set will be reduced One or more burners turn off automatically Turn the knob of the burners in question to 0 The affected burners can only be used again if the cooling element has cooled down to a safe level Overheating can be caused by heating empty cookware fats or oils being heated at high power settings a hot burner being turned on after a power ...

Page 39: ...he two front burners all the way to the left and hold them until disappears Demo mode for dealers The Demo mode can only be activated if all burners are turned off This mode allows the cooktop to be demonstrated in showrooms without heating up You do not need this setting for personal home use Activating Turn the knob for the front left burner to the left and hold it Briefly turn the knob for the ...

Page 40: ...ol panel The cooling fan will continue to run for a while after a program is complete to prevent moisture from building up in the oven on the control panel or surrounding cabinetry When the temperature in the oven has fallen sufficiently the cooling fan will turn off automatically Vented oven door The oven door is made of glass panes that have a heat reflective coating on part of their surface Dur...

Page 41: ...ean surface Follow the instructions in the Cleaning and Care section of this manual so the anti stick and easy cleaning properties are retained The following have all been treated with PerfectClean Universal tray Grilling and Roasting insert Perforated baking tray Round baking form Self Clean ready accessories The following accessories can be left in the oven during the Self Clean program Shelf ru...

Page 42: ...select some basic settings which are needed before the appliance can be used Follow the instructions on the display Setting the language Select the desired language Confirm with OK Setting the country Select the desired country Confirm with OK Setting the voltage electrical version The voltage set must match that of the house as to not damage the oven Confirm the voltage before setting If in doubt...

Page 43: ... is turned off see Settings Time Display On The time is always visible in the display Off The display appears dark to save energy Some modes are limited Night Dimming The time only shows in the display between 5 00 am and 11 00 pm It turns off at night to save energy Select the desired option Confirm with OK Information regarding energy consumption will appear in the display Confirm with OK Follow...

Page 44: ...se Heating up the oven for at least 1 hour with nothing in it will get rid of this smell It is a good idea to rinse the steam injection system at the same time Ensure that the kitchen is well ventilated while the appliance is being heated up for the first time Close doors to other rooms to prevent the smell spreading throughout the house Remove any protective wrapping and sticky labels from the ov...

Page 45: ...ime Danger of burns Allow the oven to cool before cleaning Turn on the oven Select Light to turn on the oven light Take all accessories out of the oven and clean them by hand see Cleaning and care Clean the oven interior with warm water and liquid dish soap applied with a soft sponge or cloth Dry all surfaces with a soft cloth Turn the lighting and the oven off Leave the oven door open until the o...

Page 46: ... zone will automatically turn off after 3 minutes When the appliance is turned on either inadvertently or by mistake or when there is residual heat present there is the risk of the metal items heating up Danger of burns Do not use the cooktop as a storage space Turn the zones off after use with the appropriate sensor buttons Noises When you use an induction cooking zone the following noises may oc...

Page 47: ...he outermost markings see Burner data If the diameter of the pan is smaller than the innermost marking the pan will not be recognized and will flash alternately with the power level set Pots and pans with bases with pronounced edges or ridges can scratch the ceramic burner Only use pots and pans with smooth bases Lift pans into position on the cooktop Sliding them into place can cause scuffs and s...

Page 48: ...level 2 3350 3850 rear left 4 6 1 4 10 16 cm Normal 1250 1450 Booster 2000 2300 rear right 6 1 4 9 16 23 cm Normal 2100 2400 TwinBooster level 1 2700 3100 TwinBooster level 2 3350 3850 front right 5 1 2 7 3 4 14 20 cm Normal 1700 1950 Booster 2700 3100 Total 6700 Total 7700 Cookware of any diameter may be used within the specified range The wattage quoted may vary depending on the size and materia...

Page 49: ...ying eggs without overheating the fat 6 Bringing large quantities of food to a boil e g casseroles Thickening custard and sauces e g hollandaise 6 7 Gently frying meat fish or sausages without overheating the fat 6 7 Frying pancakes etc 7 Braising for stews 8 Boiling large quantities of water Bringing to a boil 9 These settings should only be taken as a guide The power of the induction coils will ...

Page 50: ...to the symbol and hold it until flashes once Turn the knob to the right until the desired continued cooking setting appears During the AutoBoost time flashes on the display in alternation with the continued cooking setting When you change the continued cooking setting you deactivate AutoBoost Deactivating Select a different power level during the heat up time The AutoBoost is deactivated Continued...

Page 51: ...lightly beyond the stop to B I II and back to the stop once again appears in the burner display Turning off the booster TwinBooster Select a different power level The booster symbol goes out Keeping Warm This keeping warm level is for keeping food warm that has just been cooked i e food that is still hot It is not for reheating food that has gone cold All burners have a keeping warm level If the k...

Page 52: ...e switched off burner is still hot the residual heat indicator appears in the display The bars of the residual heat indicator go out one after another as the burners cool off The last bar only goes out when the burners are cool enough to touch without danger Risk of burns Do not touch the burners while the residual heat indicators are on ...

Page 53: ...5 seconds the oven interior lighting turns off automatically after 15 seconds It can be turned on again at any time by touching Light When cooking with automatic shut off or the wireless roast probe the oven heating will turn off automatically shortly before the end of cooking The residual heat is sufficient to finish the cooking process Energy Save will appear in the display The cooling fan or ho...

Page 54: ... Confirm with OK The required and the actual temperatures will appear You will see the temperature rising in the display A buzzer will sound when the oven temperature is reached if this option is selected see Settings Volume Buzzer tone After the cooking process Take the food out of the oven Turn the oven off Cooling fan After the cooking process the cooling fan will continue to run for a while af...

Page 55: ...ing program is in progress Changing and saving settings Select Settings Swipe across the screen until the desired setting appears then touch it to select The settings which are currently selected will have a colored frame around them Swipe across the screen until the desired option appears then touch it to select it Confirm with OK The setting is now saved ...

Page 56: ...g Digital Clock Format 24 h 12 h am pm Set Date Lighting On On for 15 seconds Start Screen Main Menu Operating Modes Gourmet Center Special Modes MyMiele Favorites Brightness Volume Buzzer tones Keypad tone Welcome Melody Units of Measurement Weight g lb oz Temperature C F Cooling Fan Temperature Controlled Time Controlled Factory default ...

Page 57: ...y System Lock On Off Sensor Lock On Off Catalyzer Electrical Version 208V 60Hz 220V 60Hz 240V 60Hz Sensor group Sensor group 0 9 Calibrate Temperature Showroom Program Demo Mode On Off Factory default Settings Favorites Default temperatures MyMiele Lift up control panel Automatically Manual Factory default ...

Page 58: ...e oven has be to be turned on before you can use it This also applies when using the Alarm Timer and the oven light Night Dimming To save energy the time is only visible in the display between 5 00 am and 11 00 pm The rest of the time it is not visible Clock Type You can choose from an analogue clock face or a digital h min display The date will also appear in the digital clock display Clock Forma...

Page 59: ...hting turns off 15 seconds after a program starts Touching Light turns it on for another 15 seconds Start screen The main menu will appear in the display when the oven is turned on You can change this default setting so that for instance the oven modes or MyMiele settings appear in the display Brightness The display brightness is represented by a bar with seven segments Select Darker or Lighter to...

Page 60: ...um volume is selected when all segments are filled If none of the segments are filled the volume is turned off Select Quieter or Louder to adjust the volume Select On or Off to turn the keypad tone on or off Welcome melody You can turn the welcome melody on or off It sounds when the On Off button is touched Units of measurement Weight g The weight of food in MasterChef programs is shown in grams l...

Page 61: ...is could lead to corrosion of the appliance When keeping food warm in the oven increases to the Time Controlled setting can lead to condensation of the control panel moisture on the countertop and on the cabinetry Do not adjust the Time Controlled setting and try not to leave food in the warm oven Default temperatures If you often cook with temperatures that differ from the default it makes sense ...

Page 62: ...stem lock The system lock prevents the oven being turned on inadvertently The system lock will remain activated even after a power failure Select On to activate the system lock The timer can still be used when the system lock is active On The system lock is now active If you want to use the oven touch for at least 6 seconds Off The system lock is not active The oven can be used as normal ...

Page 63: ...onds Off The buttons respond immediately to a finger touch Catalyzer The level of odor reduction is represented by a bar with seven segments Maximum odor reduction is selected when all segments are filled If none of the segments are filled the catalyzer is turned off Select Minimum or Maximum to change the level of odor reduction Select On or Off to turn the catalyzer on and off ...

Page 64: ...ss roast probe The sensor group is the second digit of the twelve digit code P0 P9 Confirm with OK Calibrate temperature Using temperature calibration the temperature can be modified in all modes and Gourmet Center oven and MasterChef speed oven programs so that it is slightly higher or lower than shown The temperature calibration is represented by a bar with seven segments If all of the segments ...

Page 65: ...Any settings that have been altered will be reset to the factory default setting Favorites All Favorites will be deleted Default temperatures Any default temperatures that have been changed will reset to the factory default settings MyMiele All MyMiele entries will be deleted Lift panel Regardless of the setting selected as soon as you start the self cleaning cycle the lift panel goes down automat...

Page 66: ... you have entered into MyMiele to appear in the Start screen see Settings Start screen To add an entry You can add up to 20 entries Select MyMiele Select Add entry You can select options from the following categories Operating Modes Gourmet Center Special Modes Favorites Confirm by touching OK The option selected appears in the list together with the corresponding symbol Proceed as described above...

Page 67: ...ies Select MyMiele Select Edit Select Delete entry Select the entry that you want to delete Confirm with OK The entry will then be removed from the list Sorting entries The order can be rearranged as long as there are more than 4 entries Select MyMiele Select Edit Select Sort entry Select the entry Select the position you want to move it to Confirm with OK The entry will now appear in the position...

Page 68: ...r instead of the time of day If you are cooking at the same time or if you are in a different menu the alarm time and will appear in the top right hand corner of the display At the set alarm time the Alarm symbol will flash next to the time in the display a buzzer will sound if turned on see Settings Volume Buzzer tones Select Timer or the alarm in the upper right of the display The buzzer will tu...

Page 69: ... desired time Setting the timer When the setting Time Display Off is set the oven must be turned on to set the timer The timer can then be seen counting down in the display when the oven is turned off Boiling eggs and setting the timer for 6 minutes and 20 seconds Select Timer Select New Timer Time Set the timer for the required time Confirm with OK When the oven is turned off the timer duration c...

Page 70: ...e symbols in the display will go out Resetting the timer Select the timer in the upper right of the display or select Timer and the desired timer The time previously set appears Set a new timer duration Confirm with OK The changed time is saved and will count down in seconds Canceling the timer Select the timer in the upper right of the display or select Timer and the desired time The time previou...

Page 71: ...0 C Surround This premium baking mode uses heat from the upper and lower elements to create perfect results on all baking recipes 350 F 180 C 75 525 F 30 280 C Moisture Plus Infuse up to 3 bursts of moisture either manually or time driven throughout the cooking program to ensure a soft moist interior with a crispy crust MasterChef Plus programs use Moisture Plus during the cooking baking process 3...

Page 72: ...py poultry 375 F 160 C 75 475 F 30 250 C Bake This mode uses traditional baking techniques to perfect pies and biscuits 375 F 190 C 200 525 F 100 280 C Browning For a perfectly browned topping for example when making a gratin or browning the top of a casserole 350 F 190 C 200 475 F 100 250 C Maxi Broil For broiling meats e g steak chops kebabs etc The entire Browning Broiling element will glow red...

Page 73: ...sed then when using Broil Ideal for broiling thicker cuts of meat e g chicken roulades 400 F 200 C 200 500 F 100 260 C Rotisserie The rotisserie evenly broils and adds a finishing touch to items such as stuffed meat tied roasts poultry vegetables and kabobs 400 F 200 C 200 500 F 100 260 C Gentle Bake A combination of different heating elements ensures excellent baked good gratins and lasagna 350 F...

Page 74: ...faces to crisp on the outside Change type of heating This option will only appear with Moisture Plus You can combine bursts of steam with another type of heating Change Operating Mode You can change the cooking mode during operation Changing the temperature As soon as a cooking mode is selected a default temperature will appear in the display together with its possible range see Guide to the modes...

Page 75: ... together with the fan to enable the oven to reach the required temperature as quickly as possible Off Only the heating elements associated with the cooking program are turned on To turn the Rapid PreHeat function off Select Change Select Additional Settings Select Rapid PreHeat In Rapid PreHeat Off will appear Confirm with OK Rapid PreHeat has been deactivated Instead of Rapid PreHeat Preheating ...

Page 76: ...activated separately for a cooking process For best results activate it at the beginning of the cooking process Select Change Select Additional Settings Select Crisp function In Crisp function On will appear Confirm with OK Moisture reduction is now activated Changing the oven mode You can change the oven mode during operation Select Change Select Additional Settings Select Change Operating Mode S...

Page 77: ...ing the wireless roast probe When using the roast probe the cooking duration is determined by when the set core temperature is reached Ready at You can specify when you would like the cooking program to complete The oven will turn off automatically at the time set A Ready at time cannot be entered if you are using the wireless roast probe When using the roast probe the end time is determined by wh...

Page 78: ... and off automatically It is recommended to use the automatic On Off feature when roasting Do not delay the start of the program for too long when baking Cake mixtures and doughs will dry out and the leavening agents will lose their effectiveness To turn a cooking program on and off automatically you have a choice of how to enter the time parameters Duration and Ready at Duration and Start at Read...

Page 79: ...wn in seconds At the end of the cooking process a buzzer will sound if turned on see Settings Volume Buzzer tones The oven heating and lighting are turned on Program Finished appears in the display You have the option to save the program as a Favorite see Favorites or to increase the cooking duration using Change Select Back to go back to the main menu During the cooling down phase the cooling fan...

Page 80: ...ted as bursts of steam into the oven cavity during the cooking program The steam inlets are located at the rear left corner of the roof of the oven One burst of steam takes approx 5 8 minutes The number of bursts of steam and when they are injected will depend on the type of food being cooked Yeast doughs will rise better if steam is injected at the beginning of the program Bread and rolls will al...

Page 81: ... wish the burst of steam to be injected into the oven automatically after the heating up phase select Automatic burst of steam If you wish to inject one or more bursts of steam manually at specific times select 1 Burst of steam 2 Bursts of steam or 3 Bursts of steam When to add the bursts of steam This option will only appear in the display after you have selected 1 2 or 3 bursts of steam Tip If y...

Page 82: ...ive and Auto Roast are available to use with Moisture Plus however Convection Bake is set as the default mode Select Change Select Additional Settings Select Change type of heating Select the desired mode Confirm with OK Cooking will be carried out using the different type of heating selected ...

Page 83: ... cooking until the end of the cooking duration 1 2 or 3 Bursts of steam Manual bursts of steam When Manual has been selected you can trigger bursts of steam once Start Manual burst of steam appears Please wait until the preheating phase is completed to allow the steam to be distributed evenly by the warm air in the oven Tip Set the Timer as a reminder Select Start Manual burst of steam The burst o...

Page 84: ...ure Plus or a MasterChef Plus program is used Evaporate Residual Moisture will appear in the display with the options Skip and Yes It is best to start the evaporation of residual water right away so that only fresh water is used during a cooking program The residual moisture evaporation process The oven will heat up and the residual water in the oven compartment will evaporate Depending on the amo...

Page 85: ...ooking process using Moisture Plus or a MasterChef Plus program can now be carried out The moisture will condense on the door and in the oven cavity and needs to be wiped off after the oven has cooled down Skipping residual moisture evaporation Skipping the residual moisture evaporation process can cause water to overflow into the oven cavity Do not cancel the evaporation process Select the Moistu...

Page 86: ... in the display In the Gourmet Center you will find MasterChef programs for the preparation of cakes meats fish dishes desserts etc MasterChef Plus program for the preparation of bread with Moisture Plus MasterChef The MasterChef programs can be found under Gourmet Center MasterChef Baked Goods Fish Meat Pizza Potatoes Poultry MasterChef Plus In MasterChef Plus a variety of bread programs are avai...

Page 87: ...lected the following information or instruction will appear in the display type of cookware shelf level using the wireless roast probe duration Follow the instructions in the display Notes on using these programs The oven interior should be at room temperature before starting a MasterChef program Some programs require a preheating phase before food is placed in the oven A prompt will appear to tel...

Page 88: ... text e g Bread The number of hits will be shown in the bottom right of the display If no match is found or if there are more than 40 matches the hits field will be deactivated and you will need to change the search text Select hits The food types and programs available will then appear Select the program or the food type and choose the program The program will start Follow the instructions in the...

Page 89: ...nd fold to the center Do the same for the left and right side of the dough Flip the dough over and cover with plastic wrap Let rest 1 hour Divide the dough into three equal portions Shape the dough into 6 cylinders Working with one piece of dough at a time keeping the other covered in plastic wrap shape into a rectangle Working along the length of the dough press with three fingers gently making s...

Page 90: ...g bowl whisk the walnuts flour sugar baking powder baking soda salt and cinnamon set aside Mix the butter mashed bananas eggs and vanilla with a wooden spoon in a medium bowl Fold the wet banana mixture into the dry ingredients with a rubber spatula just until combined Be careful not to over mix Pour batter into a prepared loaf pan that has been greased and dusted with flour Place loaf pan into ov...

Page 91: ...y incorporated it will be difficult to roll out the dough Transfer dough to a large greased bowl and cover with plastic wrap Place the bowl into refrigerator for about 15 hours Remove the dough from the refrigerator and turn out onto a flour dusted countertop Divide the dough into 4 equal squares Roll the dough into cylinders Visually mark the dough cylinder into thirds Place the edge of your hand...

Page 92: ... dough into a rectangle and let rise at room temperature for 20 minutes Stretch and fold the dough Fold the short end of the rectangle over each other away from you then fold it to the center Then fold the bottom of the dough down towards you and fold to the center Do the same for the left and right side of the dough Turn the dough over seam side down gently and cover with plastic wrap Let the dou...

Page 93: ...In the last two minutes add raisins When raisins are thoroughly incorporated into the dough remove and shape into ball Place the dough ball into greased bowl Cover with plastic wrap and let rise for 1 hour Next on a lightly floured surface knead dough for 2 minutes Place back into the greased bowl and proof for 1 hour Roll dough into a rectangle about 1 2 inch thick sprinkle heavily with cinnamon ...

Page 94: ...y hand Cover the dough and let rest 1 hours Stretch and fold the dough Start from the top of the dough pull forwards away from you then bring it to the middle Then pull bottom of the dough backwards towards yourself and fold to the middle Do the same for the left and right side of the dough Flip the dough over and cover with plastic wrap Let rest 1 hour Divide the dough in half and shape into loav...

Page 95: ... wet ingredients until combined Switch to a dough hook and knead for about 10 minutes Turn dough out onto a lightly floured work surface Shape the dough into a ball cover with plastic wrap and proof for 1 hours Divide the dough into equal two pieces Shape into two loafs that are about a 14 long by 2 wide and taper at both ends Place dough on perforated baking tray and cover with plastic wrap Proof...

Page 96: ...xer add all of the dry ingredients except for the garlic powder Make sure the cheddar and jalapeños are coated with flour With a dough hook attachment slowly add the wet ingredients to the dry Mix about 5 minutes or until well incorporated During the last minute add in the garlic powder Transfer the dough into a well greased large bowl and cover Proof for about 1 hour Then shape into loaves place ...

Page 97: ...east does not come into contact with salt In a small bowl combine honey vegetable and water With the paddle attachment slowly incorporate the wet ingredients into the dry Switch to a dough hook and knead for about 8 minutes Turn the dough out onto a work surface and shape the dough into a ball Place the dough into an oiled bowl cover with plastic wrap and proof for 1 hour Divide dough and shape in...

Page 98: ...minutes Dust countertop lightly with flour Transfer dough to countertop and knead by hand for 5 minutes The dough will be slightly sticky Dust dough very lightly with flour as needed Shape the dough into a ball and cover with plastic wrap let rest for 2 hours on countertop Divide dough into 8 equal portions and shape into rolls Cover with plastic wrap and let rest for 30 minutes Place dough on the...

Page 99: ...tand mixer combine all of the dry ingredients for the final dough together except for the caraway seeds Add dry ingredients to preferment With the paddle attachment slowly drizzle in the 14 ounces of lukewarm water Switch to a dough hook Knead for about 6 minutes Add the caraway seeds during the last two minutes of mixing Remove dough from the bowl and shape into a ball Cover the dough and proof f...

Page 100: ...lour Turn the dough onto the work surface and knead by hand for 3 5 minutes The dough will be slightly sticky Dust the dough very lightly with flour as needed Shape into a ball and cover with plastic wrap proof for 2 hours on countertop Divide dough into 2 equal portions and shape into a boule round loaf Place loaves on perforated baking tray Cover loosely with plastic wrap and let rest for 20 min...

Page 101: ...all Cover with plastic wrap Let rest for 30 minutes Knead dough for 5 minutes by hand Cover the dough and let rest 1 hours Stretch and fold the dough Start from the top of the dough pull forwards away from you then bring it to the middle Then pull bottom of the dough backwards towards yourself and fold to the middle Do the same for the left and right side of the dough Flip the dough over and cover...

Page 102: ...hand Cover the dough and let rest 1 hours Stretch and fold the dough Start from the top of the dough pull forwards away from you then bring it to the middle Then pull bottom of the dough backwards towards yourself and fold to the middle Do the same for the left and right side of the dough Flip the dough over and cover with plastic wrap Let rest 1 hour Divide the dough in half and shape into loaves...

Page 103: ... fold the dough start from the top of the dough stretch up away from you then bring it to the center Then stretch the bottom of the dough up towards you and fold in the middle Do the same for the left and right sides of the dough Turn the dough over seam side down and cover with plastic wrap Let rest 1 hour Divide the dough into 2 portions Shape each portion into a rectangle start by taking one of...

Page 104: ...now specify the settings for cooking stage 1 Follow the instructions in the display Select and confirm the cooking mode temperature and duration or core temperature Depending on the mode selected you can add the functions Rapid PreHeat and Crisp function in Additional Settings Settings for the 1st cooking stage have now been set More cooking stages can be added for example if you would like to add...

Page 105: ...ames will appear in the display Select the desired program You can start the saved program immediately delay the start or show the cooking stages Start Now The program will start right away and the oven heating will turn on Start Later This option will only appear if you are using the wireless roast probe You can specify when you would like the program to start The oven heating will turn on automa...

Page 106: ...s in a MasterChef program that have been saved under a different name cannot be changed Select Favorites The program names will appear in the display Select Edit Select Change Program Select the desired program Select Change Cooking Stages The setting specified for a cooking stage can be changed or more cooking stages can be added to the program Change the program as desired see Creating a Favorit...

Page 107: ... and select Save A message will appear in the display confirming that the name has been saved Confirm with OK The new program name will be saved Deleting a Favorite Select Favorites The program names will appear in the display Select Edit Select Delete Program Select the desired program Select Yes The program is deleted You can delete all of your Favorites at the same time see Settings Factory Def...

Page 108: ... poor browning and in some cases cakes might not cook properly Always place baking pans on the wire rack Position rectangular pans with the longer side across the width of the rack This will allow for optimum heat distribution and even baking results When baking cakes with fruit toppings or deep cakes place the tin in the universal tray to catch any spillages Parchment paper Greasing the pan All M...

Page 109: ...of the shortest duration quoted To check if a cake is ready insert a wooden skewer or toothpick into the center it should come out clean Shelf levels The shelf level that you place the food on for baking depends on the oven mode and the number of trays being used Convection Bake 1 Tray Level 3 2 Trays Levels 1 3 2 4 3 Trays Levels 1 3 5 Moisture Plus 1 Tray Level 3 Intensive Bake 1 Tray Level 2 or...

Page 110: ...l brown on the outside but will not be properly cooked through When cooking with Convection Bake Convection Roast Moisture Plus or Auto Roast select a temperature approx 25 F 20 C lower than for Surround Surround Roast Shelf levels In most cases level 3 should be used With large items such as a turkey use level 1 or 2 Tips Resting time At the end of the program take the roast out of the oven cover...

Page 111: ...mperatures applicable for different types of meat The cooking time will be similar when cooking with or without the wireless roast probe The core temperature value is sent via radio signal from the transmitter in the handle of the wireless roast probe via the antenna in the back wall of the oven to the appliance s electronic unit as soon as the food with the roast probe is placed in the oven Unint...

Page 112: ...ot use deep narrow metal cooking containers as these will weaken the radio signal Do not place any metal items above the wireless roast probe such as lids aluminum foil wire oven racks or universal trays on a shelf level above the food with the roast probe Glass lids may be used Do not use another standard metal cooking thermometer at the same time Do not allow the handle of the wireless roast pro...

Page 113: ...ome into contact with the probe this can lead to the oven being turned off too early If the meat is very heavily marbled with fat select the highest core temperature given in the roasting chart When using roasting bags or aluminum foil insert the probe through the bag or foil into the center of the meat You can also place the meat with the roast probe inserted inside the foil Follow the roasting b...

Page 114: ...ure if necessary Change the default core temperature if necessary The core temperatures cannot be changed for the MasterChef programs You can also start the process at a later time Select Additional Settings and set a time in the Start at field In MasterChef program select Start Later You can estimate approximately when the food will be ready as the duration of the cooking program is about the sam...

Page 115: ...the cooking process continues the time is revised continuously and a more accurate figure is shown The time left will be deleted if the cooking or core temperature is changed or if a different mode is selected If the door is opened for a longer time the time left will be recalculated Displaying the core temperature As soon as the time remaining appears you can also display the actual core temperat...

Page 116: ...e will appear in the display to show that the oven is in energy save mode The measured core temperature is no longer visible The cooling fan and hot air fan if turned on will continue to run When the selected core temperature has been reached Program Finished appears in the display A buzzer will sound if turned on see Settings Volume Buzzer tones Tip If the food is not sufficiently cooked insert t...

Page 117: ...not cover the meat during cooking Cooking will take approx 2 4 hours depending on the size and weight of the meat as well as the desired degree of doneness and browning Cooking duration Core temperatures Always follow USDA guidelines on food safety Meat min F C Sirloin rare medium well done 50 70 100 130 160 190 118 48 135 57 156 69 Pork Tenderloin 80 100 145 63 Smoked Pork Chop 140 170 154 68 Vea...

Page 118: ...tc Once Use the roast probe appears in the display place the seared meat on the rack and insert the wireless roast probe so that the metal tip is fully in the center of the meat For more information see Roasting Wireless roast probe Place the universal tray on the rack and then place the rack into the oven on the shelf level indicated Use Caution The Browning Broiling element will be hot Danger of...

Page 119: ... Settings Rapid PreHeat Off Preheat the oven along with the universal tray and wire rack for approx 15 minutes While the oven is preheating sear the meat on all sides on the cooktop Danger of burns When the oven is hot use pot holders to insert remove or turn the food or when adjusting the oven shelves etc Place the seared meat on the wire oven rack Select Change Reduce the temperature to 210 F 10...

Page 120: ... and browning small dishes The center of the Browning Broiling element glows red to generate the required heat Convection Broil For grilling thicker items e g rolled meat poultry pieces The Browning Broiling element and the fan turn on alternately Cooking accessories Use the universal tray with a grilling and roasting insert if available on top The insert protects the oven from splatter and collec...

Page 121: ...ood that has a consistent thickness at the same time so each piece cooks evenly Testing doneness Always follow USDA guidelines for safe food temperatures Preparing food for broiling Rinse the meat under cold water and pat dry Do not season the meat with salt before broiling this will draw out the juices Brush the meat with oil if necessary Do not use other types of fat as they can easily burn and ...

Page 122: ...and temperature Preheat the Browning Broiling element for approx 5 minutes with the door closed Danger of burns When the oven is hot use pot holders to insert remove or turn the food or when adjusting the oven shelves etc Place the food on the appropriate shelf level see the Broiling chart Close the door Turn the food halfway through cooking ...

Page 123: ...lanced in the middle for even rotation Insert the pointed end of the rotisserie 1 into the motor slot at the back of the rotisserie set up and set the other end onto the holder 2 as illustrated Slide the universal tray including rotisserie on the wire oven rack or the FlexiClip rail with wire oven rack Insert the spit into the motor slot at the back of the oven Close the door Select the Rotisserie...

Page 124: ...ect Special Modes The following Special Modes are available Defrost Dehydrate Reheat to reheat plated meals Warm up Cookware Proof Slow Roasting See Slow Roasting for more information Pizza Sabbath Program This section also gives information on the following applications Gentle Bake Canning Frozen food ...

Page 125: ... and set the duration Follow the instructions in the display Air is circulated throughout the cabinet to gently defrost the food Danger of salmonella poisoning Observe proper hygiene rules when defrosting poultry Do not use the defrosting liquid Tips If possible remove the packaging and put the food on the roasting pan or a suitable dish When defrosting poultry catch the defrosting liquid in a sui...

Page 126: ... could also use the rack or perforated baking tray if available Select Special Modes Select Dehydrate If necessary adjust the default temperature and set the duration Follow the instructions in the display Food Approx dehydrating time Fruit 2 8 hours Vegetables 3 8 hours Herbs 50 60 minutes Because this program uses the fan it is recommended that you use Surround with a temperature of 75 250 F 80 ...

Page 127: ...pot holders when removing dishes from the oven Condensation may accumulate on the bottom of the dish Warm up Cookware This program is designed to warm your cookware The temperature can be set between 75 175 F 50 80 C Use heat resistant cookware Place the rack on shelf level 3 and place the cookware to be heated on it Select Special Modes Select Warm up Cookware If necessary adjust the default temp...

Page 128: ...d set the duration Follow the instructions in the display If you would like to proof dough with the addition of moisture select the appropriate MasterChef program Pizza This program is designed specifically for baking pizza The temperature can be set between 300 475 F 160 250 C Select Special Modes Select Pizza If necessary adjust the default temperature and set the duration Follow the instruction...

Page 129: ...e lighting will remain turned on throughout the program Sabbath Program appears in the display constantly The time of day is turned off Once the Sabbath Program has started it cannot be changed or saved as a Favorites Using the Sabbath Program The program can only be canceled by turnng the oven off Select Special Modes Select Sabbath Program Select the desired mode The Sabbath Program cannot be st...

Page 130: ...e is ideal for casseroles and gratins which require a crisp topping The temperature can be set between 210 480 F 100 250 C Select Operating Modes Select Gentle Bake and change the default temperature if necessary Follow the instructions in the display ...

Page 131: ...Bake and a temperature of 150 170 C Wait until bubbles rise evenly in the jars Then reduce the temperature to avoid a boil over Fruit Cucumbers As soon as bubbles are visible in the jars select the lowest temperature Then leave the jars in the warm oven for an additional 25 30 minutes Vegetables Reduce the temperature to 100 C as soon as bubbles are visible in the jars Canning time min Asparagus 8...

Page 132: ...all frozen items use the lowest temperature recommended by the manufacturer Turn small frozen items several times during cooking Preparation Eating food which has been cooked correctly is important for good health Select the oven mode and temperatures recommended by the manufacturer Preheat the oven Place the food in the preheated oven on the recommended shelf level Check the food at the end of th...

Page 133: ...ches on glass surfaces could cause a breakage Remove any cleaning agent residues immediately Cooktop Unsuitable cleaning agents To better maintain your appliance avoid the following dishwashing liquid cleaners containing soda ammonia thinners or chlorides lime removers stain and rust removers abrasive cleaners solvent based cleaners dishwasher soap powder grill and oven sprays glass cleaning agent...

Page 134: ... follow the manufacturer s instructions Then clean the cooktop with a damp cloth and dry it off Cleaner residues will burn into the cooktop during subsequent uses damaging the glass ceramic Make sure you remove all residues Spots from lime deposits water and aluminum deposits metallic spots can be removed with a glass ceramic and stainless steel cleaner Danger of burns Risk of burns Wear oven mitt...

Page 135: ...ing agents eraser sponges metal scrapers steel wool spot cleaners oven cleaners stainless steel spiral pads Can be used to remove very heavy soiling from PerfectClean treated surfaces Soiling not removed immediately can become difficult to remove Continued use without cleaning will make the oven much harder to clean Remove any soiling immediately The accessories are not dishwasher safe Tips Soilin...

Page 136: ... the non stick properties After cleaning dry the surfaces with a soft cloth Wireless Roast Probe The wireless roast probe can be cleaned in the dishwasher Stubborn soiling Spilt fruit and roasting juices may permanently discolor surfaces of the oven This discoloration is permanent but will not affect the performance of the oven Do not use force to remove these stains Clean using the instructions i...

Page 137: ...can use the Self Clean program Any soiling is broken down into ash by the high temperatures This oven has three levels for self cleaning each with a different duration Level 1 for light soiling Level 2 for heavier soiling Level 3 for very heavy soiling Once the Self Clean program has been started the door will automatically locked The door cannot be opened again until the program has ended If desi...

Page 138: ...n program Starting the Self Clean program Danger of burns When Self Cleaning the front of the oven becomes hotter than with normal oven use Prevent children from touching the oven during the Self Clean program Select Maintenance Select Self Clean Select the level required according to the level of soiling Confirm with OK Follow the instructions in the display Confirm with OK Starting the Self Clea...

Page 139: ... is unlocking When the door lock has been deactivated Program Finished appears in the display A buzzer will sound if turned on see Settings Volume Buzzer tones Turn the oven off Acoustic and visual signals are turned off Danger of burns Danger of burns Wait until the oven has cooled down before removing any residual soiling left in the oven compartment from the Self Clean program Wipe any residues...

Page 140: ...ermanent but will not affect the efficiency of the enamel Do not attempt to remove these marks The Self Clean program is canceled If the Self Clean program is canceled the oven door will remain locked until the temperature inside the oven drops to below 535 F 280 C The following will cause the Self Clean program to cancel Turning the oven off A power failure If you turn the oven off the display st...

Page 141: ...own will appear in the display The door will unlock once the temperature in the oven has dropped below 535 F 280 C and the oven is turned off A buzzer will sound if turned on see Settings Volume Buzzer tones Program Finished appears in the display Select Back Start the Self Clean program again ...

Page 142: ...ease the locking clamps by turning them as far as they will go Do not attempt to take the door off the brackets when it is in the horizontal position the brackets will spring back against the oven Do not use the handle to pull the door off the brackets the handle could break Close the door until it rests partially open Holding the door securely at both sides lift it straight upwards ...

Page 143: ...inges Make sure that the door goes on straight Open the door fully If the locking clamps are not locked the door can easily become detached from the brackets and be damaged You must make sure that the locking clamps are locked again To relock the locking clamps turn them back up to the horizontal position as far as they will go ...

Page 144: ...ved before the shelf runners see Features FlexiClips with rack Danger of burns Make sure the heating elements are turned off and that the oven cavity is cool Loosen the screw 1 Pull the runners out of the holder 2 at the front of the oven and then pull them out of the oven 3 The runners can be reinstalled in the reverse order Be sure that all parts are installed correctly ...

Page 145: ...nce from the electric power supply for approx 1 minute by tripping the relevant circuit breaker or screwing the fuse out completely or tripping the ground fault circuit interrupter GFCI If after resetting replacing the fuse or the GFCI it still will not turn on contact a qualified electrician or Miele Service There is a strange smell or vapors when the appliance is being used for the first time Me...

Page 146: ... itself off automatically A burner might have been operated for too long You can use the burner again by switching it back on see Safety switch off The booster has automatically switched off early The overheat protection was triggered See Overheat protection The burner is not working in the usual way with the set power level The overheat protection was triggered See Overheat protection Power setti...

Page 147: ... burner has been exceeded Turn the burner knob to 0 The burner can be started up again flashes in the display in alternation with numbers There is a fault in the electronics Disconnect the power supply of the cooktop for approx 1 minute If the problem persists after reconnecting the power supply contact Miele Customer Service This display is dark The time of day display is deactivated When the app...

Page 148: ...lear the message Program Finished by selecting Back The oven is now ready to use Fault XX appears in the display A fault has occurred that you cannot resolve Contact Miele Technical Service Door not locked appears in the display The Self Cleaning program door lock is not locking Turn the oven off and then back on again Then restart the Self Clean program If the message appears again contact Miele ...

Page 149: ...mp for the steam injection system does not work Deactivate Demo mode see Settings Showroom Program The pump for the steam injection system is faulty Contact Miele Technical Service A noise is heard after the cooking process is complete The fan remains turned on after a cooking program see Settings Cooling fan The oven has turned itself off The oven turns off automatically if a button is not presse...

Page 150: ...atalyzer The oven lighting turns off after a short time The oven is factory set to turn off automatically after 15 seconds This setting can be changed see Settings Lighting The oven lighting does not turn on The halogen bulb needs to be replaced Danger of burns Make sure the heating elements are turned off and allowed to cool completely The lamp cover may be damaged if it falls When removing the c...

Page 151: ...e the ashes If coarse soiling remains start the Self Clean program again with a longer duration The rack and other accessories make a noise when being pushed into or pulled out of the oven The heat resistant surface of the shelf runners creates friction when accessories are taken in and out of the oven To reduce the friction lubricate the runners with a few drops of cooking oil applied with a pape...

Page 152: ...r Miele dealer or the Miele Technical Service Department See back cover for contact details Please quote the model and serial number of your appliance when contacting Miele You will find this information on the data plate which is behind the toe kick cover Warranty For further information please refer to your warranty booklet ...

Page 153: ...ayer Software under licence from Adobe Systems Incorporated Adobe Macromedia Software LLC Adobe and Flash are registered trademarks of Adobe Systems Incorporated Components which fall under GNU General Public Licence and further Open Source licenses are integrated into the software An overview of the integrated Open Source components and a copy of the current licence can be obtained at http www mi...

Page 154: ......

Page 155: ...e Canada Importer Miele Limited Headquarters and Miele Centre 800 843 7231 609 419 9898 609 419 4298 Technical Service Support Nationwide Phone Fax TechnicalService mieleusa com 161 Four Valley Drive Vaughan ON L4K 4V8 www miele ca 800 999 1360 888 586 8056 Customer Care Centre Phone customercare miele ca 800 565 6435 905 532 2272 Germany Manufacturer Miele Cie KG Carl Miele Straße 29 33332 Güters...

Page 156: ...M Nr 09 898 021 00 en US CA HR1622 ...

Reviews: