en
70
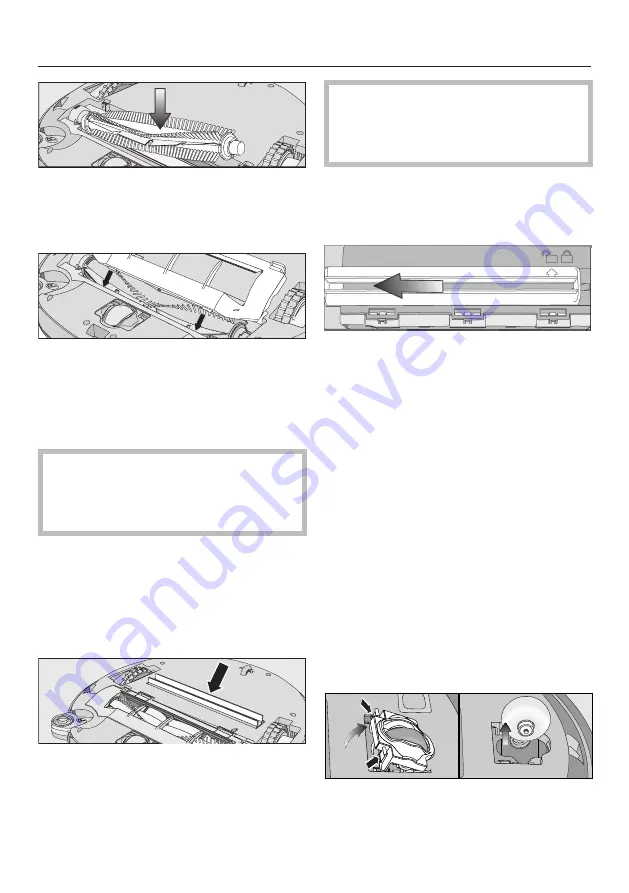
Refit the roller brush with the bearing
cover attached. Make sure that the
side with the pointed end is inserted
into the corresponding slot.
Carefully refit the roller brush cover
on both sides, making sure it clicks
into position.
Refit the side brushes, see “Cleaning
the side brushes”.
In order to continue to achieve the
best possible cleaning results, re-
place the roller brush with a new one
after appro
x. 1 year
.
Cleaning the dust box seals
Clean the seals on the bottom of the
dust box as required.
Place the robot vacuum cleaner up-
side down on a level, clean surface.
Wipe the seals with a slightly damp
cloth to clean them.
In order to continue to achieve the
best possible cleaning results, re-
place the seal unit with a new one
after appro
x. 1 year
.
Replacing the seal unit on the dust
box
Remove the dust box.
Unlatch the seal unit from the under-
side of the dust box so that the arrow
points to the
symbol.
Remove the seal unit.
Insert the new seal unit so that the ar-
row points to the
symbol.
Lock the seal unit, making sure it
clicks into position.
The arrow points to the
symbol.
Cleaning the front wheel
Clean the front wheel as required. For
this you will require the cleaning tool
which is located at the top of the dust
box lid.
Place the robot vacuum cleaner up-
side down on a level, clean surface.
Unclip the cover.
Remove the front wheel.
Summary of Contents for HS18
Page 2: ...2 de 5 en 44 da 83 es 95 fi 108 fr 120 it 133 nl 146 no 159 pt 171 sv 184 ...
Page 196: ......
Page 197: ......
Page 198: ......
Page 200: ......
Page 201: ......


