


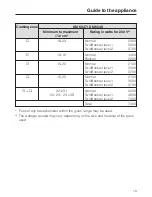


Cooking zones
Cooking zone
KM 6322 / KM 6323
Minimum to maximum
C
in cm*
Rating in watts for 230 V**
y
14–20
Normal
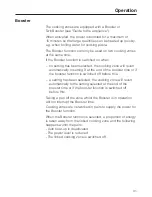
Booster
1850
3000
w
10–16
Normal
Booster
1400
2200
x
15–23
Normal
TwinBooster level 1
TwinBooster level 2
2100
3000
3700
z
15 –23
Normal
TwinBooster level 1
TwinBooster level 2
2100
3000
3700
x
+
z
22–23 /
15 x 23 – 23 x 39
Normal
TwinBooster level 1
TwinBooster level 2
3400
4800
7400
Total:
7400
* Pans of any base diameter within the given range may be used.
** The wattage quoted may vary depending on the size and material of the pans
used.
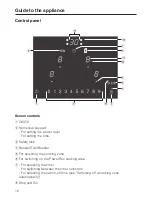
Guide to the appliance
18
Summary of Contents for KM 6304
Page 76: ...76 ...
Page 77: ...77 ...
Page 78: ...78 ...
Page 79: ...79 ...
Page 80: ...M Nr 09 542 730 01 en AU NZ KM 6322 KM 6323 KM 6347 KM 6348 ...


