

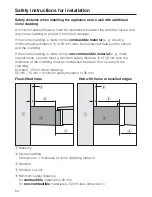

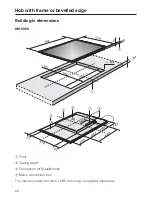


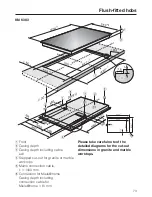


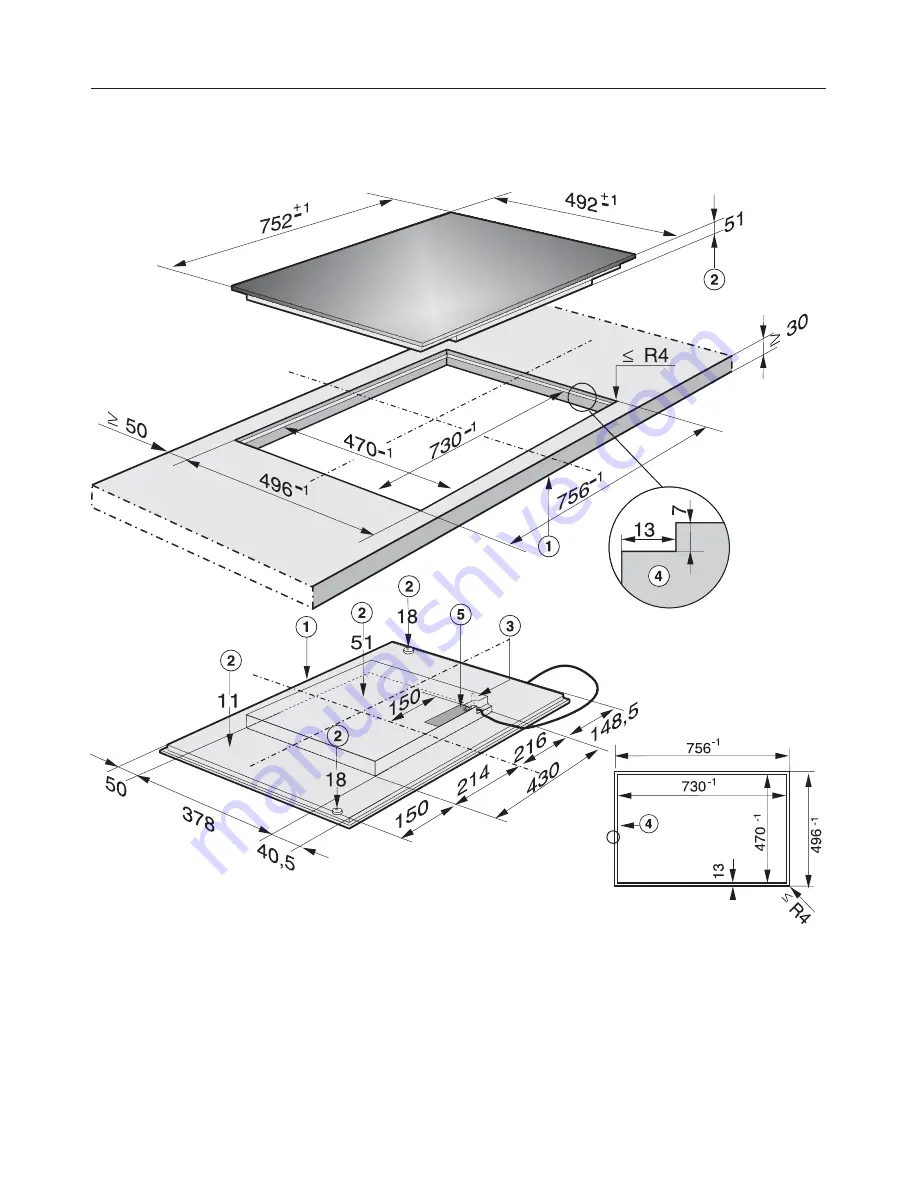
Building-in dimensions
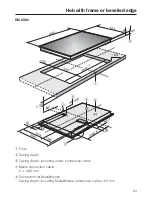
KM 6351
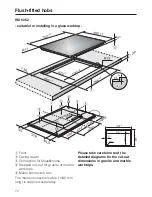
a
Front
b
Casing depth
c
Connection for Miele
|
home
d
Stepped cut-out for granite or marble
worktops
e
Mains connection box
The mains connection cable (1440 mm
long) is supplied separately.
Please take careful note of the
detailed diagrams for the cut-out
dimensions in granite and marble
worktops.
Flush-fitted hobs
71
Summary of Contents for KM 6350
Page 8: ...Control panel Guide to the appliance 8 ...
Page 81: ...81 ...
Page 82: ...82 ...
Page 83: ...83 ...
Page 84: ...Alteration rights reserved 4911 M Nr 07 799 000 07 ...