Installation
26
Electrical connection
Risk of injury caused by a faulty
appliance.
Before connecting the appliance,
ensure that it has not been damaged
in any way.
Never use a faulty appliance.
The appliance is supplied ready for
connection with a cable and plug.
Ensure that the protective contact
socket is easily accessible at all times.
If that is not possible, ensure that a
suitable means of disconnection is
provided on the installation side for
each pole.
Fire hazard due to overheating.
Connecting the appliance to a multi-
socket plug adapter or to an
extension lead can overload the
cable.
For safety reasons, do not use an
extension lead or multi-socket plug
adapter.
Connect the appliance directly to the
power supply using the original cable
and do not use any intermediate
elements.
The electrical installation must comply
with VDE 0100 requirements and local
regulations (e.g. BS 7671 in the UK).
If the connection cable is damaged, it
must only be replaced with a specific
connection cable of the same type
(available from the Miele Customer
Service Department). For safety
reasons, such replacement may only be
carried out by a qualified technician or
the Miele Customer Service
Department.
The necessary connection data can be
found on the data plate located on the
front of the oven interior or on the back
of the appliance.
Compare the specifications on the data
plate with those of the electricity
supply. Make sure that they match.
If in any doubt, consult a qualified
electrician.
The appliance must not be connected
to the inverter of an autonomous power
supply, such as a solar power system.
When the appliance is switched on,
power surges could result in a safety
switch-off. This could damage the
electronic module.
The appliance must not be used with
so-called energy-saving devices. These
reduce the amount of energy supplied
to the appliance, causing it to overheat.
Summary of Contents for M 2230 SC
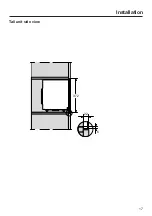
Page 17: ...Installation 17 Tall unit side view 372 6 22 ...
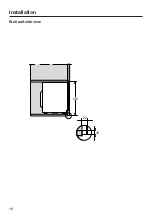
Page 18: ...Installation 18 Wall unit side view 372 16 22 ...
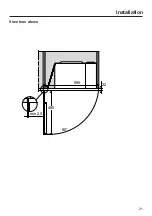
Page 21: ...Installation 21 View from above 90 22 480 595 min 2 5 ...
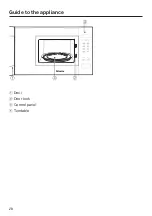
Page 28: ...Guide to the appliance 28 a Door b Door lock c Control panel d Turntable ...
Page 64: ......
Page 65: ......
Page 66: ......


