Operation
40
increments of 30 seconds when the
microwave oven is being used on
maximum power).
Cancelling a programme
Press the Stop/C button twice.
At the end of a programme
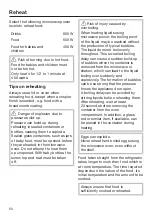
An audible tone will sound when the
cooking programme is complete. The
interior lighting goes off.
The audible tone will sound briefly as a
reminder every 5 minutes for
20 minutes after the end of the
programme.
If you want to stop the audible tone,
press the Stop/C button.
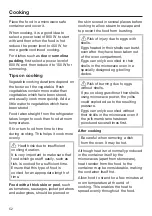
Automatic keeping-warm
function
The keeping warm function will switch
on automatically after the end of a
cooking programme which has used at
least 450 W, providing the door remains
closed and no buttons are pressed.
After approx. 2 minutes the keeping
warm function will switch on at 80 W for
a maximum period of 15 minutes.
, 80 W and
H:H
will light up in the
display.
Opening the door or operating one of
the buttons or selectors while the
keeping warm function is in progress
cancels the function.
The keeping warm function cannot be
set separately.
You can deactivate this function (see
“Changing settings”).
Quick microwave
Pressing the Start/
button is
sufficient to set the appliance operating
on maximum power for one minute.
Press the Start/
button.
The appliance runs at maximum power
for a cooking duration of 1 minute if the
button is not pressed again.
The cooking duration can be increased
by pressing Start during operation.
Each time the Start button is pressed,
the cooking duration increases by
another 30 seconds.
Changing the time and power level
You can change the saved time and
power level and save it as a main
application.
In the power range up to 300 watts, a
maximum of 10 minutes can be saved.
From 450 watts, a maximum of
5 minutes can be saved.
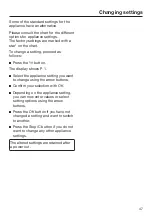
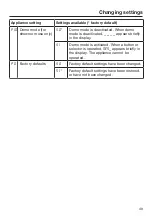
Press the
button.
The display shows P 1.
Select P 8 using the arrow buttons.
Confirm your selection with
OK
.
Change the power level and confirm
with
OK
.
Then change the duration and
confirm with
OK
.
Press the
OK
button if you do not
want to change a setting.
Press the Stop/C button if you do not
want to change any other appliance
settings.
Summary of Contents for M 2230 SC
Page 17: ...Installation 17 Tall unit side view 372 6 22 ...
Page 18: ...Installation 18 Wall unit side view 372 16 22 ...
Page 21: ...Installation 21 View from above 90 22 480 595 min 2 5 ...
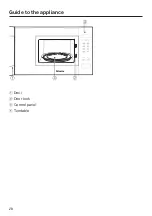
Page 28: ...Guide to the appliance 28 a Door b Door lock c Control panel d Turntable ...
Page 64: ......
Page 65: ......
Page 66: ......

